Category: How-To’s

General tips on how to perform actions on your device

  • Detect Mobile App users | vendrux Docs

    Your Vendrux app adds “canvas” to the user agent string when users browse through the app. Simply check if “canvas” is present in the user agent to detect app users.

    App user: User agent contains “canvas”
    Website user: User agent doesn’t contain “canvas”

    Basic Detection

    Check the user agent directly whenever you need to detect app users:

    if (navigator.userAgent.toLowerCase().includes('canvas')) {
        // User is in the mobile app
        console.log('App user detected');
    } else {
        // User is on the website
        console.log('Website user');
    }

    Common Examples

    Hide App Download Banners

    // Don't show app download prompts to users already in the app
    if (navigator.userAgent.toLowerCase().includes('canvas')) {
        document.querySelector('.app-download-banner').style.display = 'none';
    }

    Analytics Tracking

    Track app vs website sessions by setting a user property:

    // Set app_session property based on user agent
    if (navigator.userAgent.toLowerCase().includes('canvas')) {
        gtag('set', { app_session: true });
    } else {
        gtag('set', { app_session: false });
    }

    Custom CSS Styling

    Add different styles for app users by adding a CSS class:

    // Add 'in-app' class to body for app users
    if (navigator.userAgent.toLowerCase().includes('canvas')) {
        document.body.classList.add('in-app');
    }

    Then use CSS to style differently:

    /* Hide elements for app users */
    .in-app .web-only {
        display: none;
    }
    
    /* Show elements only for app users */
    .app-only {
        display: none;
    }
    .in-app .app-only {
        display: block;
    }
    
    /* Adjust styling for app */
    .in-app .header {
        padding-top: 0;
    }

    That’s it! The detection is straightforward and reliable across all devices.

  • Delete app from the App Store

    You can’t delete in app if it was previously available in the store, but you can remove it from the store.

    To remove your app from sale on the store

    1. Open the App Details page for the app
    1. Click Pricing and Availability.
    1. Select Remove from Sale from the Availability section.
    1. Click Save.

    The status changes to Developer Removed From Sale. Within 24 hours, your app won’t be seen in the store.

  • Customize Your App Experience | vendrux Docs

    In this guide, you’ll learn how Vendrux works, what the user agent is, how the app includes a unique identifier in the user agent, and how you can use this to make app-specific customizations. We’ll also explain why making these adjustments directly on your website is the best approach for optimizing the app experience.

    How Vendrux Works

    Vendrux converts your website into a mobile app by loading your site inside a WebView. This allows your app to function like a native mobile app while still using your existing website content. It’s a fast, efficient way to give your users an app experience without the need to build everything from scratch.

    While the website is displayed in the WebView, we can add native mobile features (such as push notifications and the bottom navigation bar) around the WebView to enhance the app experience. However, most changes to the website’s design and functionality should be made on your website itself.

    What Is a WebView?

    A WebView is a component that allows mobile apps to display web content, similar to how a browser works. In the Vendrux app, your website is loaded inside a WebView, allowing users to experience it just like they would in a mobile browser. This enables us to wrap native mobile features around your existing site, giving it the feel of an app.

    While WebViews offer a lot of flexibility, they do have some limitations compared to a full mobile browser. Some advanced browser features or behaviors may not function exactly the same in a WebView. However, for most websites, the experience remains largely seamless.

    What Is a User Agent?

    The user agent is a string of text that a browser or app sends to a website server when loading the site. It provides information about the device, browser, and operating system being used. This allows websites to customize the experience based on the type of device or app accessing it.

    For example, when someone visits your site from a desktop browser, the user agent might look something like this:

    Mozilla/5.0 (Windows NT 10.0; Win64; x64) AppleWebKit/537.36 (KHTML, like Gecko) Chrome/94.0.4606.61 Safari/537.36

    On mobile, the user agent string might include references to a specific mobile browser or device type.

    How Vendrux Uses the User Agent

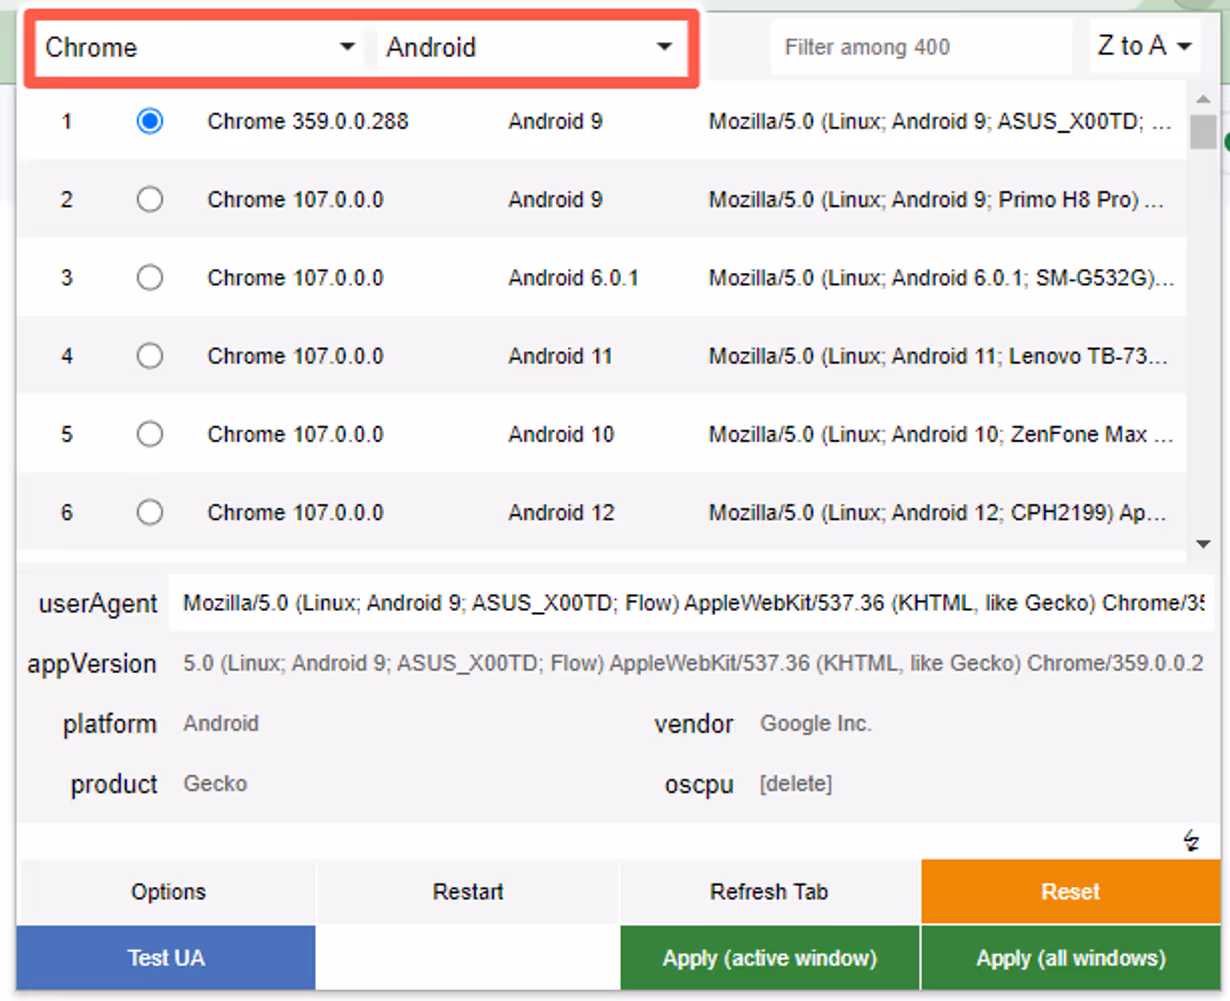
    When your website is displayed inside the Vendrux app, the user agent includes a unique identifier to signal that the app is accessing the website. This identifier is the word “canvas,” which you can detect to apply custom styles or scripts specifically for the app.

    For instance, when a user opens your site inside the Vendrux app, the user agent might look like this:

    Mozilla/5.0 (iPhone; CPU iPhone OS 15_0 like Mac OS X) AppleWebKit/605.1.15 (KHTML, like Gecko) Version/15.0 Mobile/15E148 Safari/604.1 Canvas

    The keyword “Canvas” (or similar) is included in the user agent string, which allows you to detect when the site is viewed inside the app. You can then use this information to modify how the website appears or behaves specifically within the app.

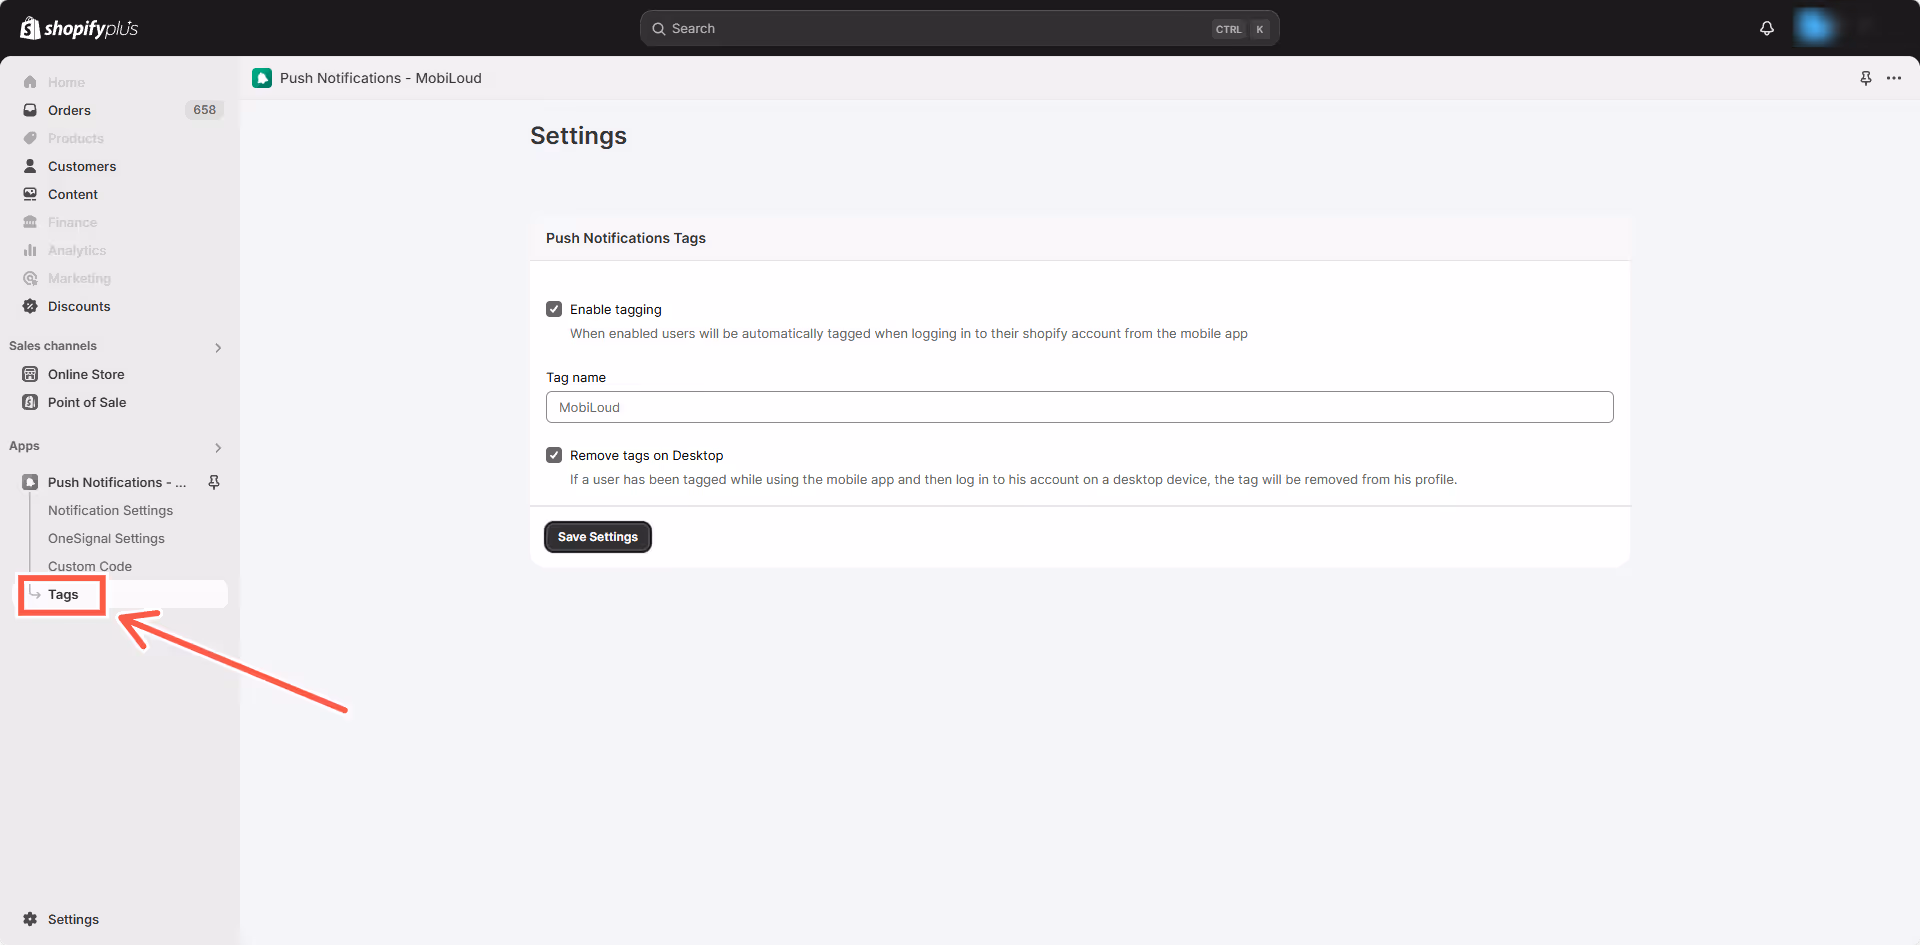
    Detecting the App and Applying Customizations

    Using the unique “canvas” string in the user agent, you can easily create conditional logic to apply custom styles or scripts only when the website is being viewed in the app. This allows you to make specific changes for app users without affecting the experience for desktop or mobile web users.

    Here’s how to detect if your website is being accessed in the app and apply customizations:

    Javascript Example:

    if (navigator.userAgent.toLowerCase().includes('canvas')) {    
    	// Your app-specific code goes here
        console.log('App detected, applying custom changes');
    }
    

    PHP Example:

    if (strpos(strtolower($_SERVER['HTTP_USER_AGENT']), 'canvas') !== false) {    
    	// Your app-specific code goes here   
        echo 'App detected, applying custom changes';
    }

    You can use these methods to apply styles, hide elements, or modify the behavior of your site when viewed in the app.

    Why Customize Directly on Your Website?

    While it’s possible to inject code into the app through our platform, making changes directly on your website is always the preferred method. Here’s why:

    1. Greater Control: Adjusting your website directly gives you full control over your code. You can easily make changes or updates without needing to involve us or wait for app store submissions.
    2. Faster Load Times: When you apply customizations directly on your site, the changes load with the page content right away, preventing flickering or delay. If you rely on injected code, changes might appear after the content loads, causing a less smooth experience.
    3. One Central Place for Updates: By managing all changes on your website, you only need to adjust your code in one location. This makes it easier to maintain and update your website, ensuring consistency across platforms.

    What’s Next?

    Now that you understand how Vendrux works and how to detect the app using the user agent, you can start applying customizations to tailor the app experience for your users.

    For more detailed guidance on customizing your app and optimizing your website’s performance in the app, be sure to check out our other guides:

    These resources will help you fine-tune the app experience for your users and make the most of your mobile presence.

  • Create an Account Deletion Page

    Why an Account Deletion Page is Necessary

    Both Apple and Google require mobile apps to offer users an easy way to delete their accounts. This regulation ensures that users can control their data and enhances transparency.

    Failing to provide a compliant account deletion page can result in app rejections or removal from app stores.

    Making the Page Publicly Accessible

    The account deletion page doesn’t necessarily need to be publicly accessible, but in order to avoid back-and-forth with Apple and Google during the app review we always suggest that you make these pages publicly accessible and easy to use.

    A simple page with a form in it should do the job and help us get your app approved faster.

    Designing the Account Deletion Form

    Include Essential Fields:

    1. User Identification: Ask for information that identifies the user uniquely, like their username or email.
    2. Reason for Deletion: Optionally, include a dropdown or text field for users to provide a reason for deletion.
    3. Confirmation: A checkbox for confirming the decision to delete the account permanently.

    Writing a Clear Description Above the Form

    Include a message explaining what deleting the account entails, such as permanent data removal and the potential inability to recover information.

    Here is a sample message that you can use:

    “Please note: Once your account is deleted, it cannot be recovered. All associated data will be permanently erased, and any remaining subscriptions or services will be canceled.”

    More Details

    You can find more details on the requirements from Apple and Google on the following pages:

  • Configure Yotpo Loyalty with Shopify

    Configure Yotpo Loyalty with Shopify

    If you have a Shopify website you can use Yotpo to create unique experiences for your users, using their rewards and loyalty features.

    The first step is to install the “Push Notifications – Vendrux” Shopify app on your store: https://apps.shopify.com/mobile-push-notifications

    Once installed, go to the app settings and then to “Tags”, where you will be able to configure the tagging system. This will add a tag to the profile of users who log in to your website through the app.

    You can use the following settings to get started:

    Whenever a user logs in to his account through the app, the “Vendrux” tag will be added to his profile.

    Now in your Yotpo account, under the Loyalty area (https://loyalty-app.yotpo.com/), you will need to create a new “Segment”, for users that have been tagged with the “Vendrux” tag, as you can see below:

    Done! You can now create rules that will target your Mobile App Users specifically, as you can see here:

  • Configure Smart App Banners | vendrux Docs

    Configure Smart App Banners | vendrux Docs

    Driving traffic to your app from your mobile site is the smartest way to gain new app users and retain mobile visitors. To get these people to download your app, you can use smart app banners.

    We highly recommend promoting your app using smart app banners – with these you’ll show a banner suggesting to install your app only to your website visitors using either an iOS or an Android device.

    Read on to learn more about smart banners, and how to implement a smart app banner on your site.

    What Are Smart App Banners?

    Smart app banners are banners that show up when someone lands on your mobile website, prompting them to get your app.

    Here’s an example:

    smart-app-banner.png

    Here’s what Apple’s own help pages say about smart app banners:

    “Smart App Banners vastly improve users’ browsing experience compared to other promotional methods. Users will trust that tapping the banner will take them to the App Store and not a third-party advertisement. They will appreciate that banners are presented unobtrusively at the top of a webpage, instead of as a full-screen ad interrupting the web content. And with a large and prominent close button, a banner is easy for users to dismiss. When the user returns to the webpage, the banner won’t reappear.”

    Features

    ML Smart Banner features:

    • Configuration options:
    • Banner position
    • Banner delay
    • Texts fonts
    • Texts color
    • Banner BG
    • Text content (for button and heading/description)
    • App icon (the same for Android and Ios)
    • Entering animation
    • Display options: On load or when user scrolls up/down
    • Android and iOS links
    • Button Link applies automatically depending on user agent: If Android, it uses the provided android link if iOS, uses the provided ios link.
    • getMobileOs method available: its a function that can be called to get the current browser OS, useful for triggering external functions’. It returns a string containing “android” | “ios” | “windows”
    • Fallback App Icon option –> If the provided icon link is invalid / or image can not be displayed, an icon is generated using the App Name Param and Button colors
    • Default options set (if not texts, images or colors provided, it shows placeholder info, useful for catching errors or for testing while implementing the banner)
    • Banner can be used as a module or used directly in an html / script tag
    • Code written in Typescript and minified/bundled with Vite

    📖 How to use

    Smart Banner can be used importing the JS code via CDN or as a module using NPM

    🚀 With CDN

     src="https://cdn.jsdelivr.net/npm/ml-smart-banner/dist/ml-smart-banner.min.js">
    script>
      function addSmartBanner() {
        new SmartBanner().init();
      }
      window.addEventListener('load', addSmartBanner);
    script>

    Configuration options:

    const options = {
        fontFamily: `"Source Sans Pro", "Arial", sans-serif`, // Font family for banner texts, defaults to system safe fonts
        fallbackFontFamily: 'sans-serif', // Font family for fallback icon, safe options are serif and sans-serif
        appName: 'ML', // Initials for fallback icon.  Reccommended 2 characters. Fallback Image uses button text and bg color
        textColor: '#222', // Banner texts color (any color property value)
        buttonColor: '#222', // Button color (any background property value)
        buttonText: 'Download', // Button text
        buttonTextColor: '#fff', // Button Text Color (any color property value)
        iconUrl: '', // Icon url, defaults to avatar with appName
        textHeading: 'Download now!', // Heading Text
        textDescription: 'Try it now, download today', // Description text
        bannerColor: '#fff', // Banner BG color
        linkIos: 'https://itunes.apple.com/', // Link for iOS 
        linkAndroid: 'https://play.google.com/', // Link for Android 
        position: 'bottom', // Position of the banner, default 'top'. 'top' | 'bottom'
        animation: 'fadeIn', // Banner animation, default 'fadeIn'. 'fadeIn' | 'scaleUp' | 'slideBottom' | 'slideTop' | 'slideLeft' | 'slideRight' | null,
        display: 'onLoad', // Display options, default 'onLoad'. 'onLoad' | 'onScrollDown' | 'onScrollUp'
        radius: '0', // Banner radius with units
        delay: 0, // defines how much time to wait until the element shows up
        shadow: true // If true applies soft shadow, true | false
    }
    
    const smartBanner = new SmartBanner(options);

    Methods

    getMobileOS

    Returns current OS, useful for knowing the user OS and triggering functions depending on that

    const smartBanner = new SmartBanner(options);
    smartBanner.getMobileOS()

    Development

    • npm run build produces a production version into /dist folder
    • npm run dev runs dev version and starts a dev server

    Testing the smart app banner

    You will definitely want to test the smart app banners once you deploy them to your website, to make sure that everything works and looks as you want.

    Running these tests on real mobile devices can get overwhelming, so we recommend that you run your tests on your desktop browser.

    To do this, you will need to emulate a mobile device by adjusting your browser’s user agent. We recommend using the following Chrome extension to do this: User Agent Switcher and Manager

    Once you have installed the extension, set it up as follows:

    Step 1

    Select “Chrome” as the browser and “Android” as the platform if you want to test the Android version of the banner, or “Safari” and “iOS” in case you want to test the iOS version:

    annotely_image (61).png

    Step 2

    Select one of the options that will appear, any will work:

    annotely_image (62).png

    Step 3

    Click “Apply” to make sure the user agent is properly set up on your browser:

    annotely_image (63).png

    Step 4

    You can now press “F5” while viewing your website to refresh the browser window with the updated user agent.

    Reset

    If you want to revert the changes to the user agent, as some websites might start behaving differently after doing so, you can click the “Reset” button:

    annotely_image (64).png

  • Configure Google Login in WebView

    Google login might not work out-of-the-box when used inside WebViews.

    For security reasons Google prevents the login page from being displayed when the page is requested from within a WebView element.

    To resolve that issue, you will want to display your Google login page using a custom popup, that can be configured using the following parameters in your app’s advanced configuration:

    "Regex_Social_Login": {
      "Regex_Social_Login_Opening_Method": "popup",
      "Regex_Social_Login_Rules": [
        {
         	"Regex": ".pay\\.google."
        },
        {
    	"Regex": ".accounts\\.google."
        }
      ]
    }

    Regex_Social_ Login_ Opening_ Method

    This parameter should always default to “popup”

    Regex_Social_ Login_ Rules

    Within the rules, we can have multiple regex expressions to identify which URLs should be opened using this method.

    In the example above we have configured the Google Account page and the GPay page to open in the popup.

    You will want to make sure that these URLs are all configured to open as internal links in your app, otherwise they will open outside the app and the popup won’t work.

  • Configure Deep Links for third-party apps

    You might have deep links on your website for third-party apps, like Facebook or Twitter.

    These deep links might not work out-of-the-box in your Vendrux app and will require some extra app configuration.

    To enable support for these deep links, you first need to identify the URLs that are used on them.

    Facebook for example, will usually have something like this: fb://profile/10050099380

    In your app advanced configuration you will want to add the following to support that specific type of deep link:

    "Deep_Links": [
      {
      	"Scheme": "fb"
      },
      {
      	"Scheme": "twitter"
      }
    ]

    With this code in place the app will understand that URLs starting with a specific scheme must be handled differently, and the links should open directly on the third-party app.