Login to your OneSignal account, here: https://dashboard.onesignal.com/login
Select your app and go to “Settings > Keys & IDs” on your sidebar:
.avif)
On this page you will be able to find and copy your App ID and Rest API Key:
.avif)
Login to your OneSignal account, here: https://dashboard.onesignal.com/login
Select your app and go to “Settings > Keys & IDs” on your sidebar:
On this page you will be able to find and copy your App ID and Rest API Key:
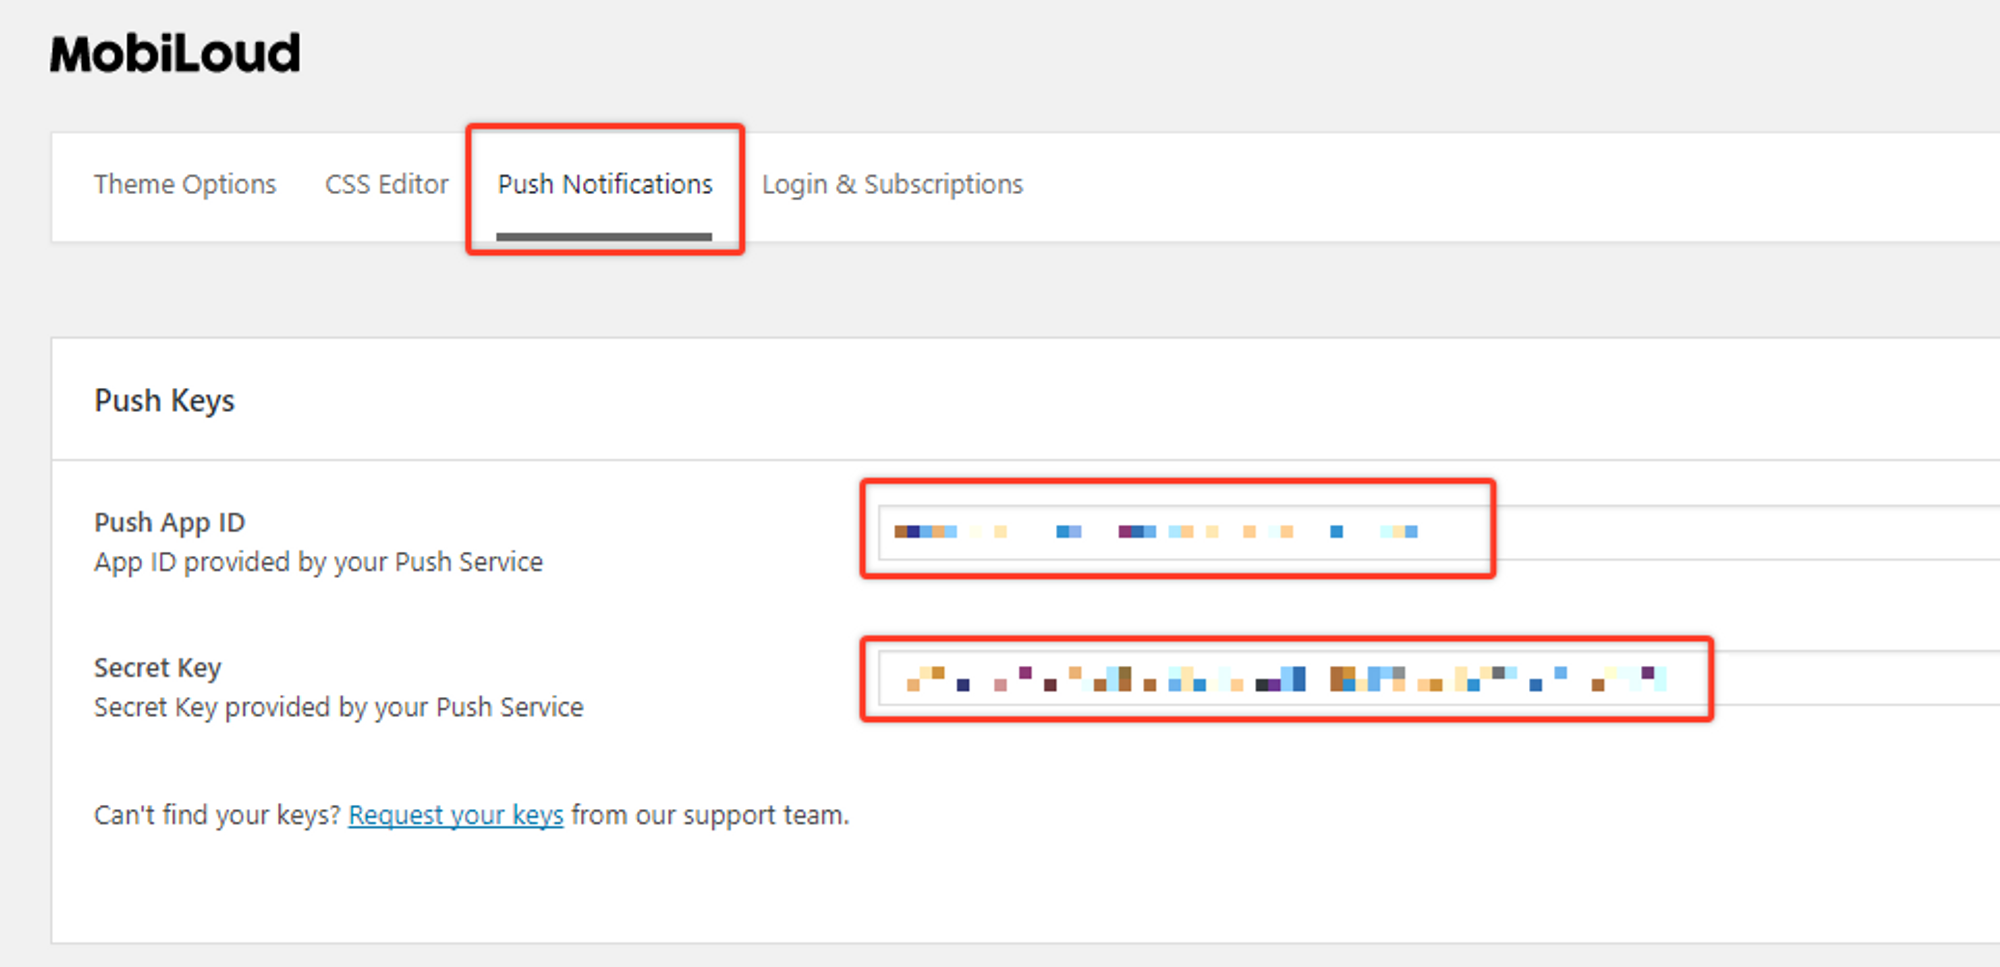
In order to start sending push notifications from your WordPress Dashboard you will need to fill the “Push App ID” and “Secret Key” fields, under the “Push Notifications” tab, with your OneSignal keys.
The mentioned fields can be found under “Vendrux > Configuration > Push Notifications” as you can see below:

These keys can be found in your OneSignal account, under the “Settings > Keys & Ids” area as you can see below:

Once you save your Push Notifications settings, a new section will be available, as you can see below:

The Push Notifications area will allow you to send manual notifications to your users and tracking information about previously sent notifications.

If you would like to send automatic notifications to your users when a new post is published on your website, you can enable this feature under “Vendrux > Configuration > Push Notifications”.
At the very bottom of the page you will find all the settings to configure notifications that will be automatically sent when a new post is published, as you can see here:

Tags will allow you and your users to segment the notifications they will receive.
In your app, if you have the “Alerts” tab enabled, users will be able to determine for which tags they will receive notifications, as you can see here:

In this case, Main Alerts, Jobs, Updates, and News are all tags that the user can enable or disable so that when a notification is sent with one of these tags assigned to it, only users that have that tag enabled will receive it.
You can create or edit the tags directly from your Vendrux Dashboard, keeping in mind that each tag will have two values assigned to it:
To clarify, “Main Alerts” would be the label and “main-alerts” the ID of this tag.
The Vendrux plugin gives you two options for tags, both explained below:
When you attach a post to your notification, you can mark this option to include the “category slugs” of that post as tags in the notification. If a post is assigned to the “Featured News” category, the “featured-news” tag will be assigned to your notification and only users that have that tag enabled will receive the notification.
Keep in mind that you will need to manually create this specific tag in your “Vendrux Dashboard”, like this:

If instead, you prefer to add tags to your notification manually you can use this option. You can simply add the IDs of your tags in the text field and those will be included in your notification.

Whenever a user enables or disables a specific tag, his profile in OneSignal will be updated with his selection, as you can see below:

The actual notification that you send, will include the necessary logic to ensure it only gets delivered to users that have the selected set of tags turned on:

After your app is live, you will want to send notifications to engage users and take them to your latest content in the app.
In this guide, we will cover the basics of sending notifications directly from your OneSignal Dashboard.
To get started access your OneSignal account through the following URL: https://app.onesignal.com/login
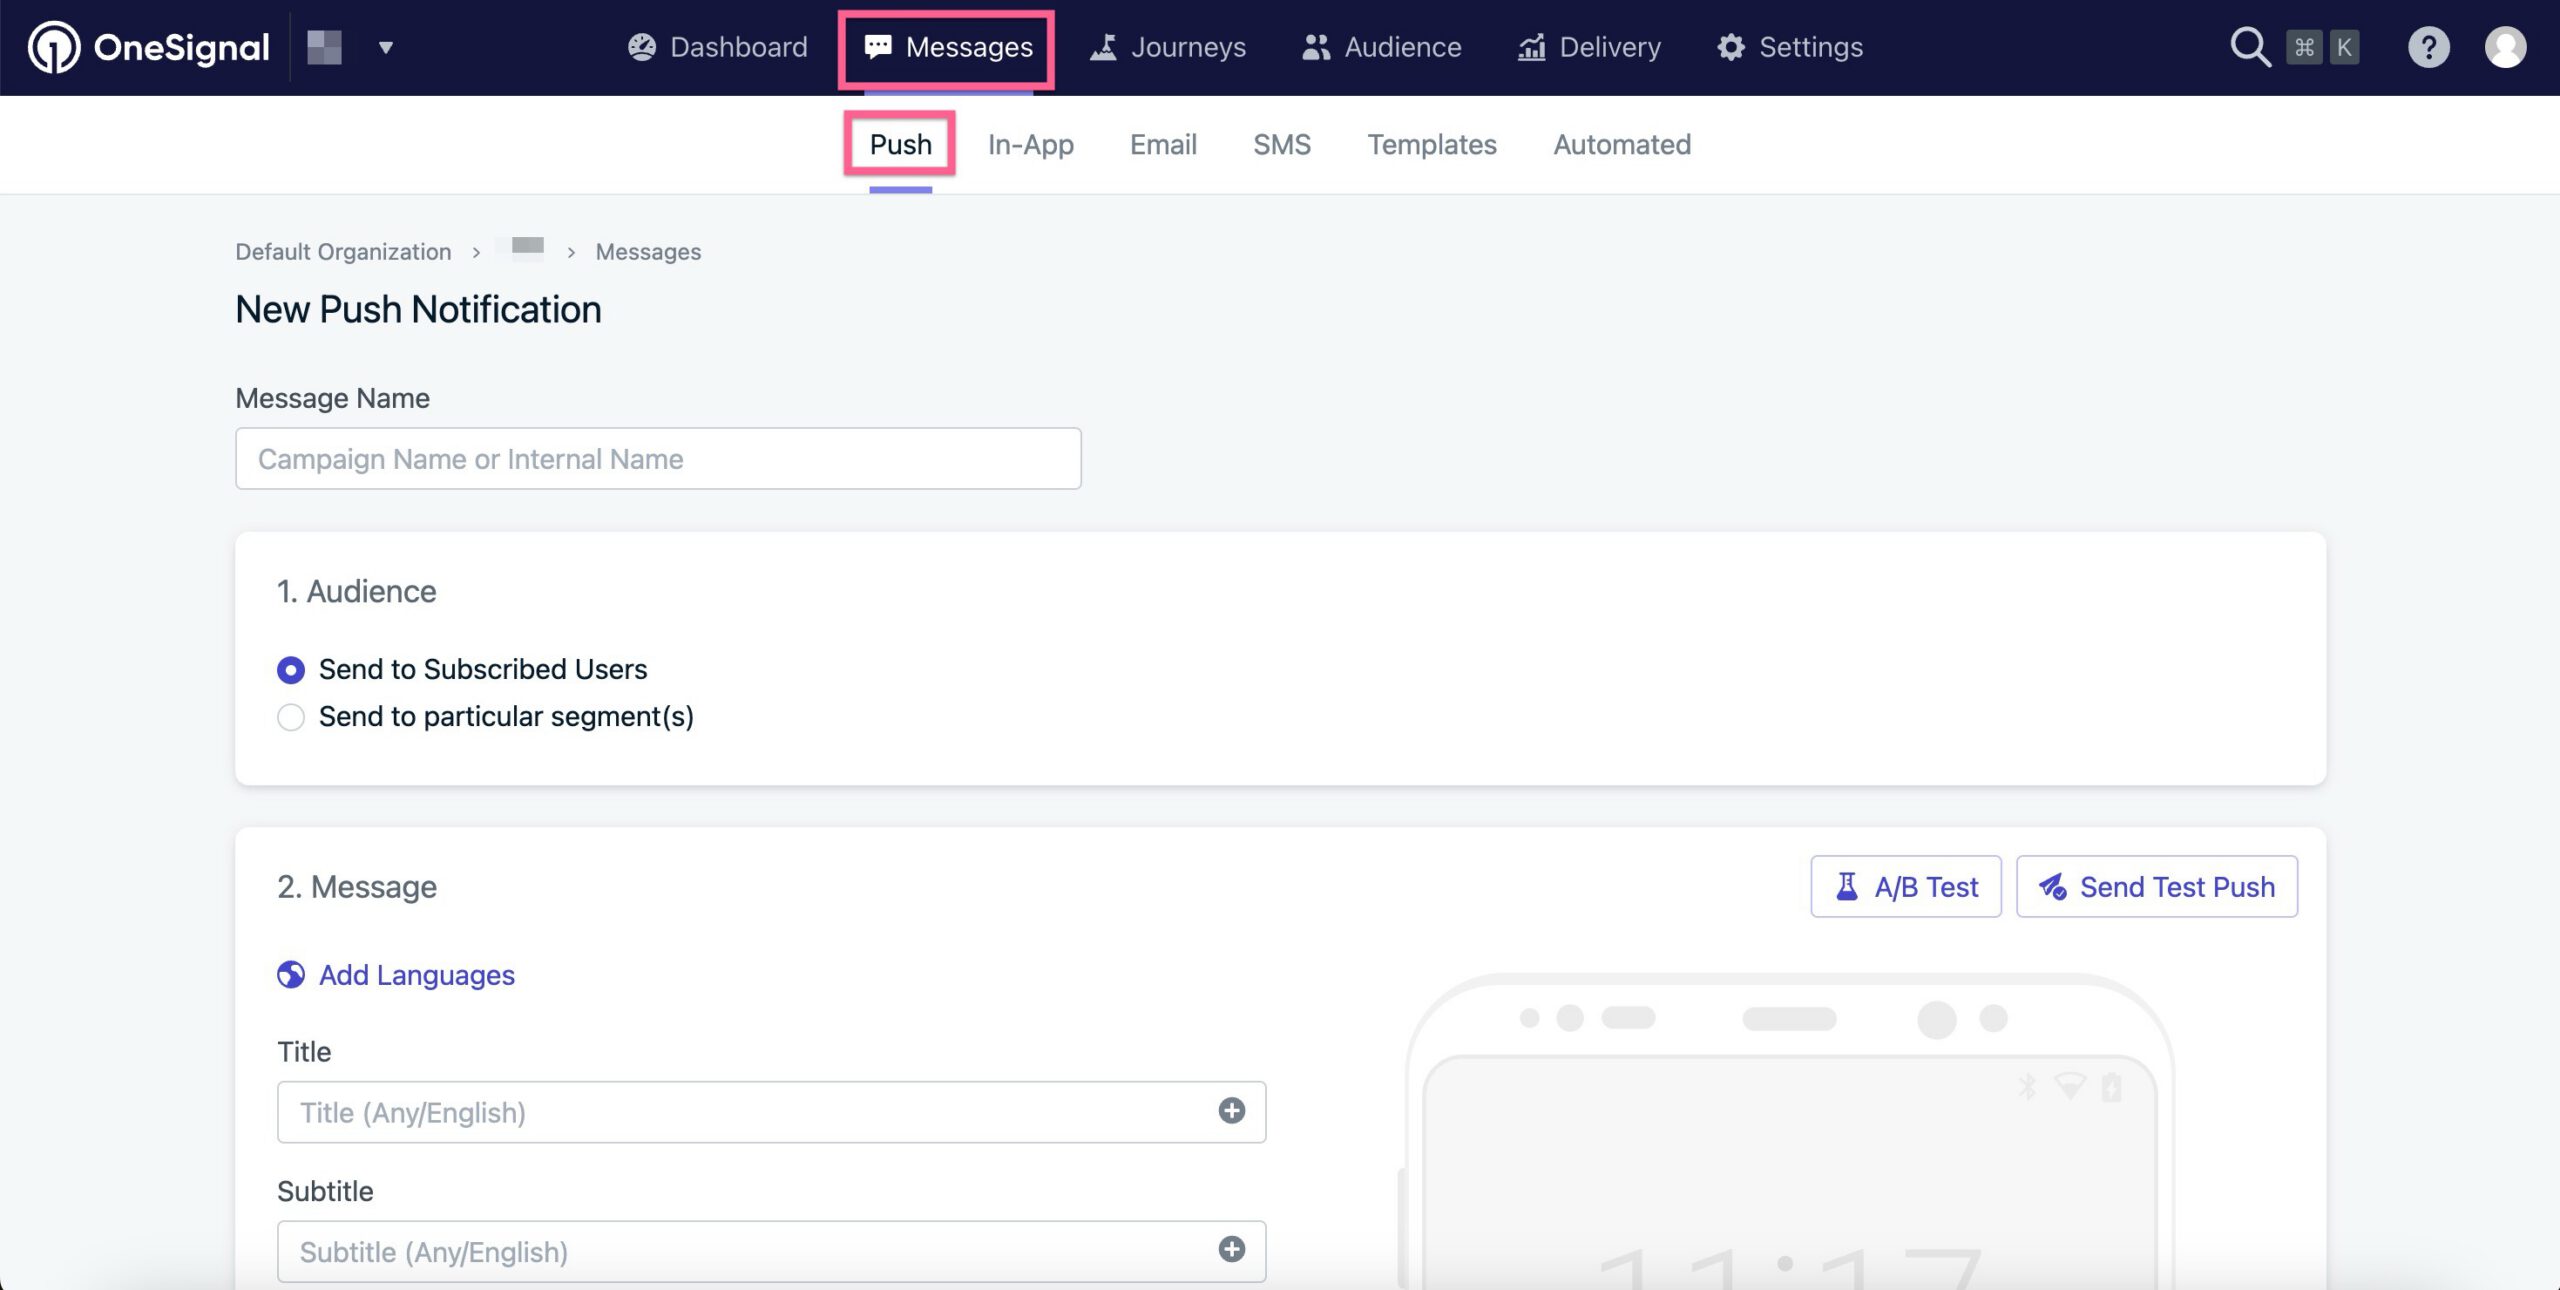
Now that you are in your account, make sure to select the Mobile App that you previously created, then access the “Messages” area and click on “New Push” as you can see below:

You will be presented with several options to customize your push notification, as well as a preview tool to see exactly how the notification looks on iOS and Android:

There is one key aspect when sending notifications from your OneSignal Dashboard to the Vendrux Platform, the “Launch URL” field must always be empty, and you must use the “Additional Data” area to specify the URL that must be opened when users click on the notification.
Under the “Additional Data” area you will have two fields, you will need to fill the “Key” field with “url” and the “Value” field with the URL that must be opened (e.g. https://yourwebsite.com):

You can now proceed with sending the notification, make sure to select the best sending method, if you are sending breaking news mark the “Send Immediately” option, otherwise, we’d recommend using the “Smart Delivery”.

Just press “Confirm” to start sending the notifications.
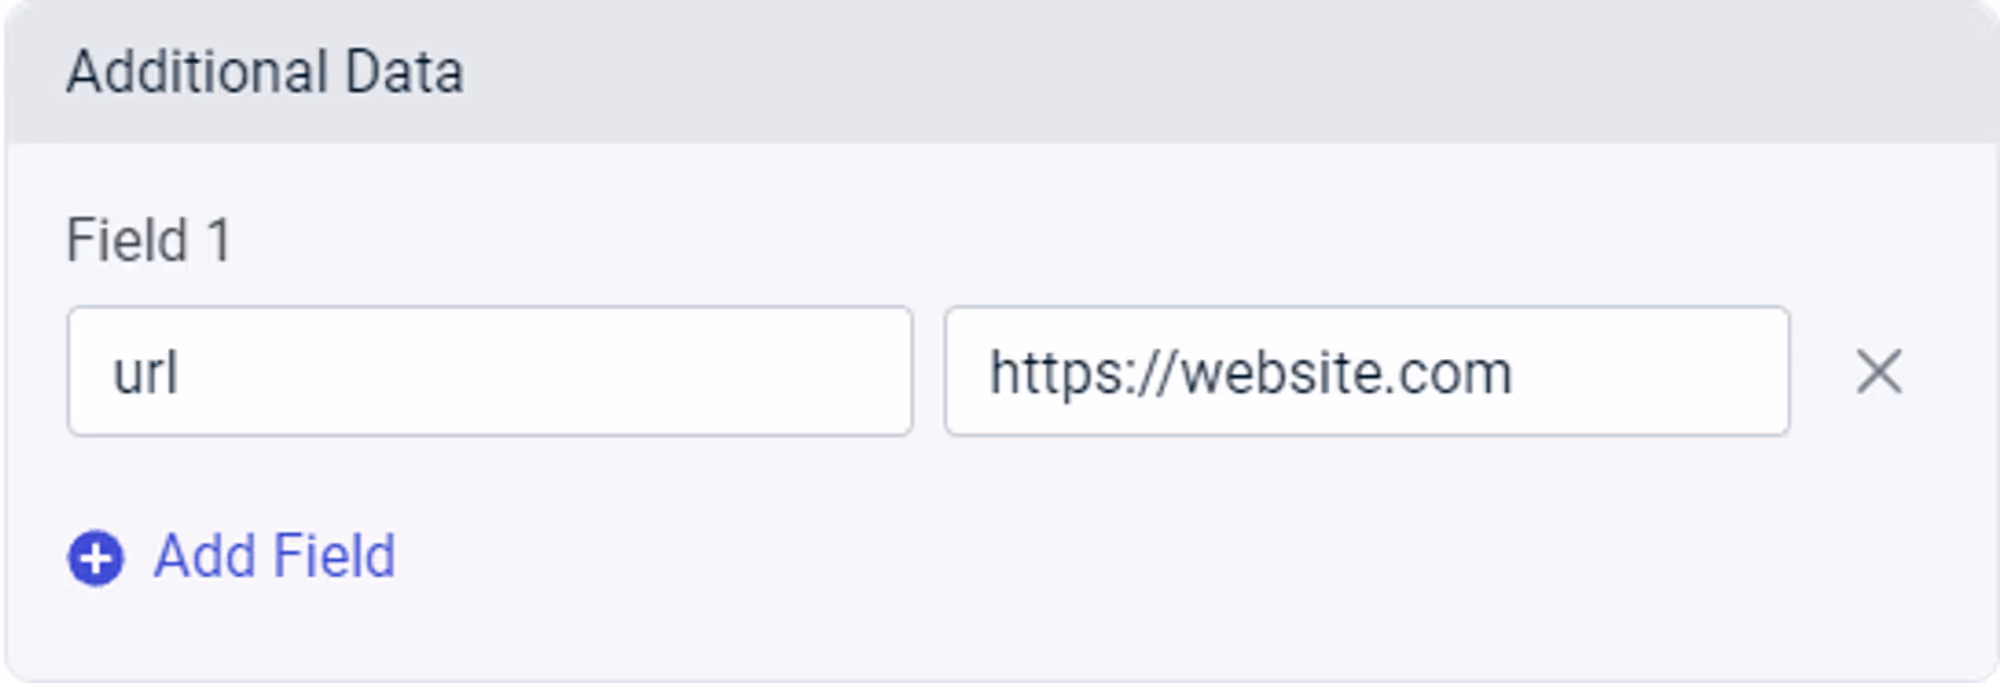
⚠️ The “Launch URL” field provided by OneSignal won’t work inside the app, you will need to use “Additional Data” in order to display a specific URL in the app when the notification is clicked.
When you create a push notification, either via the OneSignal Dashboard or the REST API, you can specify a URL to open when the notification is clicked.
To do so, you must include a field called “url” in the “Additional Data” area, with the URL that must be opened as the value.
Below you can see what that should look like:
.avif)
//OneSignal REST API

"included_segments": [
  "Subscribed Users"
],
"data": [
	'url' = 'https://website.com'
],
"contents": {
  "en": "Notification content",
}⚠️ This guide should not be used if you have a WordPress website.
There are many situations in which you will want to trigger push notifications to your users, here are some examples:
For all of these examples, the notification will need to target a specific user when a specific event happens on your website. In order to be able to send these notifications you will need the following implemented into your website’s code:
Keep in mind that this is not an implementation guide for the OneSignal REST API, each server and website is different and will require a developer to find the best approach for integrating the OneSignal REST API. The purpose of this guide is to give you a better understanding of how to integrate your website with the Vendrux platform for sending targeted, or transactional push notifications.
Let’s go through each one of the requirements:
Since Vendrux uses OneSignal for push notifications, you will need to use the OneSignal REST API to trigger the notifications.
Whenever a push notification is expected to be sent, you will need to make a call to the OneSignal REST API with the notification details (title, text, link, image, tags, etc), this call must be implemented on your website.
Here you can find the complete documentation for the OneSignal REST API: https://documentation.onesignal.com/reference/create-notification
Implementing the OneSignal REST API should be straightforward, but at some point, you will ask yourself “How do I target a specific user?”, and that’s where the Vendrux native functions come into play.
On your website, you are probably using a unique ID or even an email to identify your users, but in OneSignal that unique identifier is not available out of the box, so the idea here is to tell OneSignal to store the same unique user ID from your website into the OneSignal profile of that user.
To do this, we are going to trigger the following Javascript function as soon as the user has logged in:
// Check the user agent for the "canvas" string
const isApp = navigator.userAgent.toLowerCase().indexOf('canvas') > -1;
// Check if we are in the app
if (isApp) {
try {
// Set the external user ID
let externalUserId = 1;
// Trigger the native function to save to OneSignal
nativeFunctions.onesignalSetExternalUserId(externalUserId);
// Log the event in the console
console.log("External user ID set");
} catch (ex) {
console.log(ex.message);
}
}
We recommend adding the Javascript code inline rather than using a separate file, to avoid compatibility issues.
Fo more details on how to target users using the External User ID, you can refer to the OneSignal documentation here: https://documentation.onesignal.com/docs/external-user-ids
For most brands, the welcome message is an afterthought. A generic “Thanks for signing up!” followed by… nothing exciting.
But for the brands that get it right, this single message can be a revenue machine.
Your welcome email or push notification is your first and best shot at turning a casual subscriber into a paying customer. It gets 3x more engagement than your average marketing email, and push notifications see double the open rates of email when done right.
That’s a massive opportunity most brands completely waste.
In this guide, we’ll break down exactly how to craft high-impact welcome messages that drive clicks, conversions, and long-term loyalty. Let’s dive in.
Want more insights into what 8 and 9 figure brands are doing to boost retention and LTV? Check out our new podcast and newsletter, The Retention Edge.
For ecommerce brands, the welcome message you send to new subscribers is one of the most critical touchpoints in the entire customer journey.
You’re at the stage where the customer has shown interest, but the relationship is not cemented yet.
They’re interested enough to have signed up for your list, whether it’s to claim a discount, or because they’re just keen on what your brand has to offer.
But there’s still work to do. This is a crucial touchpoint where you can either create a new fan of your brand, or give a forgettable first impression that leads to your brand being forgotten.
Customers are more skeptical, more likely to jump ship at this stage.
With apps, up to 80% of new subscribers churn within the first week if they don’t engage.
With emails, generating engagement early is key, before your emails get buried in a hundred other promotional emails in the customer’s secondary inbox.
Yet while you can lose the customer at the welcome stage, you also have their attention. You’re fresh in their mind. And a good first impression can turn a new subscriber into a fan in no time.
Welcome emails get up to 3x higher engagement than standard promotional emails.
Consistently higher open rates, click-through rates and conversion rates.
Click-to-conversion rates for welcome emails can be as high as 56.8%! That means over half of the people who click from this email make a purchase.
The welcome message is a fantastic opportunity to drive sales. Don’t pass it up.
Customers who engage with a welcome message are far more likely to convert—and once they do, their value skyrockets.
A returning customer isn’t just more loyal – they’re up to 12X more likely to convert, and spend significantly more per order.
The hardest part? Getting them to buy the first time.
Data proves that once a customer experiences your product and trusts your brand, repeat purchases come much easier.
That’s why your welcome message is prime real estate. With the highest engagement rates of any marketing email or push, it’s your best shot at getting them over that first-sale hurdle.
Even if your welcome email or push notification doesn’t drive an immediate sale, it sets the stage for future conversions.
When someone signs up, your brand is fresh in their mind. A timely message feels familiar, reinforcing their decision to subscribe. But if you wait a week to reach out? They’ve likely forgotten who you are.
Now, your email looks like spam, increasing the chances of an unsubscribe. Your push notification feels intrusive, prompting them to turn off notifications entirely – killing future engagement.
A well-crafted welcome message conditions subscribers to expect future communication, making them more receptive when you follow up with promotions later. Ignore this step, and you risk becoming just another brand lost in the inbox (or worse, in the notification settings).
What makes a great welcome message?
To be effective, your first message to new subscribers needs to accomplish three key things:
Your welcome message should reinforce their decision to sign up and make them feel good about joining your brand community.
A simple “Welcome to [Brand]! Here’s what’s next…” goes a long way in building rapport.


Subscribers opted in for a reason. They’re hoping to get something valuable from your brand.
Your welcome message needs to deliver on that expectation with a discount, exclusive access, personalized recommendations, or some other meaningful perk.


A welcome message isn’t just about introduction; it should actively guide subscribers toward their first purchase, social engagement, or another important milestone (such as downloading your app).
Include a clear CTA that tells them the next step you want them to take.


When your welcome email or push notification serves these three key functions – acknowledge, deliver value, and drive action – it sets the stage for an engaged and profitable customer relationship.
While welcome emails (longer-form) and push notifications (shorter-form) share similar objectives, they each have unique considerations in terms of structure and content.
We’ll look at how to piece together each form of welcome message; starting with email.
Your email subject line is the gateway to engagement. It needs to stand out in a crowded inbox and compel subscribers to open.
Approximately half of all recipients decide whether or not to open an email based on the subject line.
Some effective approaches:

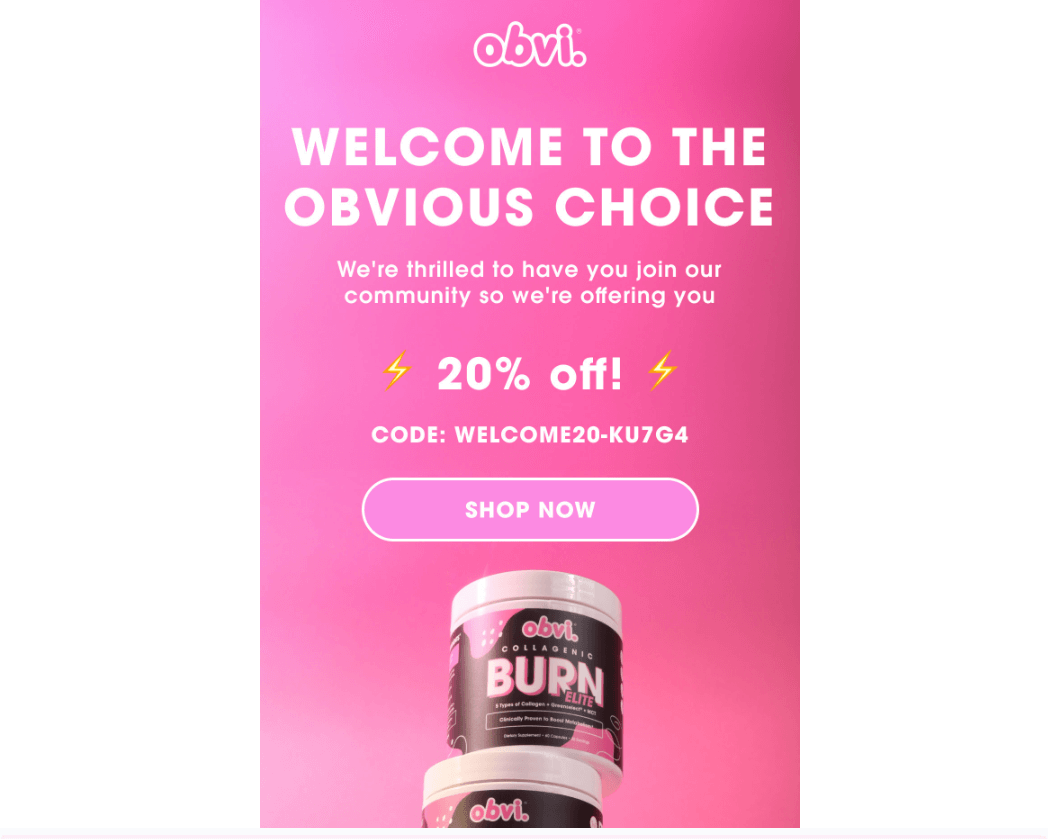
The top of your email is prime real estate for a bold branded message that gets subscribers excited.
Use a strong visual and copy like “You’ve Unlocked Exclusive Access” to reaffirm their decision to sign up.
Keep the branding here consistent with your typical fonts, colors, and tone.
Welcome email body copy should be brief, scannable, and focused on value.
Dedicate a short paragraph to reaffirming your brand promise (“We make [product] so you can [benefit]”), then follow with snappy benefit-driven bullet points or a succinct explanation of their welcome offer.
This isn’t the place for your full brand story or an overload of product details. Stick to punchy highlights and save the deeper dive for later in your email flow.
Social proof elements like a glowing testimonial, press mention, or UGC image can work well to build credibility without overwhelming.
Include a prominent, action-driven CTA button to direct their next steps. Examples include:
Place your CTA above the fold for maximum visibility, and consider repeating it at the bottom of your email for those who read all the way through.
If you have space, consider secondary elements that can enhance engagement without overloading:
Keep these brief so they don’t distract from your main CTA.
Here’s how to craft the first push notification, to sow the seeds for a fruitful relationship with your app user.
With push notifications, you have even less real estate to work with than email. Your message needs to be hyper-focused on driving that first engagement.
Best practices for welcome push copy:

“🎉 Welcome to [Brand]! Tap to unlock your exclusive 15% off.”
“You’re officially part of the [Brand] fam! Your reward is inside 🎁”
“🚀 Ready to shop? Your VIP discount is waiting.”


With push notifications, taps are your primary engagement metric. Your push CTA should be crystal clear on the action you want the subscriber to take. Some options include:
“🔗 Tap to Shop Bestsellers”
“🎁 Claim Your 15% Off – Limited Time!”
“👀 See What’s Trending Now”
To get the most out of your welcome messages, commit to continuous testing and iteration.
A/B test these elements:
Tracking the right metrics is key as well, to ensure you understand the impact of your welcome sequences, and whether there’s room for improvement.
For Email:
For Push:
By tracking these metrics over time, you can pinpoint top opportunities to improve your welcome messaging performance.
So far, we’ve focused on welcome emails and push notifications – but what about SMS?
Many brands now collect SMS opt-ins alongside email, and when used strategically, it can be a powerful retention channel. If you plan to engage subscribers regularly via SMS, a welcome message makes sense.
However, SMS comes with higher costs per send, so brands typically use it more sparingly than email or push (both of which are essentially free). But if you’re investing in SMS welcomes, the same principles apply:
If you’re using SMS, make sure your welcome message is short, clear, and valuable. It’s a high-cost, high-impact channel, so every word counts.
Your welcome message is hands down your most impactful touchpoint for turning new subscribers into loyal customers. It’s a can’t-miss opportunity to:
Whether you’re welcoming new folks via email, push notification, or both, keep these fundamentals in mind:
Not sure if your current welcome message is working hard enough? Now’s the perfect time to audit what you have and try a few experiments to boost performance.
Every new subscriber is an opportunity. Make that first impression count!
In this article, we’re going to break down the biggest misconception I see in online marketing for ecommerce – web vs native app push notifications.
They’re often lumped together, mixed up, treated as the same thing: when, in reality, they should be seen as two completely different channels.
Let’s explain.
The term “push notification” covers two fundamentally different channels. Understanding the difference is critical, because choosing the wrong one means leaving most of the channel’s value on the table.
Web push notifications are sent through the browser.
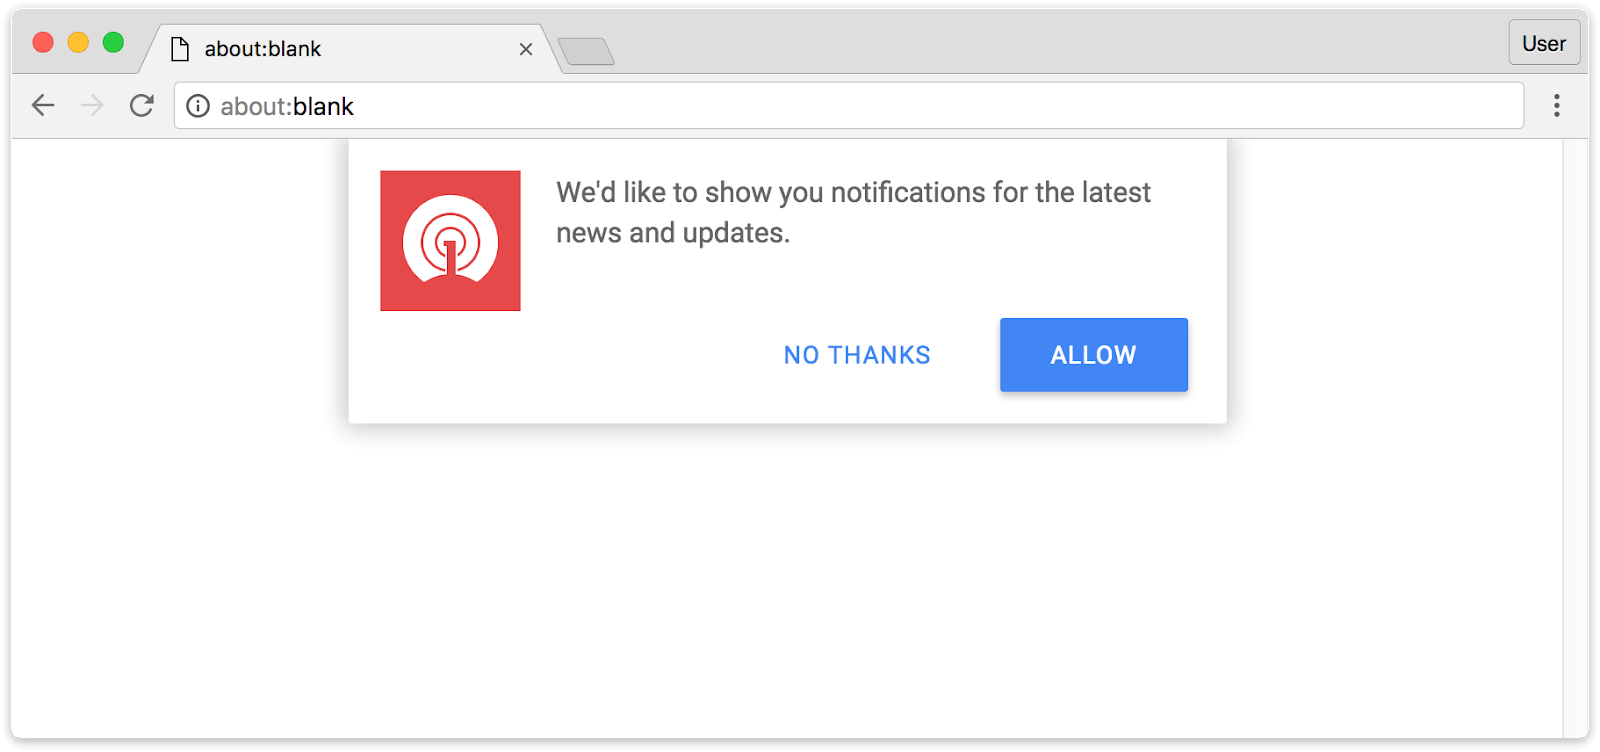
When a visitor lands on your site, a permission prompt asks if they’d like to receive notifications.


If they opt in, you can send messages that appear on their device, even when they’re not on your site, as long as their browser is running.
Popular web push tools for ecommerce brands include PushOwl (now Brevo), Firepush, PushEngage, PushWoosh and OneSignal. These are easy to set up: just install the app, configure a prompt, and start sending.
The catch: if you’re expecting these tools to send the kind of notifications that flash up on your lock screen, you may be disappointed – because that’s not what this channel does.
Native app push notifications are sent through a mobile app installed from the App Store or Google Play.
They use the operating system’s built-in notification infrastructure: Apple Push Notification service (APNs) on iOS and Firebase Cloud Messaging (FCM) on Android.
Because they’re delivered at the OS level, native push notifications can include rich media, deep links directly into specific product pages, and behavioral triggers based on in-app activity. They’re not dependent on a browser session and can reach users at any time.
We’ve covered the technical differences between web push and native app push.
But what really matters is how these channels actually perform in practice, and the business impact (cost & return) of each channel.
That’s what we’re going to look at now.
Native app push notifications appear instantly on your customer’s lock screen, notification center, and as banners.
They’re delivered through the operating system itself, so they show up whether the customer is actively using their phone or not. You can reach them at any time.
Web push, by contrast, depends on the browser. If the customer’s browser is closed, the notification doesn’t arrive.
According to PushPushGo’s 2025 benchmark data, web push notifications have an average deliverability rate of about 33%. That means two out of three notifications you send never reach the user.
This is the thing most people get wrong. We think of push notifications as a mobile channel – we compare it to SMS, we think of it as reaching customers on the go.
Native app push, yes. Web push? No.
On iOS, web push barely works. Apple requires users to manually add your site to their home screen as a PWA before you can even ask for notification permission (and most won’t).
For US ecommerce brands, iOS matters the most – roughly 58% of mobile users are on iPhone, so that’s more than half your mobile audience you simply can’t reach.
On Android, web push works better, but it still requires the browser to be running. And only about 6% of mobile usage time is spent in browsers. The rest is in apps.
So even on Android, the window for web push delivery is narrow.
There’s a place for web push notifications. But it’s not as a mobile engagement channel.
Web push has one clear advantage: reach potential.
Getting someone to opt in to web push is easier, from a practical perspective. You can get opt-ins with one click – no app download, no account creation.
To send someone native push notifications, they need to go to the App Store, install the app, open it, and then allow notifications.

That’s objectively a longer path.
So in theory, web push can reach a broader audience. In practice, though, not many people opt in.
Think about your own habits: how often do you click “Allow” when a random website asks to send you notifications?
For most people, the answer is almost never. Web push opt-in rates for ecommerce sites average around 5-6% of visitors.
It’s also worth mentioning that app push subscribers are, by the nature of the longer path to opt-in, much stronger, higher intent, more engaged. They’re your best customers. So they’re also more likely to respond to your pushes.
Realistically, one native app push subscriber could be worth 10 subscribers to web push.
Web push is much simpler to set up.
Install a Shopify push notification app, configure a prompt, and you’re live. You can be building your subscriber list and sending notifications within an hour.
Native push requires a mobile app. That’s a bigger investment. But the revenue potential is proportionally bigger too. Push notifications drive 15% of attributed ecommerce revenue from just 3% of message volume (Omnisend 2025), and that stat comes from native app push.
Vendrux customers have reported $200-300K per month in push notification revenue – we have brands getting $200K+ per month from abandoned cart push notifications alone.
However, if you want to know which channel is easiest to just dip your toes in and try out – that’s web push, without a doubt.
Web push is easier to set up, has lower opt-in friction, and theoretically can reach a lot more people. Performance-wise, native push is fundamentally better – higher visibility rates, more brands reporting strong revenue through this channel.
But the main takeaway shouldn’t be that native app push is “better”. It should be that they’re two completely different channels. They’re not taking away from, or realistically competing with each other.
It’s really an apples to oranges (or mangoes – let’s say mangoes) comparison.
Setting up web push notifications for your site is straightforward. Like, very straightforward.
Here’s the broad overview.
The most popular push notification apps on the Shopify App Store include PushOwl (now Brevo), Firepush, PushEngage, and Hextom. Most offer a free tier to get started, with paid plans starting around $19/month for more features.
The basic process goes like:
(Many of these tools also work if you’re not on Shopify as well)
These tools are genuinely useful. PushOwl, for example, supports abandoned cart recovery, back-in-stock alerts, segmentation, and A/B testing. There’s little to no technical work to set them up, and the cost is minimal.
To send native push notifications, you need a native mobile app in the App Store and Google Play.
There’s no way around this: native push uses the operating system’s notification infrastructure (APNs on iOS, FCM on Android), which only works through installed apps.
You can’t install a Shopify app and start sending native push notifications from your site, or turn your site into a PWA and send native push (PWAs send web push notifications).
So does that mean you need an investment of $100K+, and a 6-12 month dev project to start sending native push notifications?
No – it does not.
Vendrux extends your existing website into a native iOS and Android app. Your app is your website – converted to a native app, with native capabilities.
Everything that works on your site (every page, every integration, every checkout flow) works in the app, with no rebuilding required.
This means you can unlock the full power of native push notifications without spending six figures on custom app development:
Vendrux’s approach essentially lets you send mobile push notifications from your website. It’s the closest you can come to this; you don’t need a new codebase to manage, a mobile app development team, or a separate storefront.
You could go live with your app within weeks. Vendrux has helped thousands of brands launch their own mobile apps, from small DTC startups to large enterprise retailers.
“The power of push notifications is so strong. In a world where people open email less and less each day, everyone is jumping into SMS which is crazy expensive, and people are starting to tune these out too, being able to do push notifications is the reason you do an app.”
— David Cost, VP of Ecommerce at Rainbow Shops
Book a free consultation to see how Vendrux can help you launch your own mobile app, and unlock your next top revenue channel in native push notifications.
One of the top reasons to create a mobile app for your store is to get access to native mobile push notifications, and the possibilities these notifications open up for your marketing and retention strategy.
Regularly contacting your customers via push is a winning strategy for ecommerce brands. Data shows that brands who send weekly push notifications to their app users have 2-5x higher retention rates, while brands who send daily push notifications get 3-6x higher retention rates.
Many of the most common, and most effective push notifications are transactional push notifications. If you’re wondering what these notifications are, why they’re so effective, and how you can start setting up transactional push notifications for your brand, read on and we’ll explain everything you need to know.
Dive deeper: Push Notifications for Ecommerce (A-Z Guide)
Transactional push notifications are automated push notifications, sent in response to a user action.
They’re usually used to send time-sensitive information related to the trigger event, or to act as a confirmation or a reminder.
An order confirmation is one example of a transactional notification. The notification is triggered when a customer completes their order, sending them a message confirming that their order has been successfully received, and their product is one the way.
Transactional notifications are often updated like the example above, but not always. They can be promotional, they can be designed to elicit a response or action from the recipient (like opening your app, or making a purchase), or they can simply convey information.
We’ll look at more of the wide range of different transactional push notifications in the section below.
Now let’s take a look at some of the most common types of transactional push notifications used by ecommerce brands.
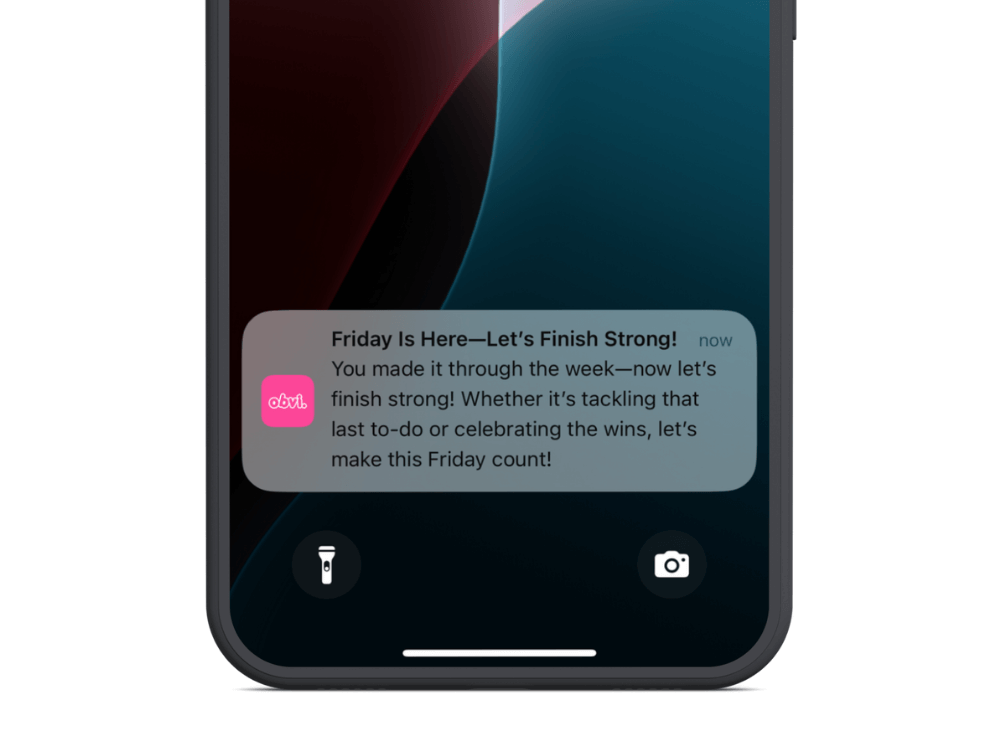
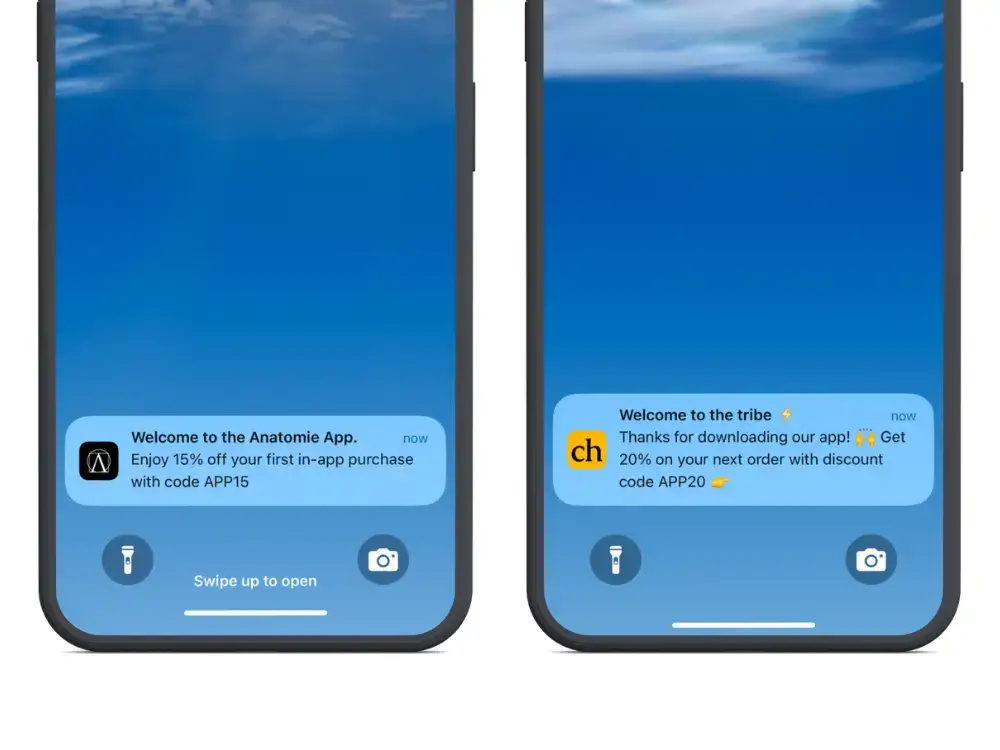
A welcome message is a simple way to start building a relationship with your customer.
This message would be sent after the user first downloads the app, sending a friendly welcome (and potentially a one-time discount code as a thanks).
Research shows that app retention rates are nearly 3x higher when a user receives at least one push notification during their first 90 days using an app, so setting up a simple message like this can go a long way to keeping your users engaged long-term.
This notification is triggered when a user completes an order. It’s a simple message to let them know that everything was successful, and could also remind them of the estimated delivery timeline.
Shipping update notifications update the customer on the status of their delivery.
You could send them a notification when the item is out for delivery, or even multiple notifications keeping them in the loop with where their package is and how long it will take to get to them.
A delivery confirmation would be sent after the item has been marked as delivered to the customer, again keeping them informed and in the loop.
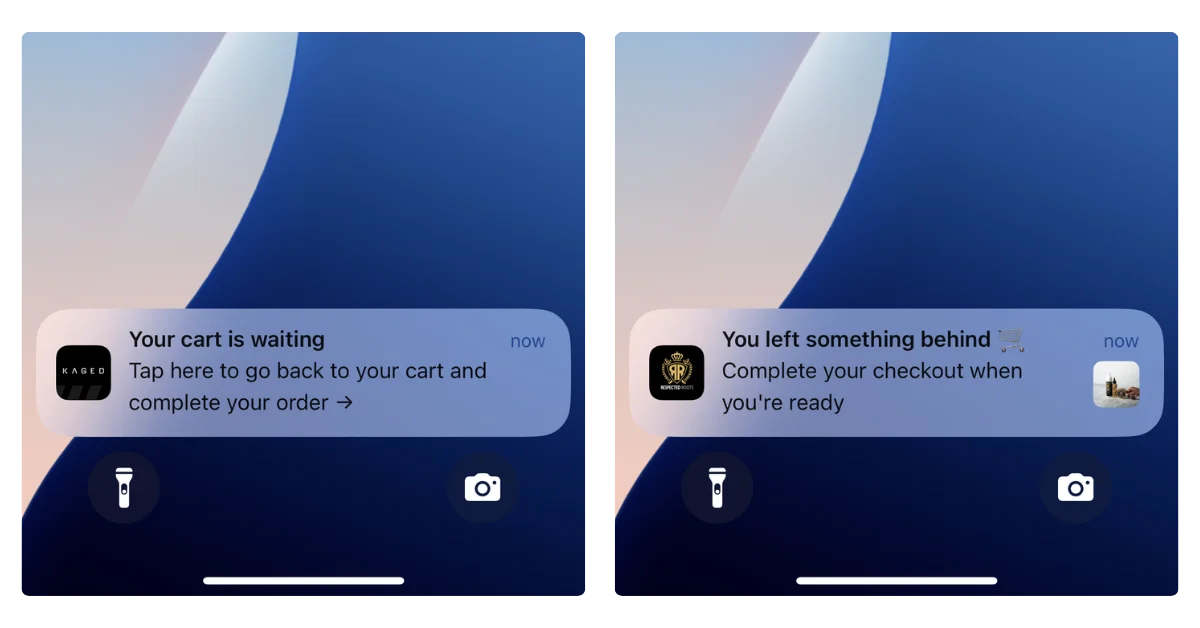
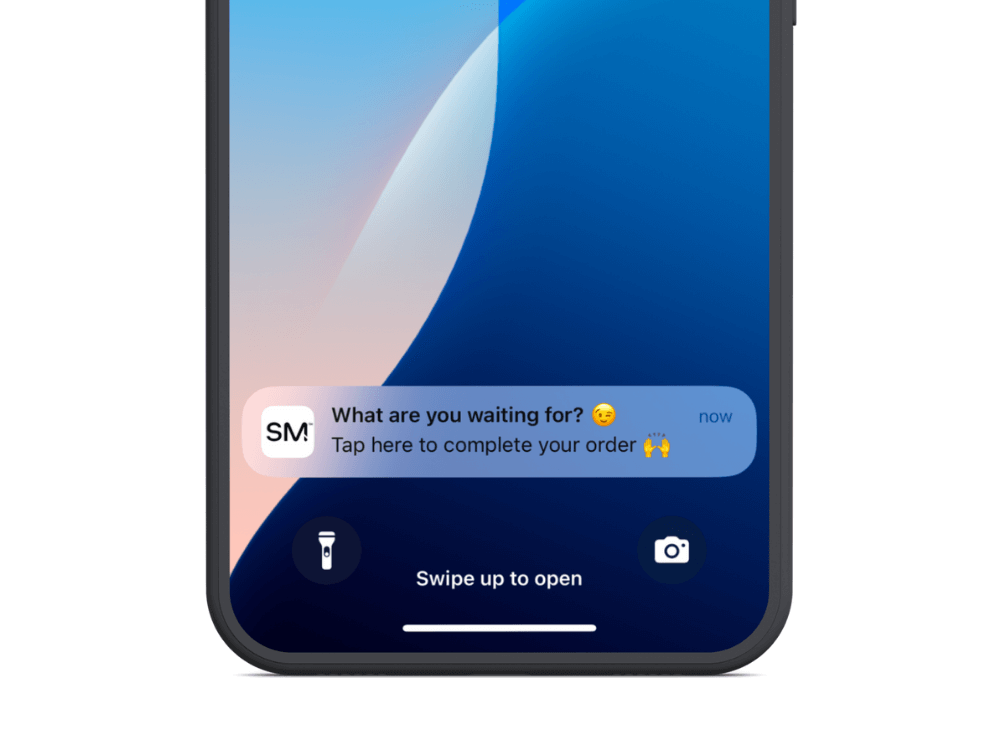
These notifications are sent when a user has added a product (or products) to their cart, and has not completed their checkout after a certain period of time.
Abandoned cart notifications are a super-effective way to generate more revenue from your existing store traffic.
Statistics show more than 86% of mobile shopping carts are left abandoned – if you can recover just a small percentage of these with an automated notification, you can significantly increase your revenue and profit margins.
If a customer showed interest in a product that was out of stock (i.e. added to their cart, or requested to be notified about it), you could send them a push notification when the product is back in stock.
This notification sends a message to users who have saved a product to their wishlist, updating them about the status of the product.
You could notify them if stock levels of the product are running low, or (like Steam does via email), notify shoppers when a product in their wishlist goes on sale.
This notification updates users on their status of their loyalty account, such as the number of points they’ve earned and can redeem.
This gives customers a jolt of positive energy when they make a purchase and earn points, and adds an element of gamification that’s generally a great way to drive long-term engagement.
Many brands send emails after a customer has made a purchase and their product has arrived, asking them to leave a review or provide feedback on their purchase.
Push notifications can be even more effective than emails for this – especially if the user can leave a review within the app, as it’s low-friction and makes leaving a review quick and easy for the customer.
If you do customer service within your app, you can send push notifications to keep the customer updated with their inquiries, like notifying them when there’s a reply to their support ticket, or that their support request has been resolved/closed.
Like an order confirmation, when a customer requests a refund, you might use push notifications to confirm to them that the refund has been processed, and update them on the expected timeline for the money to be in their account.
Another common push notification is when there’s a new sign on to the customer’s account (e.g. a sign on from an unrecognized browser). This helps ensure that the user’s account is secure, and lets them protect themselves if someone happens to get access to their account.
Now we know some of the most common examples of transactional push notifications, here are some best practices to follow when setting up these notifications for your brand.
Small touches of personalization – like mentioning the customer’s name in the message – can go a long way, making your customers feel unique, and not the recipient of a generic automated message.
(Read more about using personalization with push notifications here).
You want to ensure your notifications are always relevant, and sent at the right time.
Customers don’t want to see a restock notification for an item they have no interest in. And they don’t want to see an order confirmation email three days after they made their purchase, or a welcome message after they’ve been using the app for a month already.
If your customers start to feel your notifications are irrelevant or unimportant, they’re highly likely to turn off notifications, and you’ll lose this channel with this customer forever.
Push notifications, as a medium, give you very little space to get your point across. It’s important to capture your customers’ attention quickly, and deliver any important information (or provide a strong hook to get them to tap on the notification and learn more).
If it’s an update, like a delivery confirmation or shipping update, get right to the point.
Otherwise, say what you have to say in as few words as possible – research shows that push notifications with 10 words or less have nearly twice the click rate as messages with 11-20 words, and nearly 3x the click rate of messages with over 20 words.
Don’t be vague. Convey any important information (such as shipping/delivery information) upfront, and if the notification requires an action, let the customer know with a clear CTA.
Push notifications with rich media (e.g. images, gifs or videos) have a 56% higher open rate than plain text notifications.
Nearly 30% of push notification campaigns use emojis, and messages with emojis have 20% higher reaction rates 😲
This won’t be appropriate, or necessary, for all types of push notifications (you don’t need to send a picture of a truck with every shipping update), but if you’re trying to catch the user’s attention, rich media and emojis are a great way to do it.
While many transactional push notifications are “set and forget” type campaigns, where you set them up once and don’t need to touch them again, you should consistently test and optimize any push campaigns with a desired outcome, such as purchase.
If you’re running abandoned cart notifications, wishlist updates or restock notifications, for example, test different approaches to copy to figure out what performs best.
Push notifications are a balancing act. While brands that regularly contact their customers with push notifications tend to get higher engagement and retention, customers will turn off notifications fast if they feel like they’re being bombarded.
Most brands are more guilty of underusing push notifications than overusing, but just be careful that you’re not updating users with a notification every quarter-mile of the delivery truck’s journey.
Push is just one way to send transaction notifications or messages to your customers.
With the cost of push notifications, and their proven effectiveness at generating visibility and reactions from customers, this is the best way to send many types of transactional messages.
However, there are some cases where email or SMS may be more appropriate. Let’s take a look at a few now.
Emails are more permanent than push notifications, and make it easier for customers to search for messages they received in the past. This makes them better for anything the customer might need to find later, such as receipts.
Email is also better for long-form content, such as messages featuring detailed instructions, and for messages that might need a reply from the customer.
(Read more about push notifications vs email and when to use each medium here.)
SMS (text messages) and push notifications are a lot more similar than push and email – both are short, direct mediums, which are good for sending timely messages and generating a high visibility rate.
SMS may be a better fit for messages that require a response, or for urgent or particularly time-sensitive messages, as they’re more likely to be delivered and seen right away than push notifications.
(Check out this article for more about push notifications vs SMS.)
Other than that, if you have the ability to send push notifications, we recommend you use them.
With a push notification service like OneSignal or Klaviyo, setting up automatic push notifications with custom triggers is easy. These platforms take almost all of the technical work and coding out of it, and all you need to do is define the logic and compose your messages.
Vendrux apps come with native integrations for both OneSignal and Klaviyo, making it even easier to set up and manage transactional push notifications.
If your brand doesn’t have an app, Vendrux is a great way to build one.
Our done for you website to app service takes care of all the technical aspects of building high-quality iOS and Android apps.
We replicate everything that already works on your website, adding native mobile features like push notifications to deliver a true native experience.
Once live, your apps and website will be completely in sync, meaning there’s very little for you to do to update and maintain your apps (any changes you make to your website will be reflected in the apps automatically).

Just look at some of the amazing apps we’ve delivered for high-revenue brands like John Varvatos, Rainbow Shops, Sleefs, and many more.
To see how easy it is to build an app, with push notifications integrated from the start, get a free demo of your app now.
In DTC marketing every dollar counts.
Few marketing channels offer the cost-to-impact ratio of push notifications. The combination of low cost, low effort, and significant, compounding returns makes this one of the most underutilized and underappreciated channels around.
This combination of factors creates an almost guaranteed positive ROI that most DTC brands are still not fully leveraging.
The problem is that most brands don’t fully grasp the economics of push notifications, and they either:
We’re here to help you avoid making the same mistakes as those other brands.
Here’s the truth about push notifications for ecommerce – and why it’s almost impossible not to get a positive ROI from this channel.
Want the latest insights into how 8 and 9-figure brands are driving sustainable growth? That’s what you get with our weekly newsletter, The Retention Edge. Subscribe for free today.
Push notifications stand out because of simple economic factors; low cost, high gain.
Let’s break it down.
Push notifications are free to send once a user has opted in.
This fundamentally changes the economics of your marketing strategy. You can reach thousands of customers without spending a dime on the delivery itself.
Push notifications don’t require elaborate designs, long-form copy, or production-heavy assets.
A typical push notification is just 10-15 words, which means your team can create and deploy messages quickly without the resource demands of other channels.
Push notifications bypass crowded inboxes and go straight to the lock screen, meaning almost all of your notifications at least get seen.
Email marketers would kill for that kind of visibility.
Messages are delivered and seen in real-time, making push ideal for urgency-driven, time-sensitive campaigns (such as flash sales and abandoned carts).
You’re only sending push notifications to people who’ve already downloaded your app.
While this limits your reach, it also means your audience is warmer than any other channel.
These customers have already demonstrated commitment to your brand by installing your app on their device. That makes it much more likely that advertising to these customers will have meaningful results.
When you invest in a marketing channel, you don’t want to be putting blood, sweat and ad spend (and a few tears along the way) just to get someone who’s going to buy once and forget you.
Because push subscribers are already much more qualified, they’re more likely to be the kind of high-value, loyal customers who contribute a significant LTV over time (if you nurture them the right way, early in their customer journey).
To better understand why the economics of push notifications are so compelling, let’s compare them to other key marketing channels:
Push notifications, in contrast, always drive profit because the cost is fixed at close to zero. This opens up far more possibilities and viable use cases.
Comparing push to email, SMS and paid ads is not to say you should stop marketing on these channels and divert all your resources to push.
They’re not competitors – they’re complements, each filling a specific niche in a holistic marketing strategy.
The best brands use each channel in concert, to meet their entire customer base at the right channel and at the right stage in their customer journey.
Brands that have a mobile app, but aren’t getting any meaningful return from push notifications are typically making the same mistakes we see over and over again.
The temptation is to expect every push to drive immediate revenue. But that’s the wrong mindset.
Because of the economics, as we learned, every message doesn’t have to drive an instant return on investment.
You can afford to send 20 messages and only have 1 result in a reaction, and you’re still ahead.
Think in terms of frequency and consistency rather than single-message performance. You don’t measure paid ads by one impression, so don’t measure push by one send.
Some brands hesitate, sending just one push every few weeks.
The economics don’t work so well without scale. 1 reaction in 20 messages doesn’t work out so well if those 20 messages come over 20 weeks.
If you’re sending 1 or fewer notifications per week, up the cadence. Brands should typically send 2-5 per week.
“But I don’t want to annoy my customers – they might unsubscribe.”
That’s where the third mistake comes in.
Over-sending is not really the issue. The issue is over-sending push notifications that the customer doesn’t want.
This comes from notifications that are always pushing a sale, irrelevant, impersonal, intrusive or annoying messages.
If customers feel spammed, they’ll disable notifications, or worse, uninstall the app.
But if your customers enjoy receiving your notifications, and you can message them daily without any issues.
To fix, prioritize personalization and value-driven messaging. Keep them simple, positive, on-brand.

Want to turn push notifications into one of your most effective, pound-for-pound, marketing channels?
The biggest change most brands need to make is to shift their focus from immediate results, to building awareness and mindshare.
Most of your notifications should be aimed at keeping your brand top of mind, and building familiarity with your customers.
You can include gentle reminders of what you sell, but you’re not blasting someone with a “buy this NOW” every day.
Because of the low-cost, low-effort of push notifications, you don’t need an instant return.
Think of push notifications more like a billboard, or a display ad on your customer’s phone.
People don’t immediately swerve off the highway to get to a grocery store when they see a Coke billboard.
But if they see that billboard every day, Coca Cola will be the first thing they think about when they’re thirsty for a soft drink.
A long-term focus drives long-term results.
Yet you should know when to turn from awareness to urgency.
Some push notifications can drive excellent short-term results. New product launches, flash sales, abandoned cart reminders, browse abandonment reminders, personalized promotions… used strategically, these can drive a ton of sales.
Don’t ignore promotional push notifications, by any means. During BFCM, for example, go for it and make sure your app users know about your great deals.
But make these messages the exception, not the norm.
If you’re still not sure where to start, or you just want to have your push notifications handled for you, we can help.
All our plans come with an optional done-for-you push notification service, where we handle the strategy & planning, campaign management, analytics & reporting, and implementation of key automated flows like welcome messages and abandoned cart notifications.
We’ll take care of strategy, creation, scheduling, and optimization, so you don’t have to.
Our team of experts use the same playbook that numerous brands have followed to drive $10k+ in additional monthly revenue from push.
Interested? Get a free consultation to discuss how Vendrux can help you manage your mobile app and push notifications for the highest return on your investment.
If your brand has an app and you’re not fully utilizing push notifications, you’re leaving easy money on the table.
The economics are too strong to ignore; zero cost per send, minimal effort, and near-guaranteed visibility.
If you’re making one of the key mistakes we outlined above, take the steps required to solve it.
Fix your cadence, focus on value, and push smarter. Your bottom line will thank you.
If you’re not sending push notifications yet because you don’t have an app, the fix is even easier.
Just get a free preview of your app now, with just your website URL and a few details about your store.
We’ll show you how easy it is to convert your site into an app with Vendrux – and you’ll be halfway towards building yourself a powerful brand asset, and a new high-ROI marketing channel.
If you run a Shopify store, you may have heard that push notifications can recover abandoned carts, drive repeat purchases, and bring customers back without the cost of SMS or the deliverability challenges of email.
Pound-for-pound, push notifications might be your most powerful direct marketing channel.
But few Shopify stores have push on their radar – many don’t even have the capability to send push notifications right now (at least not the kind that matter the most).
Keep reading and we’ll explain all you need to know to unlock this key engagement and retention channel for your brand.
Push notifications give you a direct line to your customers’ screens, outside of their email inbox and without per-message costs like SMS.
For Shopify brands focused on customer retention and lifetime value, push is one of the few channels where you own the relationship entirely.
The numbers back this up. According to the Vendrux Benchmark Report, ecommerce brands using native app push notifications see:
These aren’t marginal improvements. For a Shopify brand doing $1M+ in annual revenue, a well-run push notification program, particularly for cart recovery, can generate five to six figures in additional monthly revenue, from largely automated campaigns.
“We’ve seen huge success with SMS, and push notifications are a free version of SMS.”
— Adam Taylor, Founder and CEO of PetShop.co.uk
Unlike SMS, there’s no per-message cost. Unlike email, there’s no spam folder.
That’s not to say that these channels are bad, or not worth doing. But push gives you something that they don’t. A cost-free notification that lands directly on your customer’s lock screen or notification center.
(For a full breakdown of how these channels compare, see our guide to push notifications vs email vs SMS.)
Here’s a crucial distinction to understand for any Shopify brand evaluating push notifications.
“Push notifications” doesn’t always mean the same thing. There are push notifications sent from a website, through the browser. And push notifications sent through a native mobile app.
They’re not two sides of the same coin – they’re fundamentally different channels.
Web push notifications are delivered through a customer’s web browser.
When someone visits your Shopify store, a browser prompt asks if they’d like to receive notifications. If they opt in, you can send them messages that appear on their desktop or mobile device, even when they’re not actively on your site (though they need the browser running).
The technology relies on service workers, which run in the background of supported browsers. Chrome, Firefox, and Edge on desktop and Android all support web push well.
The important caveat is iOS.
Apple added web push support to Safari on iOS in March 2023 (iOS 16.4), but with a significant limitation: notifications only work reliably when the user has added your website to their Home Screen as a Progressive Web App.
In practice, almost no one does this. That means your web push notifications will not reach most of your iPhone users, a serious gap for US-focused Shopify brands where iPhone accounts for over 60% of mobile traffic as of early 2026.
Yet even without this, the limitations of being sent through the browser, and needing the browser open to send, makes web push a lot less effective than the alternative.
Native app push notifications are delivered through Apple’s Push Notification service (APNs) on iOS and Firebase Cloud Messaging (FCM) on Android. They require a mobile app installed on the customer’s device, and land on the customer’s lock screen.

The difference in capability is significant:
The tradeoff is that native push requires your customers to have your app installed. And, of course, you need an app in the first place. That’s a much higher barrier of entry compared to web push, where you can just install an app from the Shopify App Store (sometimes for free).
But it’s worth it.
Web push is the fastest way to start using push notifications. You can be collecting subscribers and sending your first campaigns within an hour.
All you need is a subscription to a Shopify App or SaaS tool, a small amount of setup work and you’re good to go.
Several Shopify apps handle web push well. The right choice depends on your existing marketing stack and how much you want push integrated with your other channels.
For a detailed breakdown of features and pricing across these and other options, see our guide to Shopify push notification apps.
The process to set up web push notifications is similar across most tools:
Most Shopify web push apps handle the technical integration automatically. You don’t need to edit your theme code or manage service workers manually.
Web push notifications are super easy to set up. But there are some notable constraints to be aware of.
Think about the fourth point.
You’re a cookie clear away from losing your subscriber. That’s a key thing to be aware of, and it means that web push can’t really be considered any kind of real “audience building.”
Your web push subscribers are far less permanent, compared to email, SMS or native app push, where someone needs to take an active step to remove themselves from your list.
Web push subscribers can disappear just because they’re trying to speed up their browser.
Native app push notifications give you the full capability of the push channel: reliable delivery on every device, rich media, deep personalization, and the engagement rates that make push one of the highest-ROI marketing channels in ecommerce.
The prerequisite is straightforward: you need a mobile app.
Native push notifications are delivered through Apple’s APNs and Google’s FCM, which require a published app registered with each platform. There’s no way around this; it’s how the technology works.
The good news is that building a Shopify mobile app is more accessible than most brands assume. In general, there are three ways to do this:
Each approach has tradeoffs in cost, customization, and time to launch. We break down the best way to build a mobile app for your Shopify store here.
In short: Vendrux is the most seamless way to unlock push notifications for your Shopify store. We help you turn your existing site into a mobile app, with minimal operational lift, and no separate management from your website.
It’s the closest thing there is to just being able to send native push notifications directly from your website.
But regardless, the important point is that “we need to build an app” is no longer a six-figure, year-long project for most Shopify brands.
When you build your app, you’ll connect it to push notification services that give you the same segmentation and automation capabilities you use for email or SMS:
The key capabilities to look for:
For Shopify brands, who are often already paying Klaviyo thousands of dollars for email, adding push to your existing stack is the most straightforward way to go.
The performance gap between web push and native app push is substantial. According to our Mobile App Benchmark Report, ecommerce brands using native app push see:
For many brands, the revenue from a single automated abandoned cart push campaign more than covers the cost of building and maintaining the app.
“The power of push notifications is so strong. In a world where people open email less and less each day, everyone is jumping into SMS which is crazy expensive, and people are starting to tune these out too, being able to do push notifications is the reason you do an app.”
– David Cost, VP of Ecommerce at Rainbow Shops
Whether you’re using web push, app push, or both, certain campaign types consistently deliver results for Shopify stores. Start with these and expand from there.
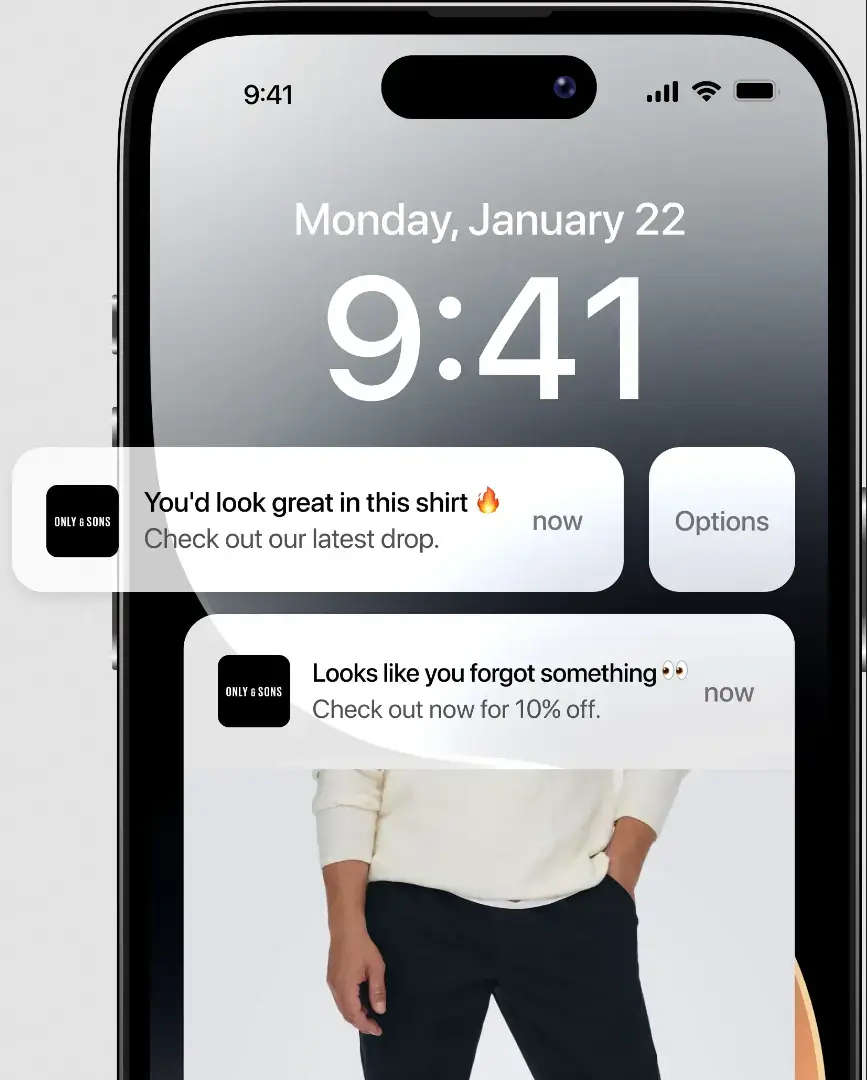
Abandoned cart push is the highest-ROI push notification campaign for most ecommerce brands. When a customer adds items to their cart and leaves without purchasing, an automated push notification brings them back.
A typical sequence:
The key is restraint. Three messages per abandoned cart is plenty. More than that risks opt-outs.
.webp)
For a deeper look at this specific campaign type, see our guide to recovering abandoned carts with push notifications.
These are high-intent notifications. The customer has already shown interest in a specific product; you’re telling them it’s available again or cheaper than before.
Most Shopify push apps can sync with your inventory data to trigger these automatically. The conversion rates on back-in-stock alerts tend to be among the highest of any push campaign because the intent is already established.
Push notifications are uniquely suited to time-sensitive promotions. Unlike email (which might sit unread for hours) or social media (which relies on algorithmic timing), a push notification reaches your subscriber’s screen within seconds.
Send the notification 15-30 minutes before the sale starts to build anticipation. For app push, include an image of the featured product and a direct deep link to the sale page.
The first push notification a new subscriber receives sets the tone for the entire relationship. A welcome notification sent within minutes of opt-in typically sees higher engagement than any subsequent message.
Keep it simple: thank them for subscribing, highlight one clear benefit (a first-purchase discount, early access to sales, exclusive content), and link to a relevant page. Don’t try to sell in the welcome message; build the habit of opening your notifications first.
Transactional push notifications, such as order confirmations, shipping updates, and delivery alerts, aren’t marketing campaigns in the traditional sense. But they serve a critical purpose: they train your customers to pay attention to notifications from your brand.
Every time a customer taps a shipping update, they’re reinforcing the habit of engaging with your push messages. When your next promotional notification arrives, they’re more likely to open it.
Push is really a hard channel to get wrong. It doesn’t take any kind of high-level copywriting or creative, or targeting, or anything like this.
It just comes down to making sure you get the timing and relevance right – and maximizing the number of people you can reach with push.
The biggest lever for success with push is how many people you can contact.
For apps, the initial push prompt is a crucial moment. You want to make sure you’re communicating the value of saying “yes” to push; otherwise, it’s going to take a lot of work to get the customer to re-enable them at a later time.
For web push, don’t show the browser permission prompt the moment someone lands on your site. A visitor who hasn’t had time to see your products has no reason to say yes, and once they decline a web push prompt, you typically can’t ask again.
Instead, delay the prompt until the visitor has shown engagement:
For app push, the dynamic is different. The opt-in prompt appears during app onboarding. Since the user has already chosen to install your app, opt-in rates are naturally higher. But it still helps to explain what they’ll receive (“order updates, exclusive deals, and back-in-stock alerts”) before the system prompt appears.
Learn more about average push opt-in rates, as well as tips on getting your strategy right.
There’s no universal “right” frequency. It depends on your product, your audience, and how much genuinely useful content you have to share.
Here’s some general guidance:
Timing varies by audience, but late morning (10-11am) and early evening (6-8pm) in the customer’s local time zone tend to perform well for ecommerce.
Generic blast notifications underperform targeted ones by a significant margin. The more relevant a push notification is to the recipient, the higher the CTR and conversion rate.
Segment by:
Native app push tends to offer deeper segmentation than web push because apps collect richer behavioral data (session frequency, in-app browsing patterns, wishlist activity).
Track these metrics to understand whether your push program is working:
Most push platforms integrate with Shopify analytics, so you can track revenue attribution directly. For a broader look at the data, see our push notification statistics roundup.
Push notifications give Shopify brands something rare in ecommerce marketing: a direct line to your customers’ screens with no per-message cost, no algorithmic filtering, and no inbox competition.
Web push is quick and easy. But native app push is where the serious engagement and revenue gains live.
Vendrux turns your existing Shopify store into a native iOS and Android app with full push notification capability built in, including automated abandoned cart recovery.
No rebuild, no separate platform to manage. Get a free consultation to see what push notifications could do for your revenue.