Category: Docs

  • Set Shopify user ID in push notification platform

    Set Shopify user ID in push notification platform

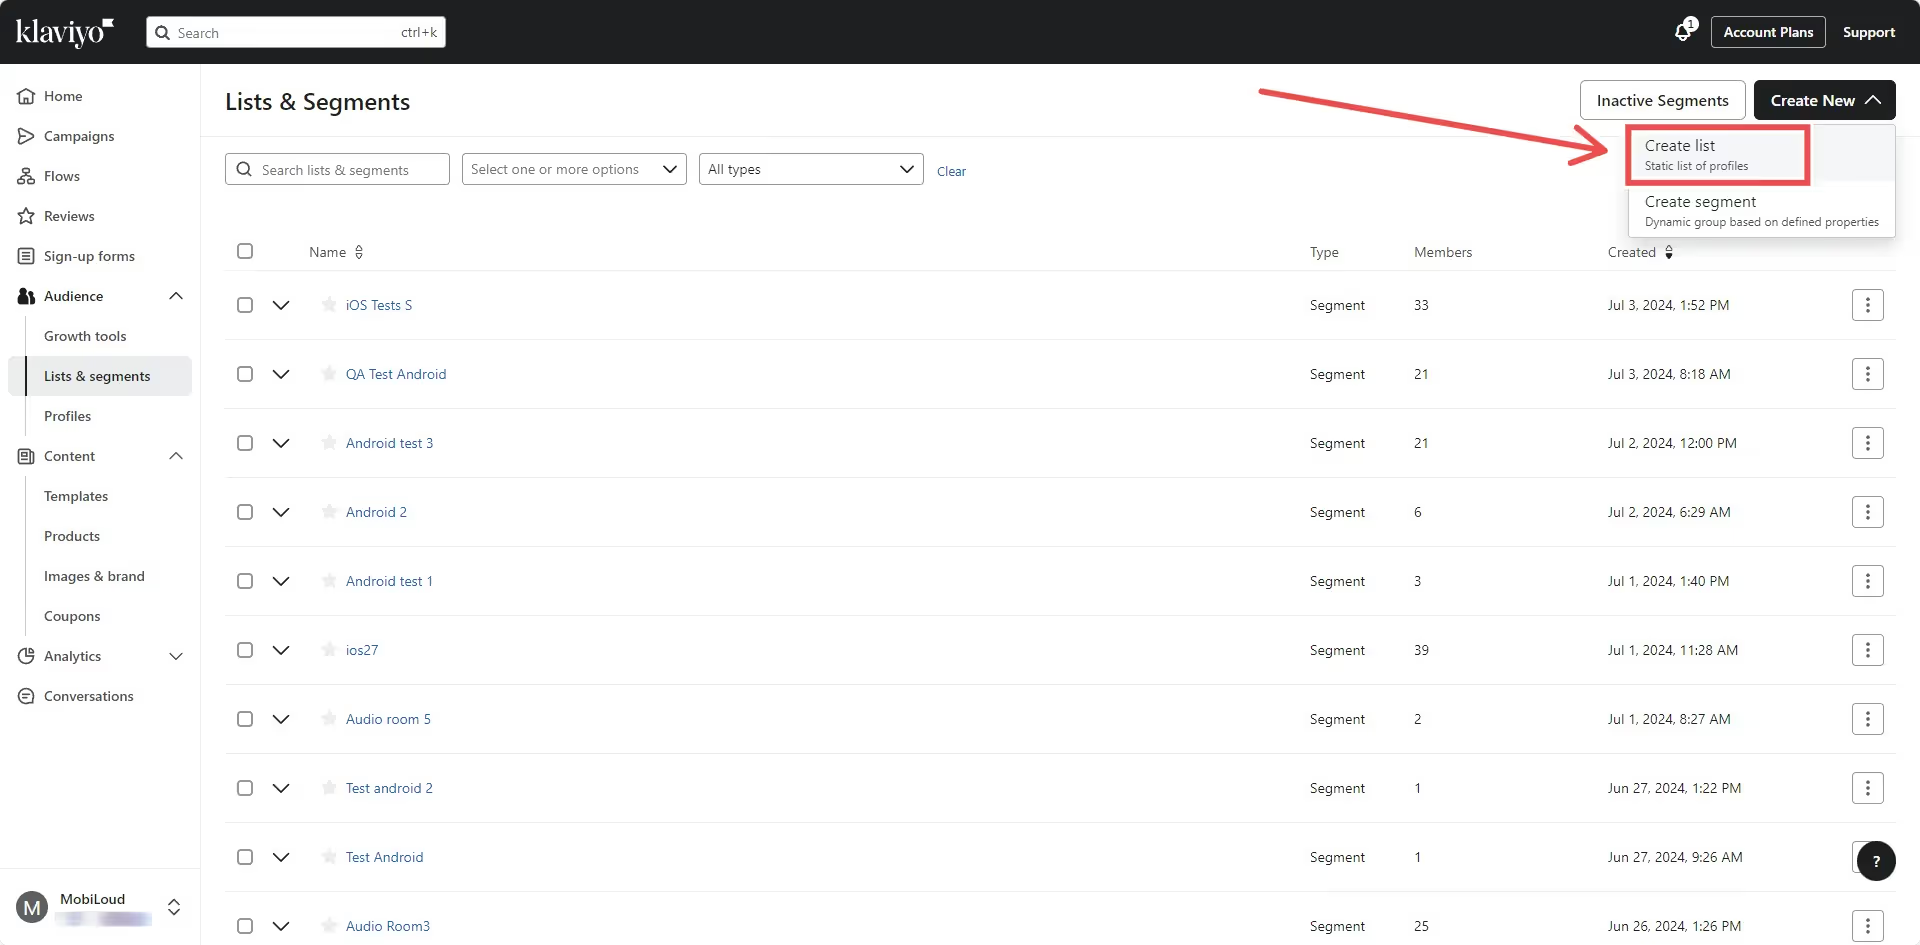
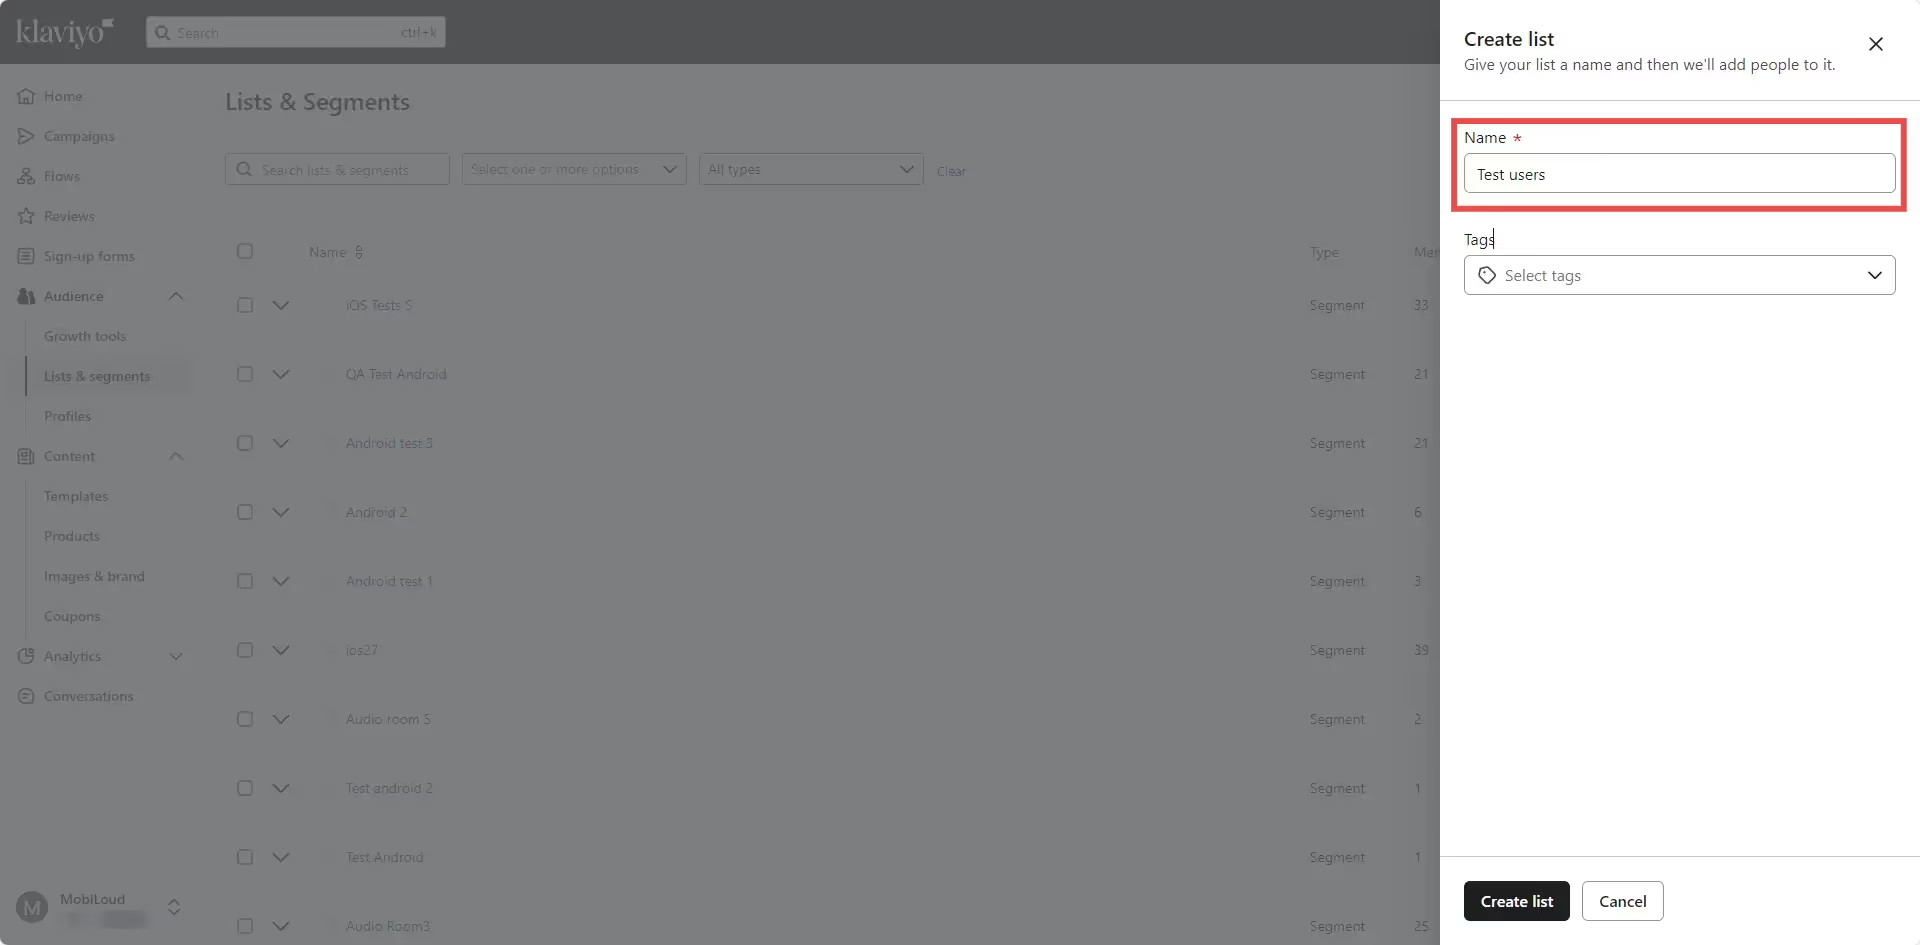
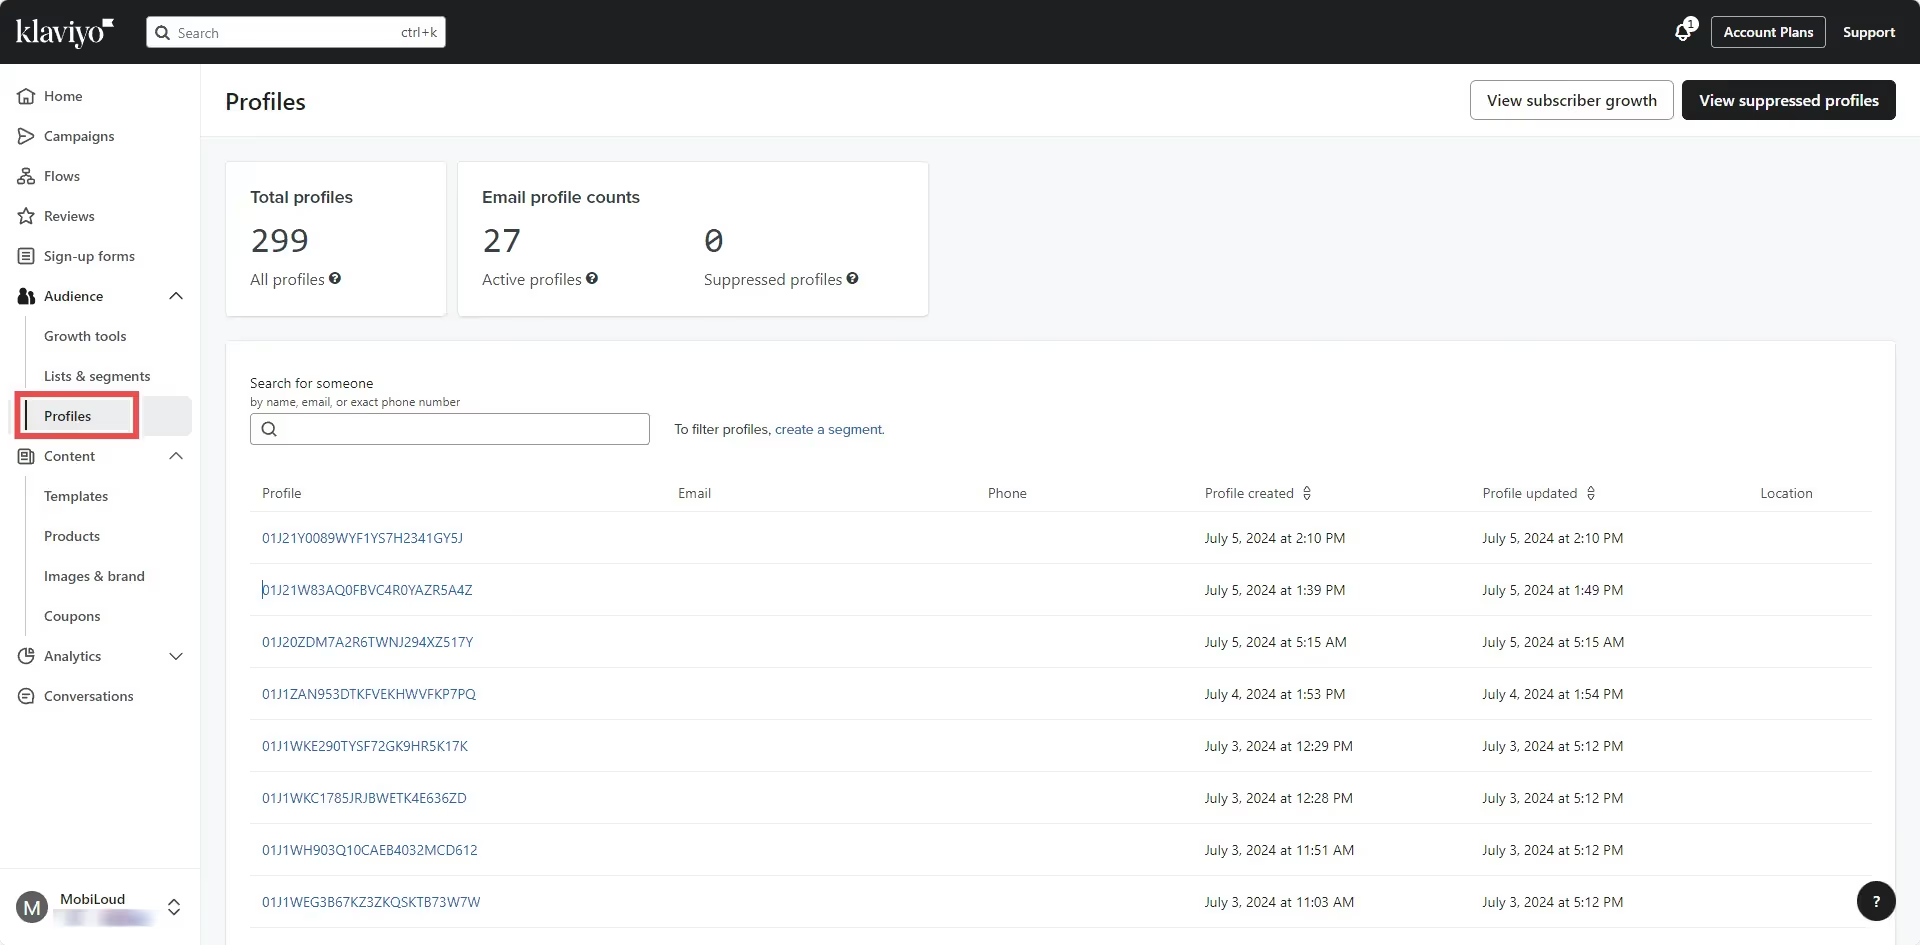
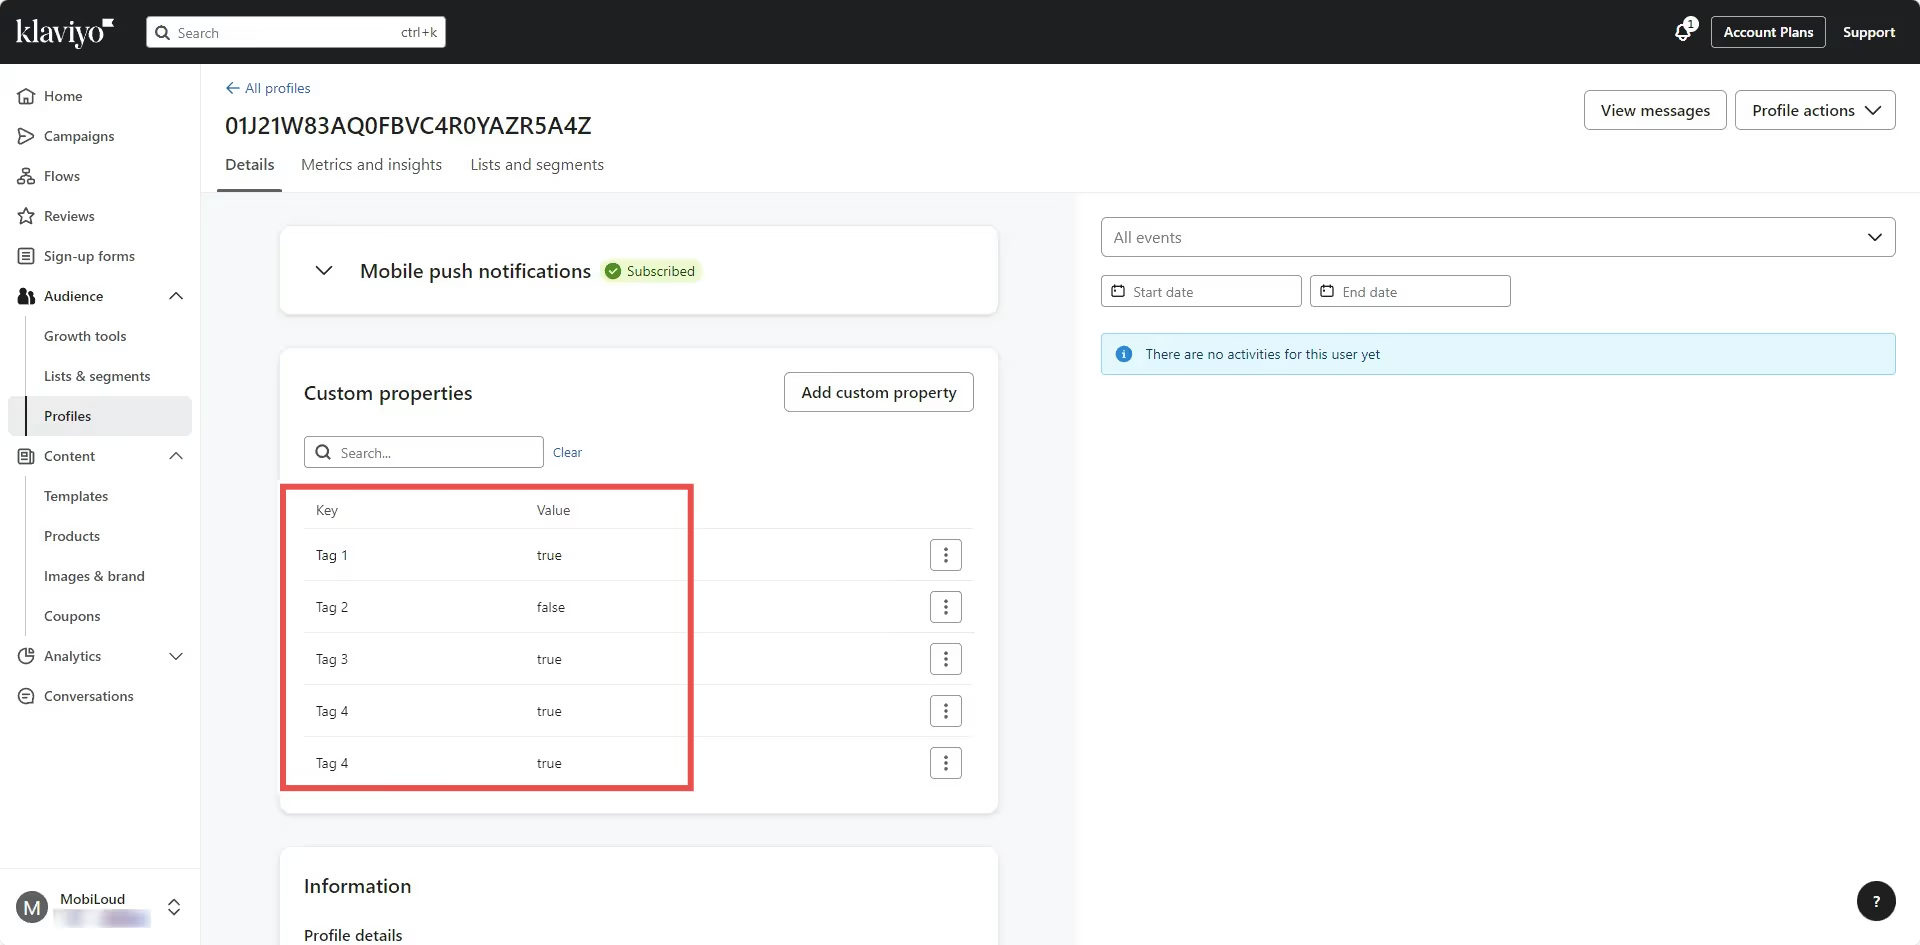
    If you are using Shopify and want your app users to receive push notifications for order and shipping updates, you will want to assign a common identifier to your users in your prefered push notifications platform.

    To do this, we can use the Shopify user IDs, and a simple code snippet.

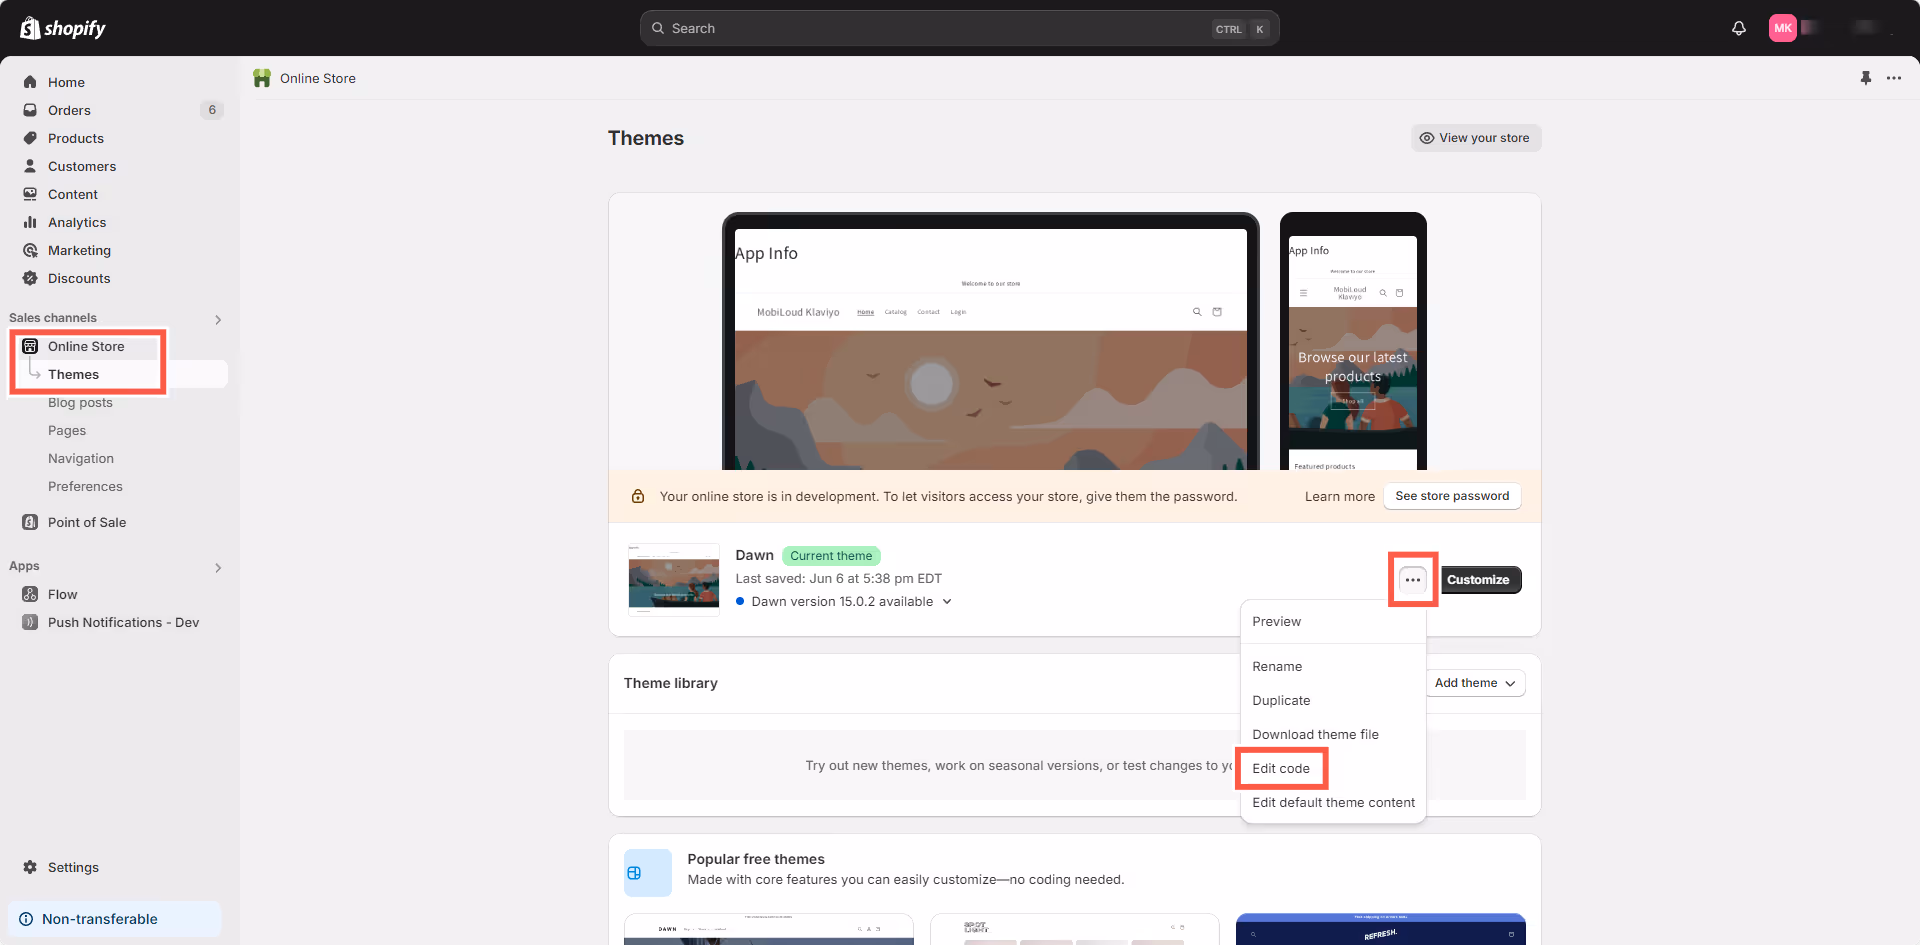
    First, in your Shopify Dashboard go to “Online Store > Themes” then click the three dots and click “Edit Code”, as you can see below:

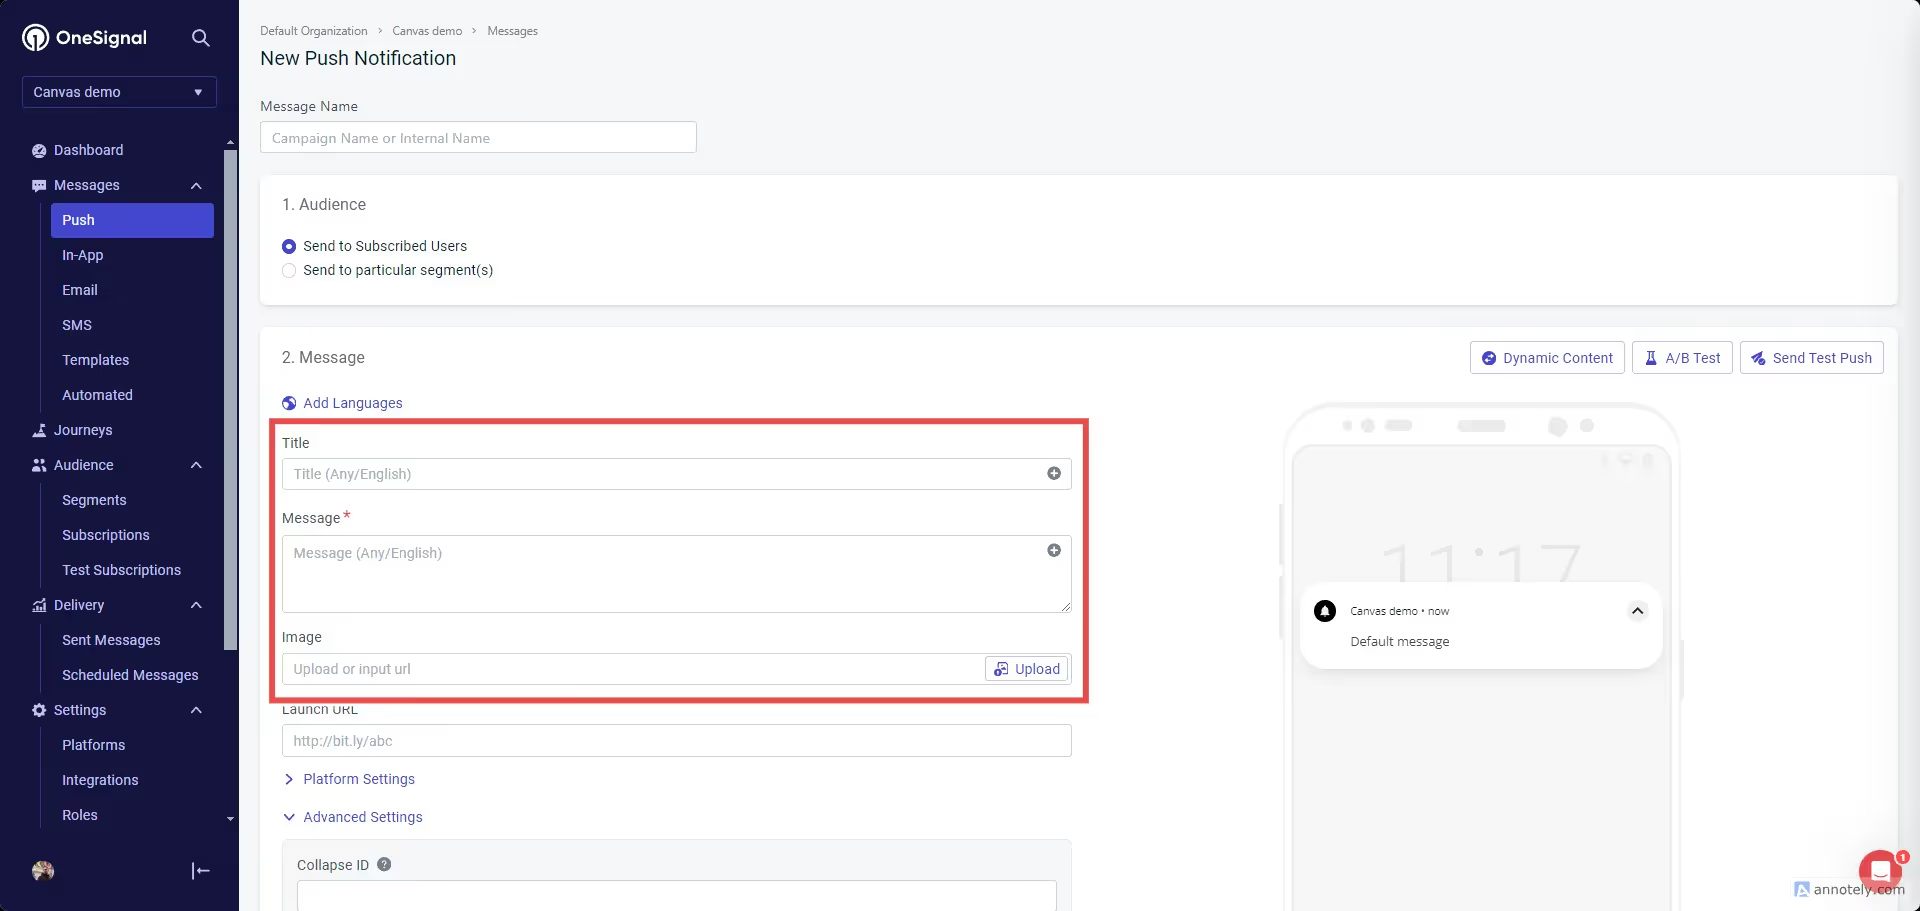
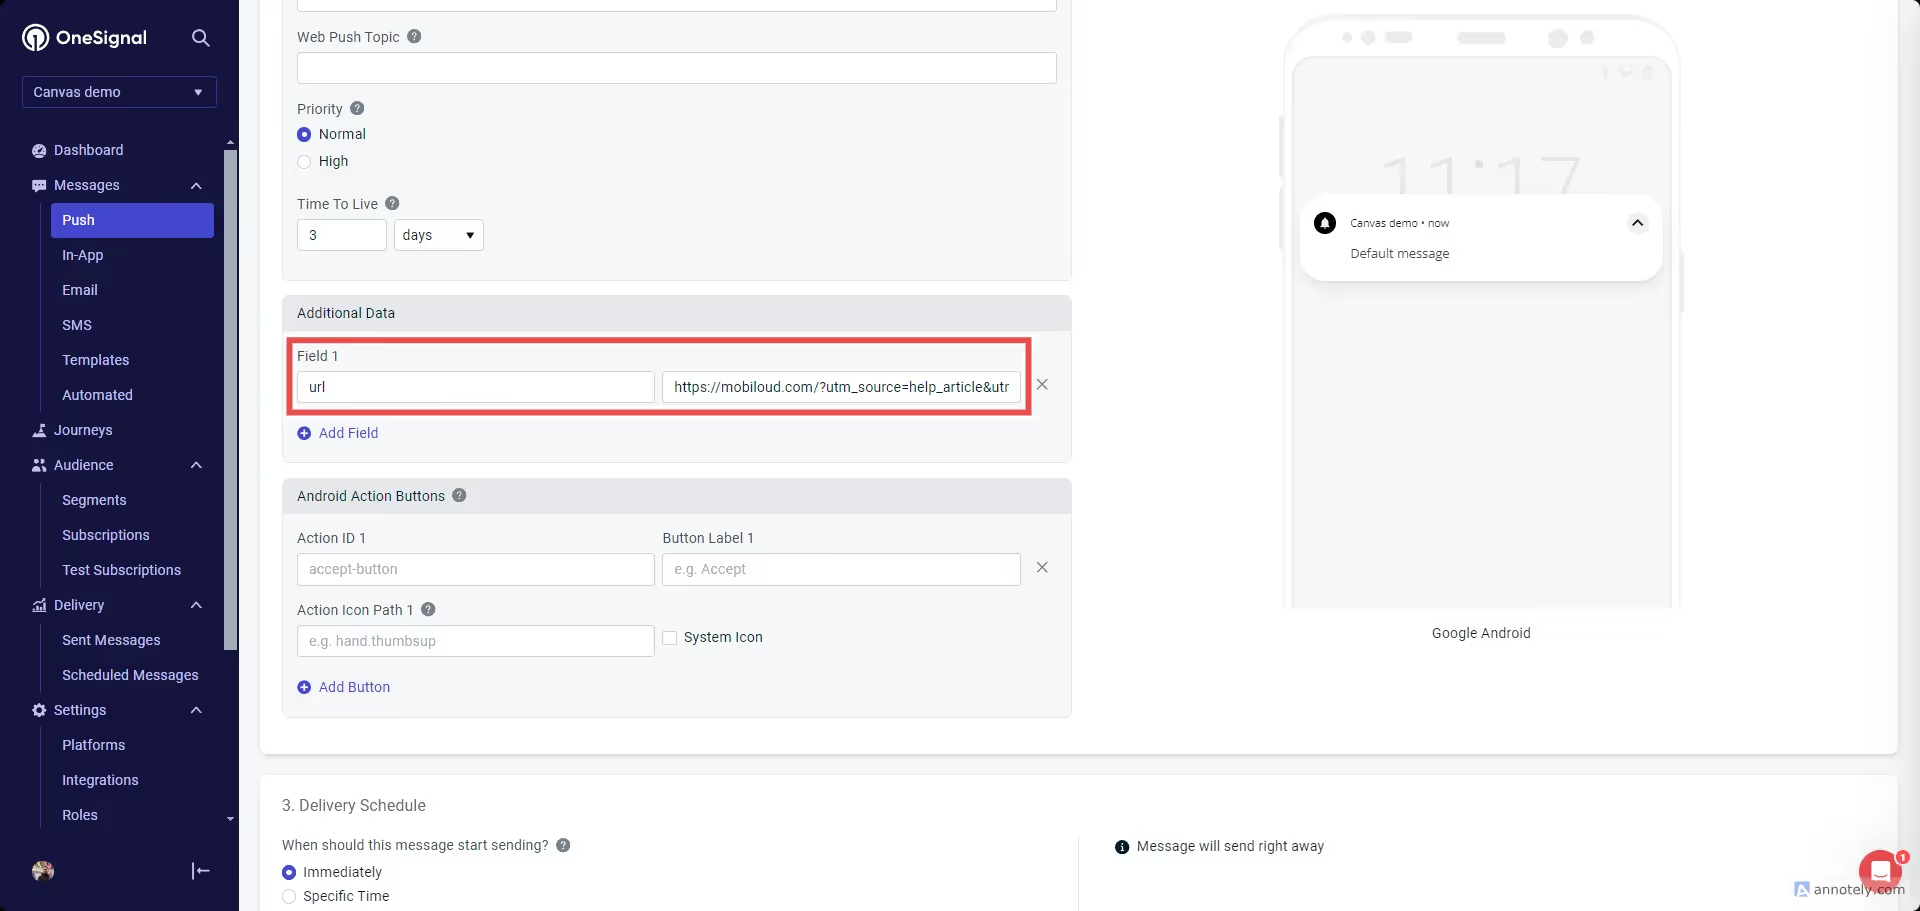
    Select the “theme.liquid” file on the left sidebar, and drop the code for your selected push platform right before the closing “” tag:

    Klaviyo

      // Function to check if user agent contains "canvas"
      function mlCheckUserAgentForCanvas() {
        const userAgent = navigator.userAgent.toLowerCase();
        return userAgent.includes('canvas');
      }
    
      // If the user agent contains "canvas"
      if (mlCheckUserAgentForCanvas()) {
        {% if customer %}
          // If the user is logged in, set their Shopify user ID
          nativeFunctions.klaviyoSetExternalUserId("{{ customer.id }}");
        {% else %}
          // If the user is not logged in, set an empty value
          nativeFunctions.klaviyoSetExternalUserId('');
        {% endif %}
      }
    

    OneSignal

      // Function to check if user agent contains "canvas"
      function mlCheckUserAgentForCanvas() {
        const userAgent = navigator.userAgent.toLowerCase();
        return userAgent.includes('canvas');
      }
    
      // If the user agent contains "canvas"
      if (mlCheckUserAgentForCanvas()) {
        {% if customer %}
          // If the user is logged in, set their Shopify user ID
          nativeFunctions.onesignalSetExternalUserId("{{ customer.id }}");
        {% else %}
          // If the user is not logged in, set an empty value
          nativeFunctions.onesignalSetExternalUserId('');
        {% endif %}
      }
  • Sending push notifications with UTMs

    Sending push notifications with UTMs

    UTMs (Urchin Tracking Modules) are a great way to track the performance of your push notification campaigns, and the behavior of the users who get to your app through a push notification, in Google Analytics.

    The first step would be to create a URL that contains all the UTM parameters for your campaign, you can do this easily with this tool: https://ga-dev-tools.google/campaign-url-builder/

    Here is an example of how your URL will look like after you add your UTM parameters: https://vendrux.com/?utm_source=help_article&utm_medium=link&utm_campaign=utm_education

    Make sure your have Google Analytics configured to track your app usage, you can check this guide for more details: https://www.vendrux.com/docs/track-app-data-in-google-analytics-with-google-tag-manager-gtm

    Now let’s head to OneSignal to send a push notification: https://onesignal.com

    In your account’s “Push” area, on the top right side, click “New push”:

    Fill your push notification content with a title, message, and image (optional):

    For your notification URL scroll a bit further until you see the “Additional Data” field. In the first field type “url”, and in the second one add your URL containing the UTM parameters:

    That’s it! You can now send the notification to your users and track the UTM parameters via your Google Analytics account.

  • Send test notifications with Klaviyo

    Send test notifications with Klaviyo

    When using Klaviyo you might want to test your push notifications before sending them out.

    In this guide we will go through the process of finding your device in the list of profiles and then sending a test notification to it.

    The first step is to login to your Klaviyo account here: https://www.klaviyo.com/login

    Create a list for test users

    We will now create a list where we can add all test users, this will make it a lot easier for you to find users or event send campaigns out for testing purposes.

    On the left sidebar click “Lists & Segments”:

    On the top right area click “Create New”, then “Create list”:

    Give your list a name like “Test users” and click “Create list”:

    Find your profile and add it to the list

    We will now proceed with finding your profile so we can copy its token and add it to the list.

    Go to “Profiles” on the left sidebar:

    You will see a list of all the profiles who have used the app recently. If you are not yet assigning emails or IDs to your profiles, you will need to find your profile using some logic.

    We’d suggest reinstalling the app, then refreshing the “Profiles” page and ordering the profiles by “Profile created” date, so you can easily find your profile between the first few that appear on screen:

    Click the profile you think belongs to you and check the information on screen. You can look for matching operating system, attributes, timezone (if available):

    Once you’ve found your profile, proceed with copying the “Token” that is displayed under the “Mobile push notifications” block:

    Now click on “Profile actions” on the top right area and “Add to list”:

    Select the “Test users” list you created and add the profile:

    Sending test notifications

    It is time to start sending the notifications.

    Click “Campaigns” on the left sidebar and configure your notification as described in this guide: How to send push notifications with Klaviyo

    Instead of sending the notification though, click on “Send preview” on the top right area:

    You will then be asked to provide the profile token you previously copied:

    Paste it in the field and then click “Send preview”:

    Done! Your test notification will be sent to your device and you should receive it almost immediately.

  • Send notifications from WordPress | vendrux Docs

    Send notifications from WordPress | vendrux Docs

    In order to start sending push notifications from your WordPress Dashboard you will need to fill the “Push App ID” and “Secret Key” fields, under the “Push Notifications” tab, with your OneSignal keys.

    The mentioned fields can be found under “Vendrux > Configuration > Push Notifications” as you can see below:

    These keys can be found in your OneSignal account, under the “Settings > Keys & Ids” area as you can see below:

    Notion Image

    Once you save your Push Notifications settings, a new section will be available, as you can see below:

    The Push Notifications area will allow you to send manual notifications to your users and tracking information about previously sent notifications.

    If you would like to send automatic notifications to your users when a new post is published on your website, you can enable this feature under “Vendrux > Configuration > Push Notifications”.

    At the very bottom of the page you will find all the settings to configure notifications that will be automatically sent when a new post is published, as you can see here:

    Notion Image

    Notification tags

    Tags will allow you and your users to segment the notifications they will receive.

    In your app, if you have the “Alerts” tab enabled, users will be able to determine for which tags they will receive notifications, as you can see here:

    Notion Image

    In this case, Main Alerts, Jobs, Updates, and News are all tags that the user can enable or disable so that when a notification is sent with one of these tags assigned to it, only users that have that tag enabled will receive it.

    You can create or edit the tags directly from your Vendrux Dashboard, keeping in mind that each tag will have two values assigned to it:

    • Label: the text that will be visible to users in the app
    • ID: the actual tag name that will be assigned to the user profile and used to send the notifications

    To clarify, “Main Alerts” would be the label and “main-alerts” the ID of this tag.

    The Vendrux plugin gives you two options for tags, both explained below:

    Category slugs as tags

    When you attach a post to your notification, you can mark this option to include the “category slugs” of that post as tags in the notification. If a post is assigned to the “Featured News” category, the “featured-news” tag will be assigned to your notification and only users that have that tag enabled will receive the notification.

    Keep in mind that you will need to manually create this specific tag in your “Vendrux Dashboard”, like this:

    Notion Image

    Manual notification tags

    If instead, you prefer to add tags to your notification manually you can use this option. You can simply add the IDs of your tags in the text field and those will be included in your notification.

    Notion Image

    How tags work in OneSignal

    Whenever a user enables or disables a specific tag, his profile in OneSignal will be updated with his selection, as you can see below:

    Notion Image

    The actual notification that you send, will include the necessary logic to ensure it only gets delivered to users that have the selected set of tags turned on:

    Notion Image

  • Send notifications from OneSignal | vendrux Docs

    Send notifications from OneSignal | vendrux Docs

    After your app is live, you will want to send notifications to engage users and take them to your latest content in the app.

    In this guide, we will cover the basics of sending notifications directly from your OneSignal Dashboard.

    To get started access your OneSignal account through the following URL: https://app.onesignal.com/login

    Now that you are in your account, make sure to select the Mobile App that you previously created, then access the “Messages” area and click on “New Push” as you can see below:

    You will be presented with several options to customize your push notification, as well as a preview tool to see exactly how the notification looks on iOS and Android:

    There is one key aspect when sending notifications from your OneSignal Dashboard to the Vendrux Platform, the “Launch URL” field must always be empty, and you must use the “Additional Data” area to specify the URL that must be opened when users click on the notification.

    Under the “Additional Data” area you will have two fields, you will need to fill the “Key” field with “url” and the “Value” field with the URL that must be opened (e.g. https://yourwebsite.com):

    You can now proceed with sending the notification, make sure to select the best sending method, if you are sending breaking news mark the “Send Immediately” option, otherwise, we’d recommend using the “Smart Delivery”.

    Just press “Confirm” to start sending the notifications.

  • Secure Your Website in the App

    When your website is accessed through a WebView, it’s crucial to make sure that good security practices are in place to avoid potential risks. Even with a secure WebView, weaknesses in your website could expose users to attacks. This guide outlines essential security practices website owners should follow to create a safe browsing environment in the app.

    1. Use HTTPS Everywhere

    Why it matters:

    • HTTPS encrypts data exchanged between the client (WebView) and server, ensuring confidentiality and integrity of user data. This prevents attackers from intercepting or altering the data.

    How to implement:

    • Obtain an SSL certificate and configure your server to redirect all traffic from HTTP to HTTPS.
    • Enforce HTTPS on all connections.

    2. Implement Content Security Policy (CSP)

    Why it matters:

    • CSP protects against cross-site scripting (XSS) attacks by controlling which resources are allowed to load on your site. This is particularly important for WebView, where the app’s security may rely on your website’s content security.

    How to implement:

    Define a strict CSP header in your server configuration or HTML using the following meta tag:

    "Content-Security-Policy" content="default-src 'self'; script-src 'self' https://trusted-scripts.com">

    You can learn more about CSP here: https://developer.mozilla.org/en-US/docs/Web/HTTP/CSP

    Tip: Test your CSP in a staging environment to ensure no legitimate functionality is blocked.

    3. Sanitize and Validate User Inputs

    Why it matters:

    • Input validation prevents attackers from injecting malicious scripts or SQL commands. In a WebView environment, improper validation could allow attackers to manipulate website behavior through user inputs.

    How to implement:

    • Validate all user inputs server-side, even if you’ve done client-side validation.
    • Use libraries such as OWASP Validator to clean and sanitize inputs.
    • Escape special characters to prevent XSS and SQL injection.

    Tip: Never rely solely on client-side validation, as it can be bypassed easily.

    4. Leverage Secure Cookies with HTTPOnly and SameSite Flags

    Why it matters:

    • Secure cookies protect user sessions from being hijacked, especially in WebView, where cookies may store sensitive information like login credentials.

    How to implement:

    Set cookies with the Secure, HttpOnly, and SameSite attributes to ensure they are only accessible over HTTPS and are restricted from being accessed by JavaScript.

    You can find more details here: https://developer.mozilla.org/en-US/docs/Web/HTTP/Headers/Set-Cookie

    Tip: Always use SameSite=Strict for highly sensitive cookies, such as those used for authentication.

    5. Avoid Inline Scripts and External Resources from Untrusted Sources

    Why it matters:

    • Inline scripts or resources from untrusted sources could introduce vulnerabilities or allow third-party content to run malicious code. In WebView, these scripts may exploit the in-app browser environment.

    How to implement:

    • Avoid using inline JavaScript in your HTML.
    • Host your scripts and styles on your domain or trusted CDNs.
    • Ensure third-party resources like analytics or ad scripts are from verified, secure providers.

  • Reset Keystore Details for Android App

    Reset Keystore Details for Android App

    When You Might Need to Reset the Android App Signing Key

    1. Lost or Forgotten Keystore Details
    The most common reason for resetting the signing key is if the keystore file or its credentials (password, alias) have been lost or forgotten. Without this file, updates to the app cannot be published, as Google Play requires it to authenticate app updates as coming from the same developer.

    2. Changing Development Teams
    If the app is being transferred to a new development team, and the original team cannot provide the keystore file, resetting the signing key might be necessary to maintain control over future updates.

    3. Security Concerns
    If there’s reason to believe the keystore has been compromised or accessed by unauthorized parties, resetting the key helps secure future versions of the app and maintain user trust.

    How to Reset the Android App Signing Key

    1. Sign In to Google Play Console

    Go to the Google Play Console and sign in with the email that created the Google Developer account.

    2. Navigate to Your App

    From the dashboard, select the app for which you want to reset the signing key.

    3. Go to Setup > App Integrity

    In the left-hand menu, navigate to Setup > App integrity. This section includes app signing details, as you can see below:

    4. Request a Key Reset

    In the App signing section, find the Reset key option (may be called “Request key upgrade” depending on your Play Console version).

    Click Request key upgrade and follow the prompts to initiate the process.

    5. Provide Any Required Information

    Google may require details about why the reset is necessary. If the keystore was lost or compromised, mention this to streamline the request.

    6. Wait for Google to Process the Request

    Google will review and approve the key reset, which may take several days (often up to a week).

    Once approved, Google will replace your app’s signing key with a new one.

  • Reset Android app keystore file and password

    Reset Android app keystore file and password

    Google now allows you to safely update your app’s .jks file in case you have lost it.

    In order to be able to do this, you must be enrolled for Google App Signing or give Google the necessary permissions to manage your app signing.

    To confirm that you are eligible for this, go to your Google Developer Console then “Release > App Integrity”. Just make sure that you have “App Signing” showing “Signing by Google” in place:

    After confirming that you are eligible, you can follow the steps from this page to reset your key: https://support.google.com/googleplay/android-developer/answer/9842756#lost

  • Remove external user ID from OneSignal

    If you would like to remove the external user ID from a user profile in OneSignal you can trigger the nativeFunctions.onesignalRemoveExternalUserId() function.

    This can be helpful in case you don’t want users that are not logged in to receive push notifications, for example.

    If that is the case, whenever you log a user out of his account you would also call the nativeFunctions.onesignalRemoveExternalUserId() function, as follows:

    >
        // Get the user agent and convert it to lowercase for case-insensitive comparison
        var userAgent = navigator.userAgent.toLowerCase();
        
        // Set the user ID
        var userId = "1";
    
        try {
            // Check if the user agent contains the string "canvas"
            if (userAgent.indexOf('canvas') > -1) {
                // Native function can be called here
                nativeFunctions.onesignalRemoveExternalUserId(userId);
            }
        } catch (ex) {
            // Log any error messages for easier debugging
            console.log(ex.message);
        }
    
    
  • Register Google Developer account | vendrux Docs

    Register Google Developer account | vendrux Docs

    In this guide, we will walk you through the process of creating and verifying your Google Developer Account. This is a required step if you want to publish your app on the Play Store for Android users.

    What You Need Before Starting

    Before beginning, ensure you have the following:

    All of these are mandatory, and you will be asked to provide them during registration.

    If you don’t have a DUNS number yet, request one as soon as possible. Keep in mind that while the process is free, it can take a few days or weeks to complete.

    Important Notice: Organizational Accounts Only

    We only work with organizational Google Play Developer accounts, not personal accounts. This is because an organizational account ensures that the app belongs to your business rather than an individual. It also provides better long-term management, allowing multiple team members to access and maintain the account as needed.

    Using a personal account can lead to ownership complications, especially if the individual who created the account leaves your company. To avoid these issues, always register your Google Play Developer account under your business entity.

    Step 1: Sign in to Google

    Go to https://play.google.com/console/signup and sign in with your Google account. If you don’t have one, create a new account at https://accounts.google.com/signup.

    If you are not the owner of the company, we strongly recommend using a general company email (e.g., contact@company.com) rather than a personal one. This ensures the Developer Account remains accessible to the organization and prevents potential ownership issues in the future.

    Step 2: Select “An Organization”

    • Choose “An organization” as your account type.
    • Click Get started and review the required information before proceeding.

    Step 3: Enter Your Developer Name

    • Enter your company name as your developer name, exactly as you want it to appear on the Play Store. This name will be publicly displayed, so make sure to use the correct spelling and capitalization. For example, if your company is called “Tech Solutions Inc.”, entering “tech solutions inc” or “TECH SOLUTIONS INC” may not look as professional as “Tech Solutions Inc.”.
    • Next, you’ll need to link a payments profile to verify your organization

    Payments Profile Setup

    • If your Google account is already linked to a payment method, select it from the options available.
    • If not, click “Create or select payments profile” and follow the instructions to add your business details.

    Enter Your D-U-N-S Number

    Step 4: Complete Your Public Developer Profile

    • Enter your developer phone number and email address.
    • Click Verify phone number and Verify email address to complete verification.
    • This information will be displayed on your app’s Google Play Store listing after your app is published.

    Step 5: Add Developer Experience

    • If you are new to Android development, select “No experience” and continue.

    Step 6: Provide App Information

    • Number of apps: Select 1 or 2-5.
    • Earning money on Google Play: Select No (unless you plan to monetize).
    • App categories: Select None of the above if unsure.

    Step 7: Provide Contact Information

    • Enter your contact name, email, preferred language, and phone number.
    • Click Next to proceed.

    Step 8: Accept the Terms

    • Review the Google Play Developer Terms of Service.
    • Check both agreement boxes and click Create account and pay.

    Step 9: Pay the Registration Fee

    • Enter your payment details to pay the $25 USD one-time registration fee.
    • Click Save card and complete the purchase.

    Step 10: Verify Your Account

    After registration, visit the Google Play Console (https://play.google.com/console) to check if additional verification is required.

    IMPORTANT! We can only publish apps to your account after it has been verified.

    Possible Verification Steps:

    If you have any questions regarding the verification steps, refer to Google’s documentation, here: https://support.google.com/googleplay/android-developer/answer/9198012

    1. Identity Verification
      • Confirm that the name and address match your identity document.
      • Any discrepancies may require re-submission and delay your ability to publish apps.
    2. Website Verification
      • Google may ask you to verify your website.
      • Follow the instructions under View details to complete this step.
    3. Android Device Verification
      • If required, verify using an Android device (Android 10 or later).
      • Click View details and follow the instructions provided.