Author: Vendrux

  • Push Notification Best Practices for Ecommerce Brands (10 Ways to Level Up)

    Push Notification Best Practices for Ecommerce Brands (10 Ways to Level Up)

    Push notifications are a game-changer for eCommerce brands.

    Push is the best and most direct channel for:

    • Promoting offers
    • Recovering abandoned carts
    • Automated order & shipping updates
    • Building deep relationships with customers
    • …and any other brand to customer communication

    At Vendrux, we’ve seen first hand how push can drive more revenue and higher retention for eCommerce businesses.

    But like anything else, push notifications are a tool, that can have great or terrible results, depending on how you use them.

    You can’t just spam them with no regard for strategy, and expect to get results.

    In this article, we’ll share everything you need to know for using push optimally, in a way that brings value to both your business and your customers. 

    Mastering push notifications could potentially mean millions of dollars in revenue, so take the time to absorb these push notification best practices and think about how to apply them to your own business.

    Want to dive even deeper? Check out our complete guide to push notifications for Ecommerce, where we share tips on crafting push notifications that convert, plus real examples from successful brands using push.

    Push Notification Tactics 101 – Best Practices to Maximize Return

    Though some eCommerce brands stumble into success by sending push notifications without a clear and deliberate strategy, you don’t want to be one of these brands who just “spray and pray”.

    Every notification you send should have a purpose for your brand, and deliver value to the customer.

    These two pillars inform the rest of the push notification best practices we’ll cover in the rest of this article.

    If you follow these tips, every message will count, and you’ll reap the benefits of push fully. 

    Read on, and this one article will give your eCommerce brands all it needs to crush it with push notifications.

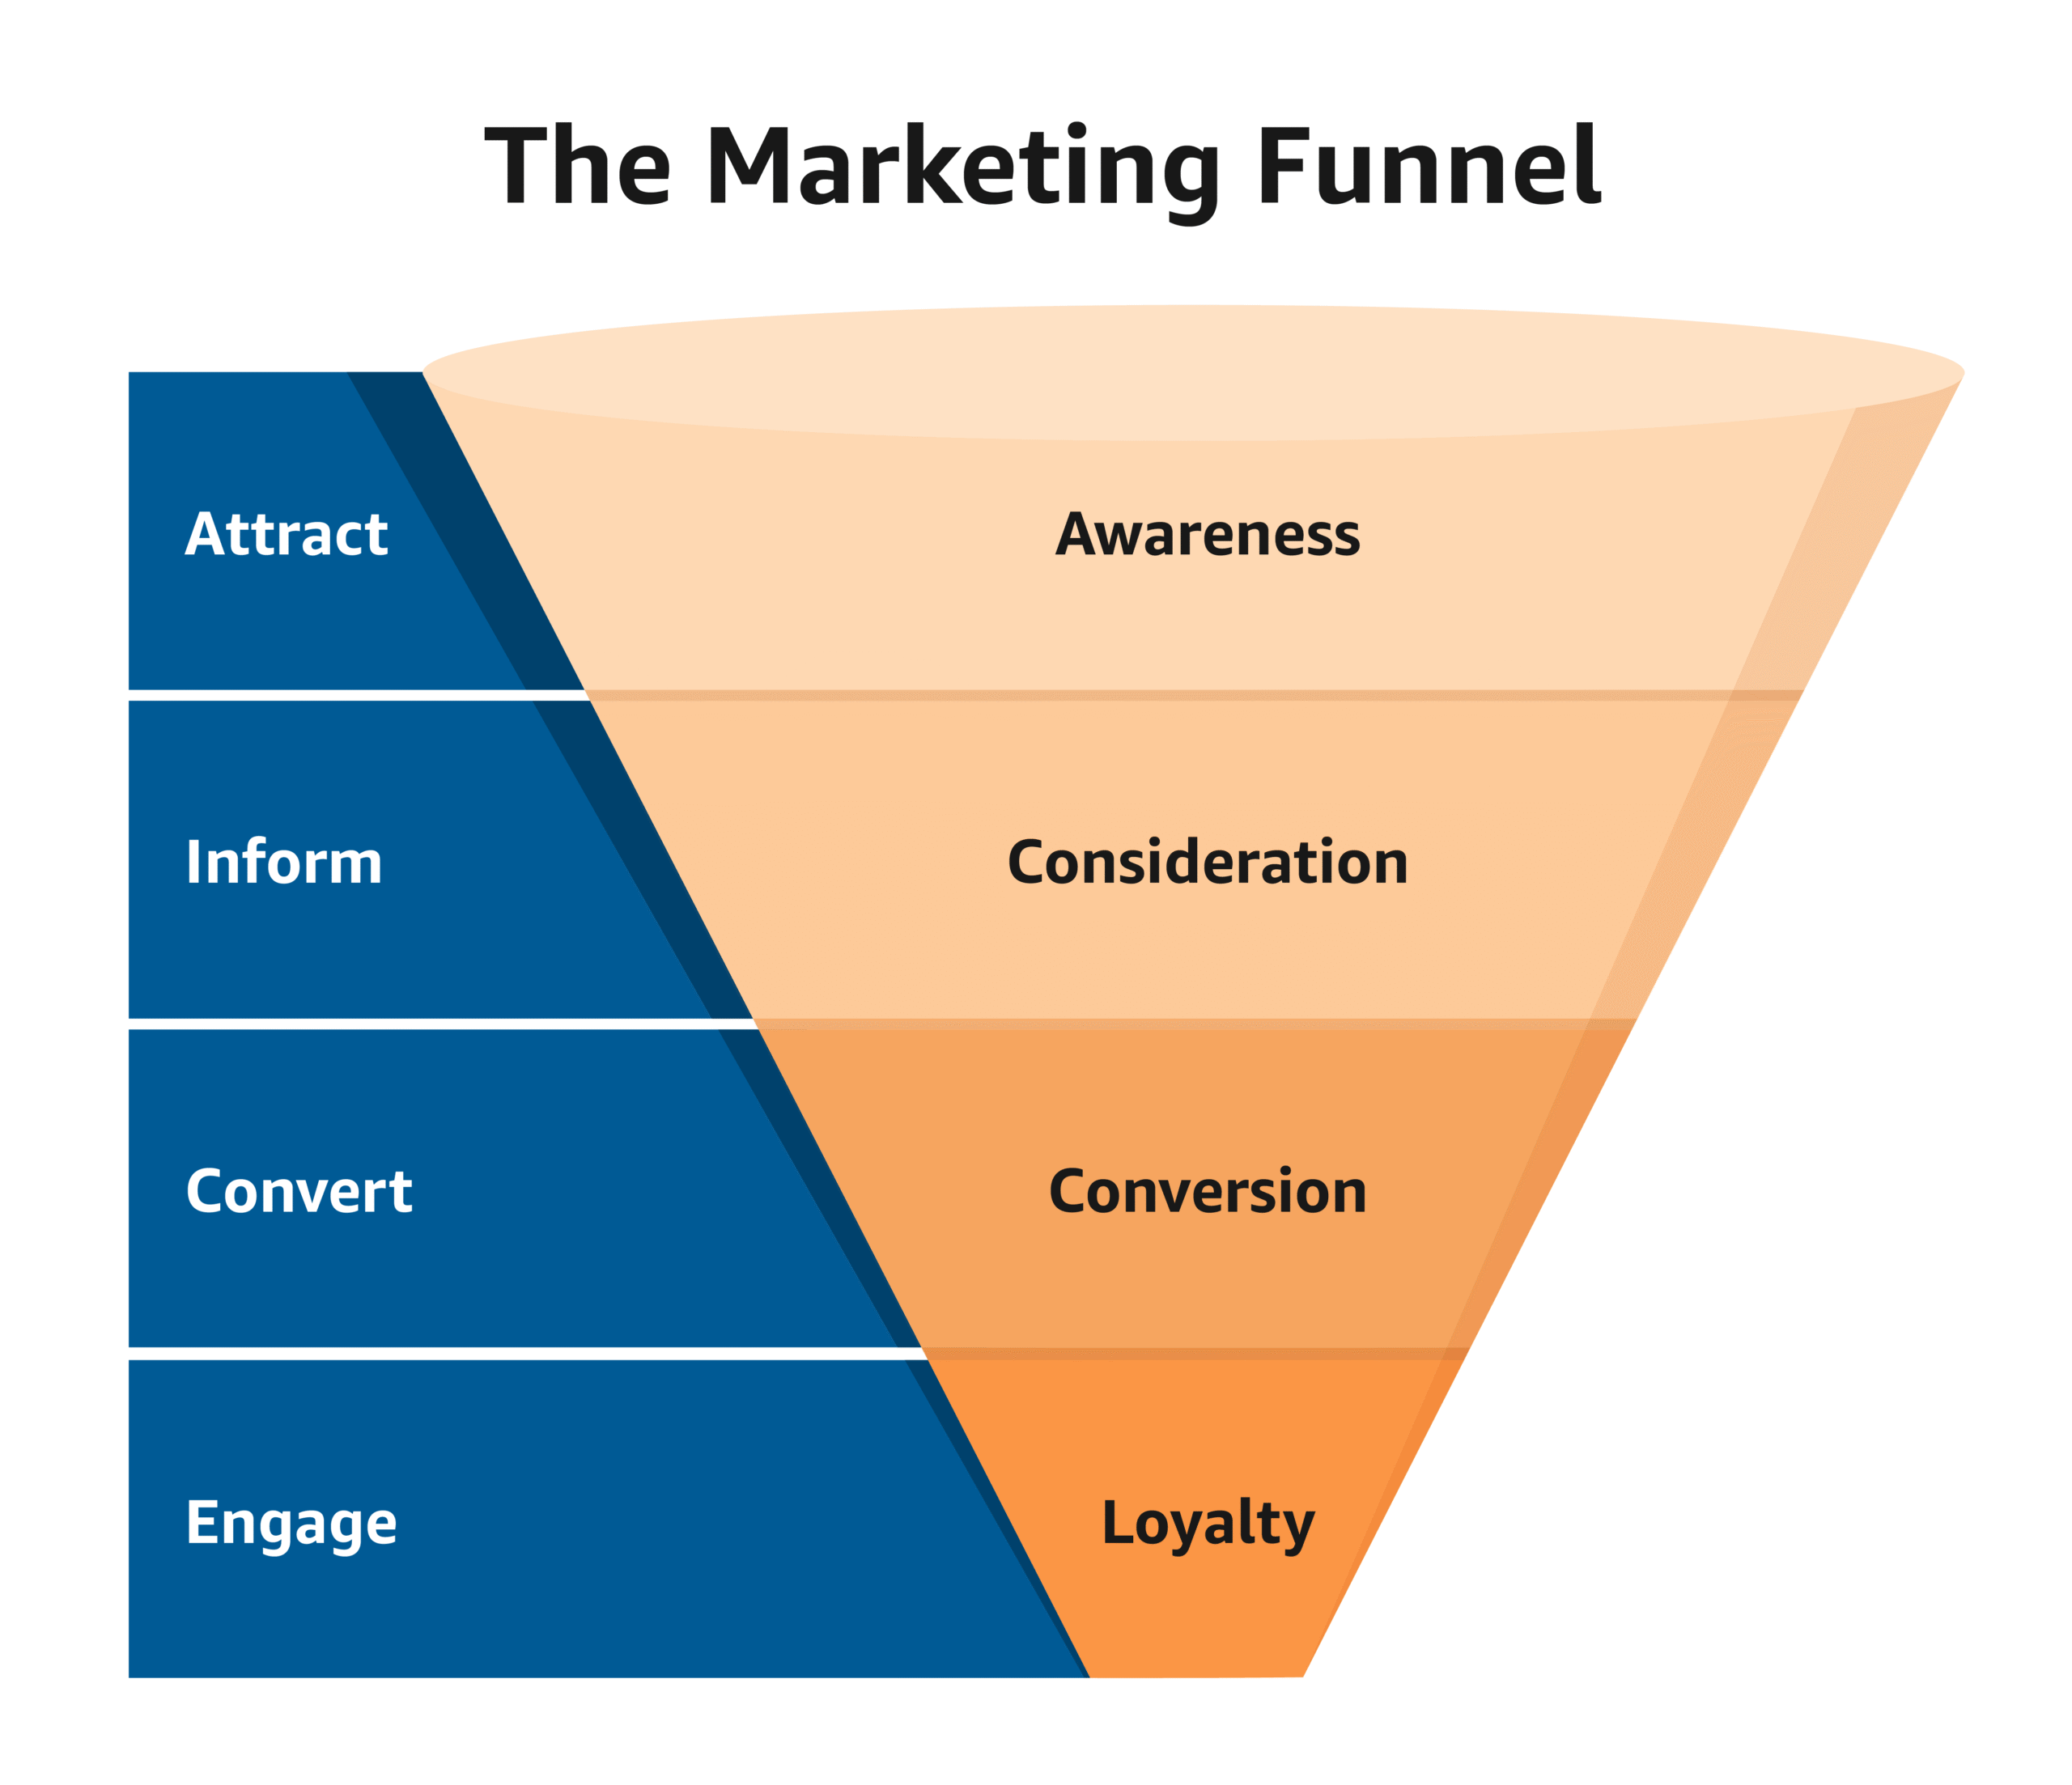
    1. Integration with the Funnel

    The best eCommerce brands in the world have a deep understanding of the customer journey and map all channels and touchpoints to it – including push.

    Different types of push notifications make sense at different stages of the journey, and different stages of the funnel:

    Image via Amazon

    This is individual, and you need to think about how it will work for your brand. 

    Here’s an example of how you could set it up:

    At this initial stage, push notifications should aim to educate and inform. 

    Showcase new lines or trending products. Keep messages light and engaging to welcome users to your brand and build that initial connection. 

    Here, customers are often weighing up their options. 

    It’s a good time to send push notifications that highlight product benefits, reviews and social proof, and comparisons with other products. 

    This could also be a good time to promote content from your blog or videos that can influence their decision-making.

    Once users are ready to make a purchase, push notifications that include exclusive discounts or limited-time offers can be the decisive factor that nudges them to checkout.

    This is the time to hit them with your most powerful messages and conve them. 

    This is also the time to send abandoned cart notifications if necessary to close the sale (more on this in the next paragraph). 

    • Retention / Loyalty Stage

    After the purchase, don’t stop there. 

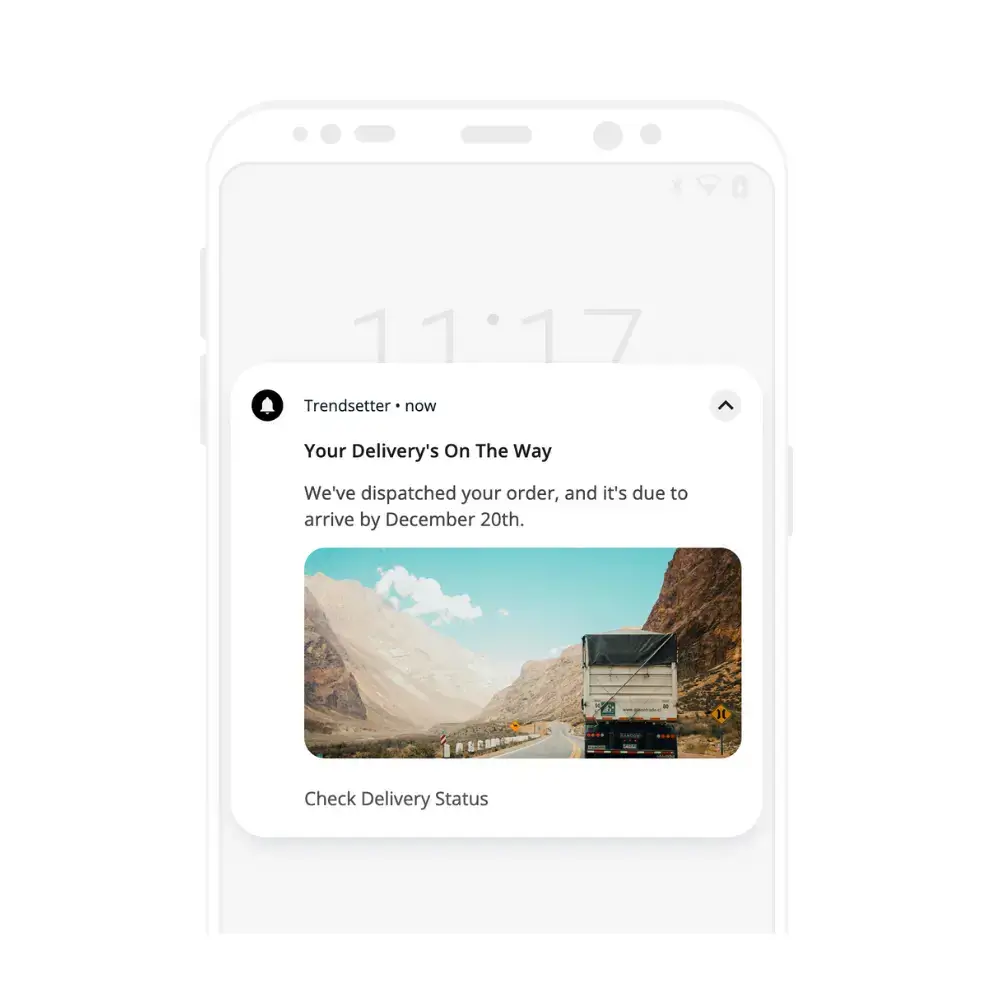
    You can use push notifications to improve CX here by notifying them about their order and shipping if appropriate. This will encourage repeat purchases by leaving a positive impression.

    You can also use push to solicit feedback, offer post-purchase support, and promote cross sells and upsells. 

    All of this sets you up to encourage repeat purchases and drive up that customer LTV

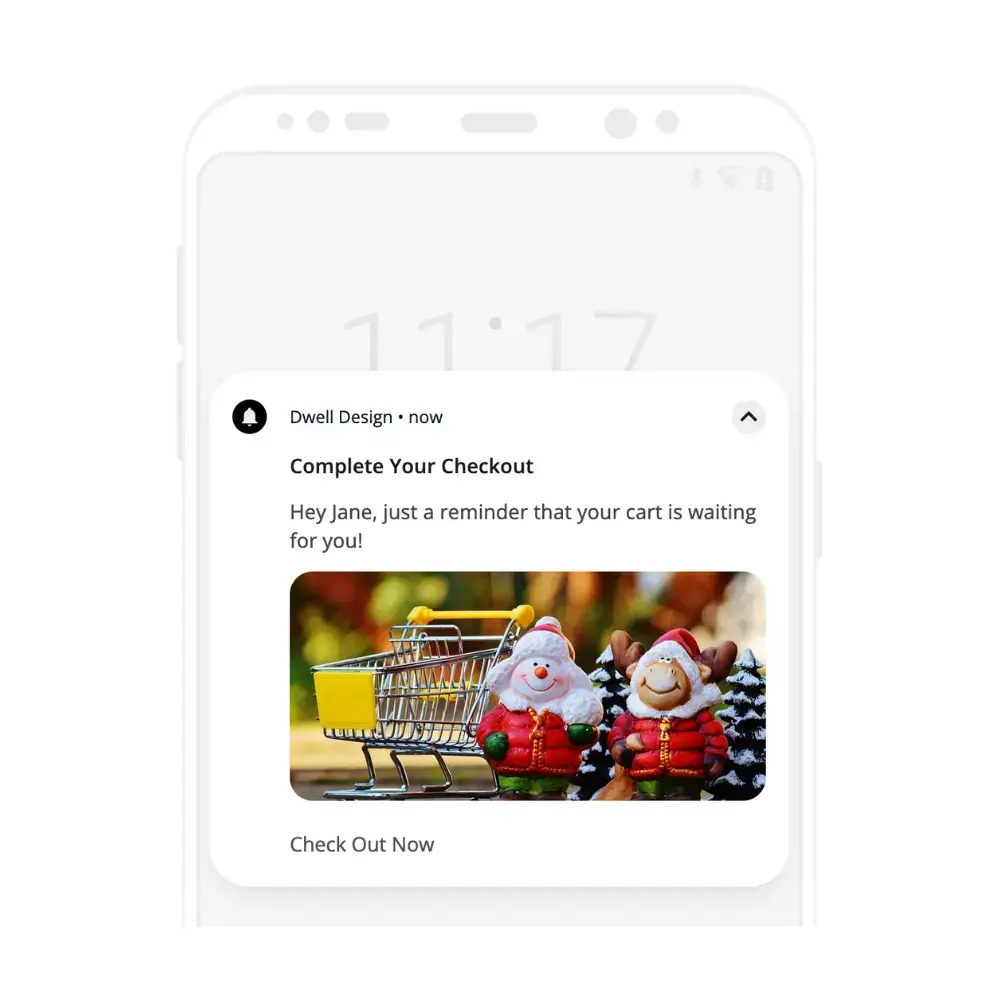
    2. Use Abandoned Cart Notifications

    A super important use case of push notifications is to recover abandoned carts.

    This is another great example of mapping notifications to the customer journey. 

    Photo by Elimende Inagella on Unsplash

    Abandoned carts are a huge opportunity for eCommerce businesses. 

    According to the Baymard institute, over 70% of carts are abandoned. Think about how many billions of dollars that represents. 

    There are various reasons for cart abandonment, like:

    • Unexpected costs like high shipping fees or hidden taxes 
    • Buggy or complex checkout process 
    • Mandatory registration 
    • Slow or inconvenient shipping options 
    • Lack of trust in data or financial security

    You should fix these if they’re a problem but you should also set up abandoned cart notifications. 

    According to PushEngage, these notifications convert at around 8% – so sending them to every single customer with an abandoned cart is a no brainer!

    There are a few best practices when it comes to using push to recover abandoned carts.

    • Timeliness: send a notification reminding customers of their abandoned cart within an hour. A second message can follow if the first is ignored, but don’t spam. 
    • Personalization: each notification can reference the specific items left behind, making the message as relevant as possible – show them what they’re missing out on!
    • Incentivization: occasionally including a special offer or discount with the abandoned cart notification can boost recovery rates. Only use this if it makes sense. 
    • Feedback Requests: sometimes, a cart is abandoned due to an issue on the site or during the checkout process. If you can’t recover the cart, at least you might be able to find out why it was abandoned and fix the issue.

    Automate abandoned cart recovery

    Abandoned cart notifications are so important that we built our own dedicated feature for them. 

    With Vendrux apps most notification types are sent from your dashboard via our OneSignal integration (one of the leading push notification services today).

    Our abandoned cart notification feature works differently, through local notifications. Everything happens on the users’ device. 

    Our systems monitor the in-app carts of your customers continuously.

    When we detect pending items, and that the app is closed (in the background), this triggers a timed notification sequence. 

    The sequence uses CRO best practices and powerful copywriting to bring them back to the cart page within the app and prompt them to take the final step. Simple but powerful. 

    This is all managed and controlled remotely by our team, but you can customize it too, adding your own branding and copy as you wish. 

    It’s the best way to send abandoned cart notifications from a mobile app, and the best way to recover abandoned carts in general.

    Read more about how Vendrux works and how we can supercharge your mobile eCommerce game. 

    3. Clear and Concise Messaging

    With all writing clarity and concision is important but it’s even more important with push notifications. 

    Think about it. iOS limits characters to around 150, while Android limits them to 450.

    There’s no room for fluff for that reason alone.

    People also flit around on their mobile devices and lose interest in a fraction of a second – so you need to get your point across instantly. If it’s overly wordy or confusing, your customers will ignore it. 

    How is this achieved?

    The golden rule is to get straight to the point. 

    Keep the language simple and direct, which not only respects the customer’s time but also makes engagement more likely. 

    With eCommerce push notifications, every word counts, so choose them carefully to ensure that the core message is front and center.

    A compelling call-to-action (CTA)

    Part of clarity is telling the customer what they should do, so a strong call-to-action (CTA) is crucial. 

    The best eCommerce brands use CTAs that are direct and unambiguous, prompting the customer to take immediate action. 

    Whether it’s a discount, an announcement of a flash sale, an invitation for customers to check out a new product, the CTA is the element that drives conversion. 

    Try to avoid generic phrases like “Click here,” and instead opt for more action-oriented language such as “Shop Now” or “Grab Your Discount.” 

    This will improve CTR, and you should test different wording to see which works best. 

    Consistent tone and voice

    Make sure that the tone of the push notifications aligns with your brand’s voice. 

    Whether the brand is playful, professional, or somewhere in between, maintaining this consistency across all channels, including push, is key. 

    Use language, phrases, imagery and even emojis that match your brand’s style.

    This approach doesn’t just reinforce brand identity – it helps your notifications to stand out in a crowded lockscreen.

    4. Optimizing Timing and Frequency

    Another important piece of the puzzle is sending push notifications at the right time.

    If you send messages at the wrong time – or at the wrong tempo – you’re leaving money on the table. 

    Ideal Times for Engagement

    When setting up your push campaigns, think hard about the ideal days of the week (and time of the day) to send them. 

    Many of you will have customer bases in the US, but it’s still important to adapt to which timezone they’re in. 

    Research shows that retail apps get the best CTR from push notifications during the hours of 8-9am, and 6-8pm.

    The most effective days to send push notifications tend to be Monday and Tuesday.

    Ultimately, though, you’ll need to rely on your own data and testing to figure out the optimal timing for your brand.

    Optimizing frequency to avoid overwhelming users

    Push notification frequency is a delicate balancing act. 

    Too many notifications can annoy customers and cause opt-outs, but too few might result in missed opportunities for engagement.

    More notifications can also increase retention – data shows that retail apps get 2-5x higher retention when sending weekly push notifications, and 3-6x higher retention when sending daily notifications.

    We recommend starting with a moderate frequency of promotional notifications (one per day) and monitoring opt-out and engagement rates. 

    Of course notifications for abandoned carts and personalized updates are sent as and when appropriate. 

    Getting more advanced – you can allow your customers to set their own optimal frequency.

    The bottom line: Experimenting with different frequencies and monitoring customer reactions is an ongoing process. By paying close attention to user feedback and interaction data, you can find a sweet spot that works best for your eCommerce business.

    5. Personalization 

    Personalization can be the difference between an opt out and a welcomed message that is acted upon immediately. 

    Segmenting your customers

    Not all customers are alike.

    By segmenting them you can tailor your messages so that they’re more likely to hit the mark.

    Here are a few ways you could segment them. You’ll have to decide which are appropriate for your own business. 

    • Demographics: age, gender, and location provide a basic starting structure for segmentation
    • Purchase history: grouping users based on their past purchases can lead to highly relevant recommendations
    • Behavior: tracking how users interact with your site and apps can help to create segments based on engagement and interests
    • Customer lifecycle stage: knowing where each customer stands, from a first time buyer to a loyal customer, allows for messages that cater to that stage

    Top eCommerce brands use segments like these to create specialized notifications for different groups, such as exclusive deals for my top spenders or a welcome discount for new users. 

    By doing this, you’ll likely boost engagement rates and reduce the likelihood of opt-outs or ignored messages.

    Depending on your setup and tech stack, you can get quite granular. 

    Leveraging user data to send hyper-relevant notifications

    Every interaction a customer has with your site or native app is an opportunity to gather valuable data. 

    You can leverage this information to make sure your eCommerce push notifications are not just broadcasted messages but relevant prompts that inspire action. 

    Here’s are a few starting points:

    • Browsing habits: track what users are looking at and for how long to predict future interests
    • User preferences: by allowing users to set preferences, I gather data to curate more personalized recommendations.
    • Search queries: depending on your site or app, you can see what a customer searches for and send notifications promoting relevant items 
    • Wish lists: whatever a customer adds to their wishlist, you can notify them when those items are back in stock, about to sell out, or go on sale 

    One example that several brands use: a customer frequently checks out a particular category on your site, so you use this data to send notifications about new arrivals or sales within that category.

    This direct relevance increases the chances of converting notifications into sales. 

    There are a few caveats with personalization. 

    You should avoid over personalization, which can come off as intrusive and even creepy.

    You should comply with all relevant regulations, and also give customers full transparency and control on how their data is used. 

    If you do it right, your customers should welcome personalized messages. That’s because the north star should always be to genuinely help the customer (while also helping your business). 

    By constantly refining the data you collect and working it into your notification flows, you’ll make sure every message is as impactful as possible.

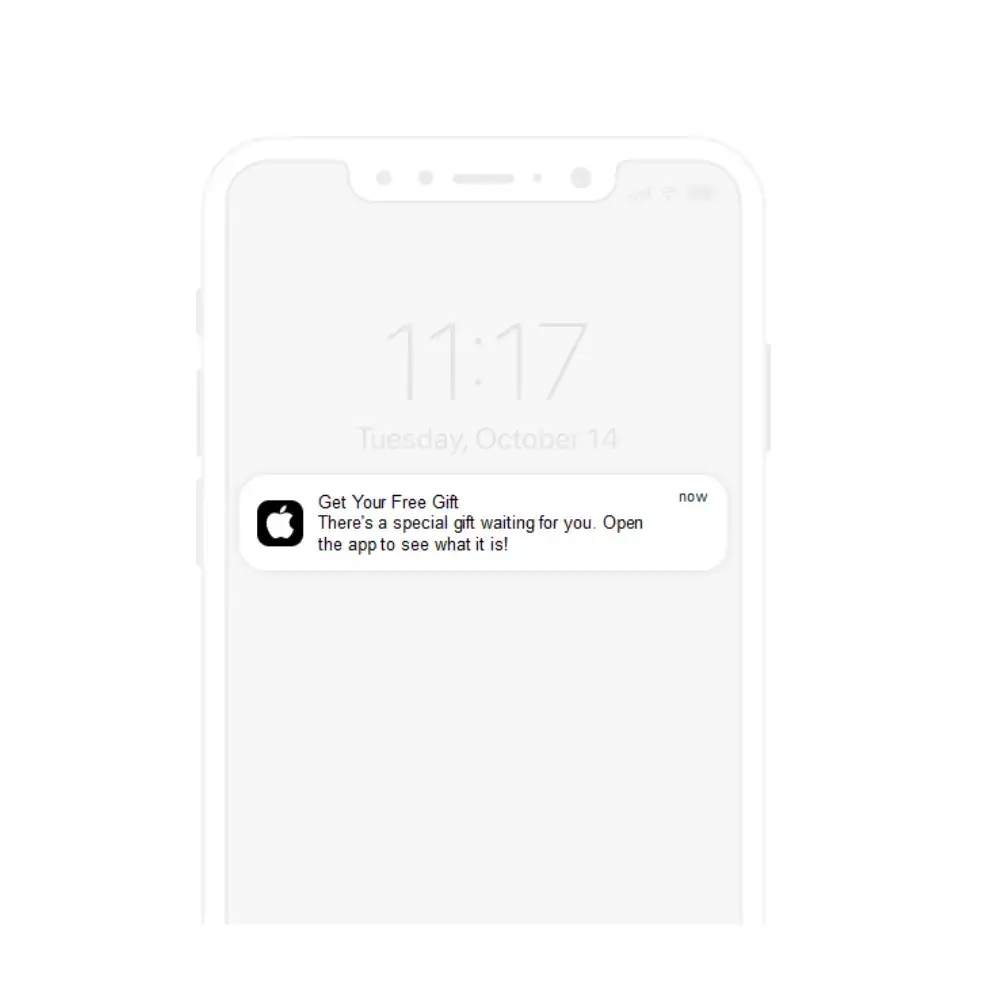
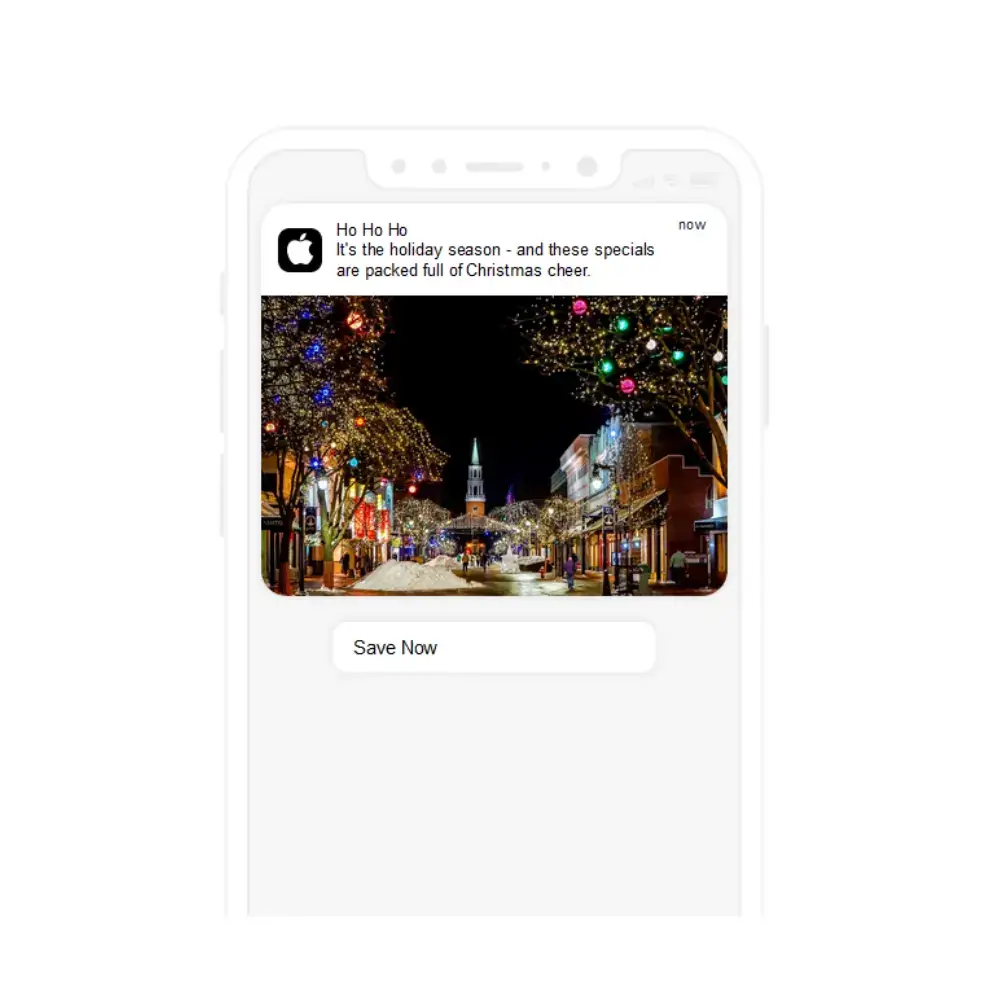
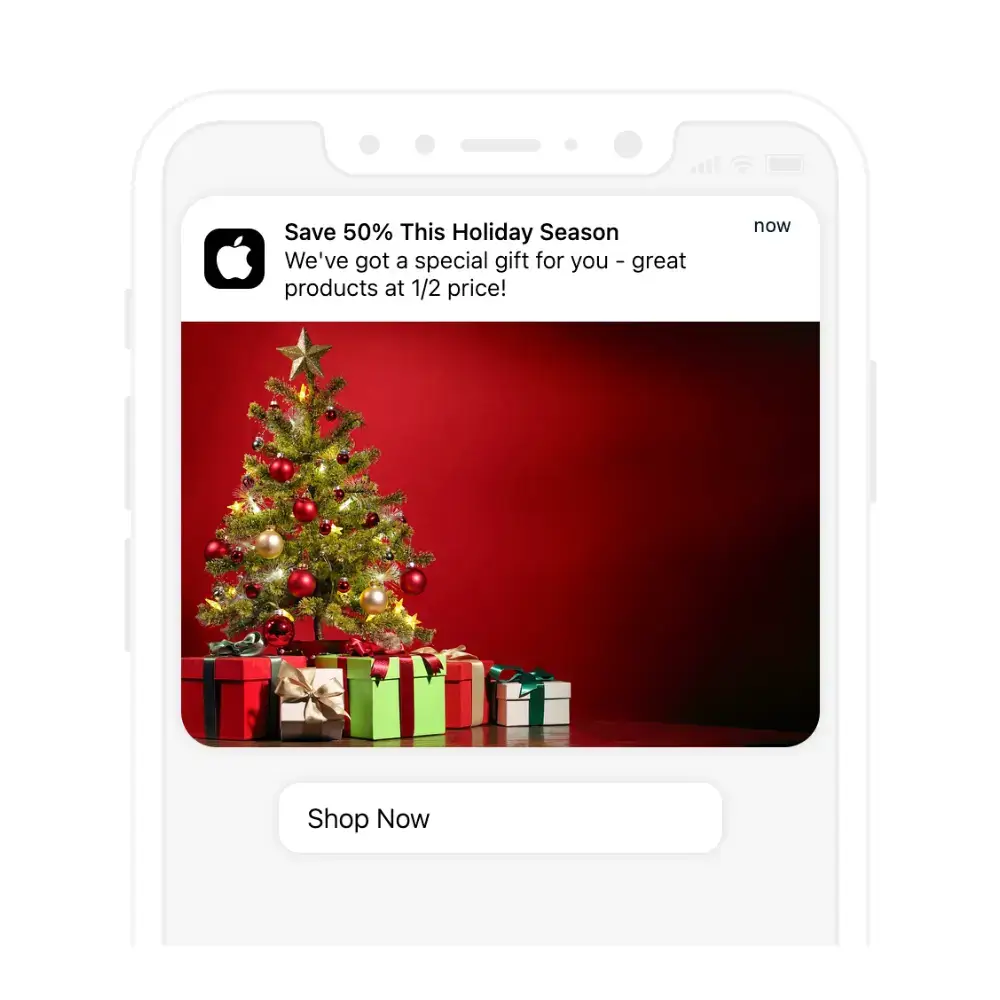
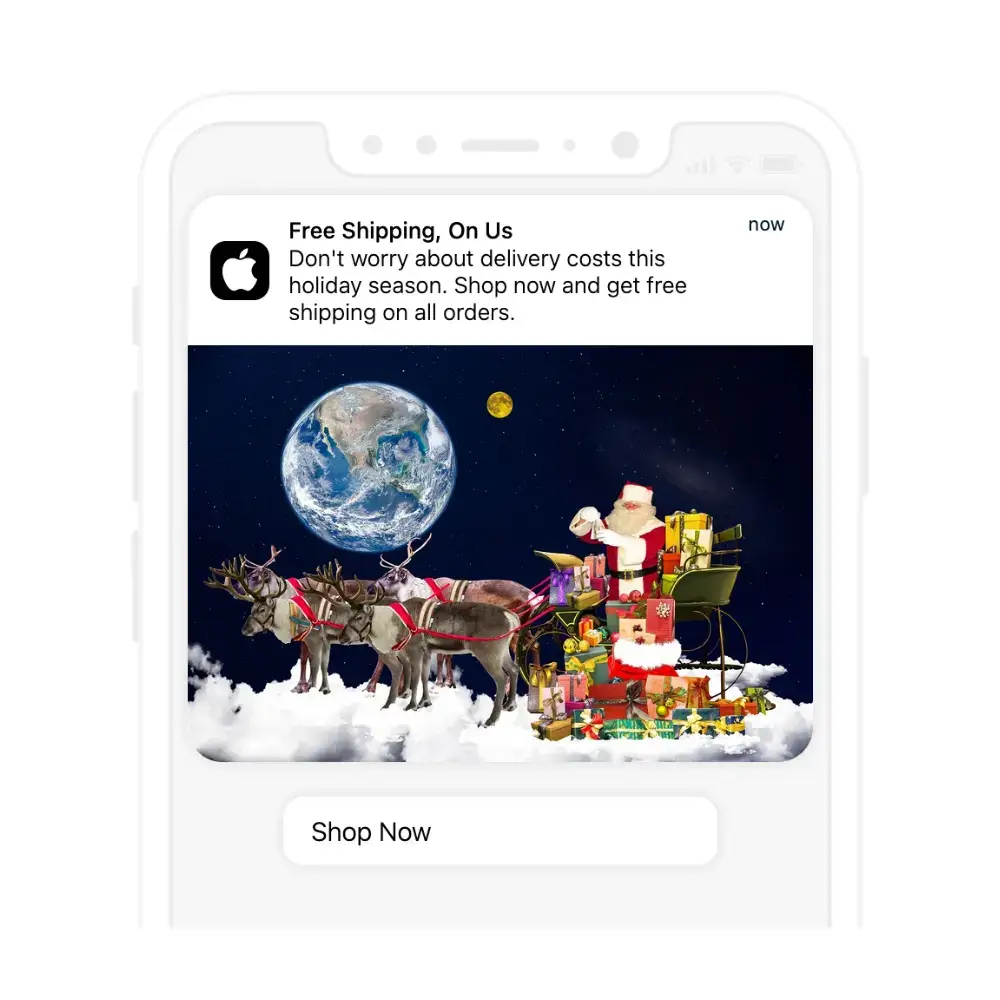
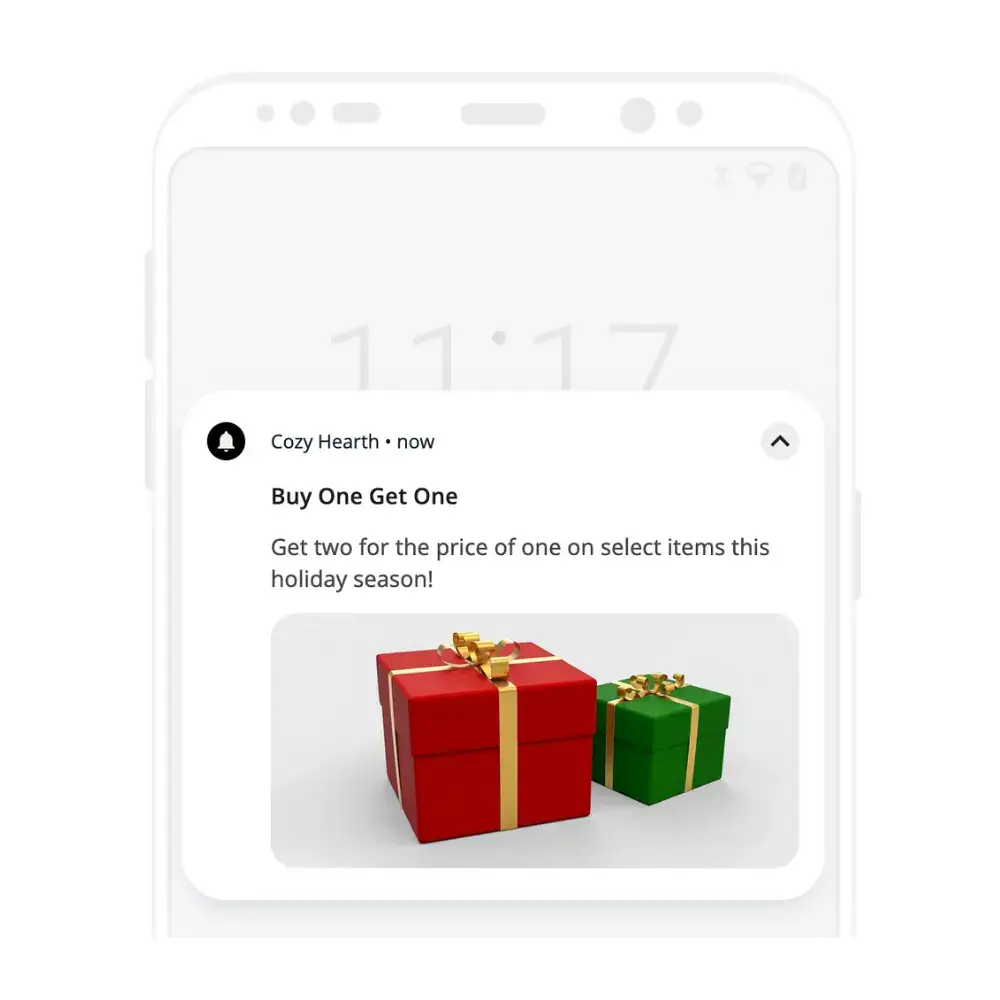
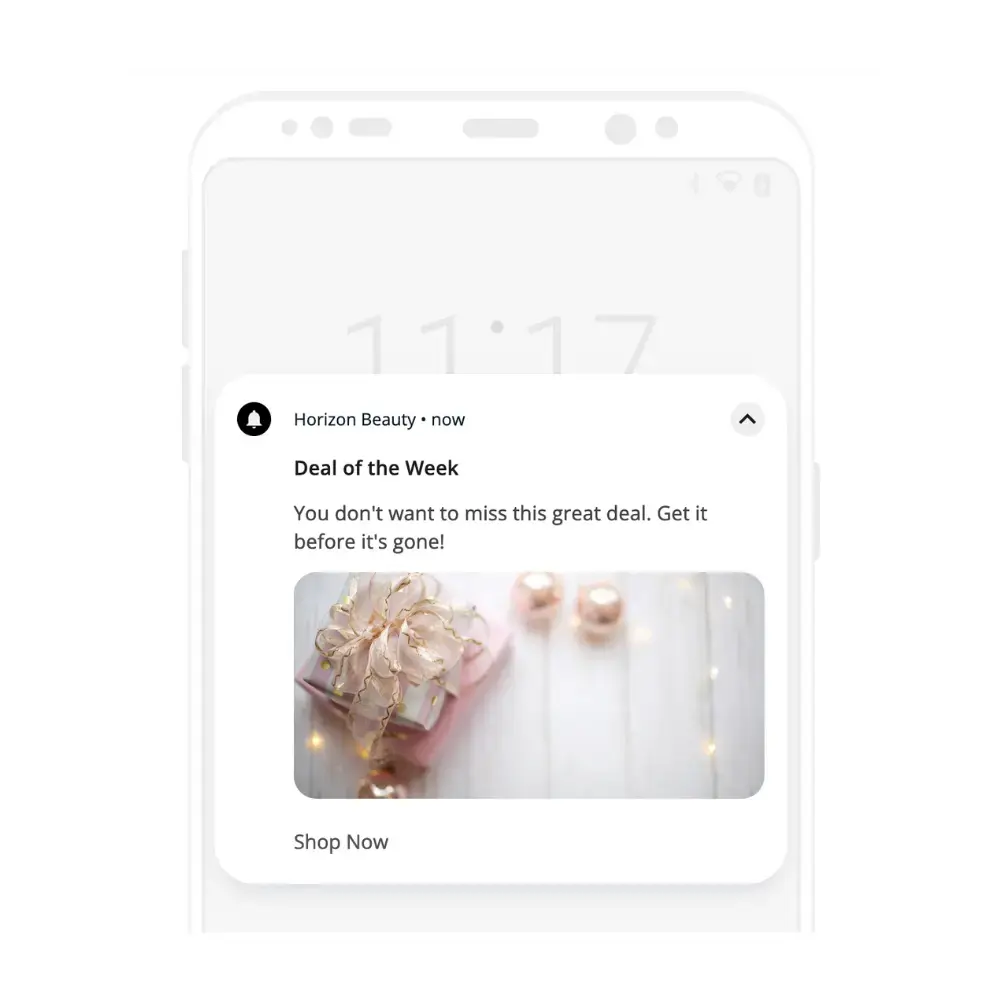
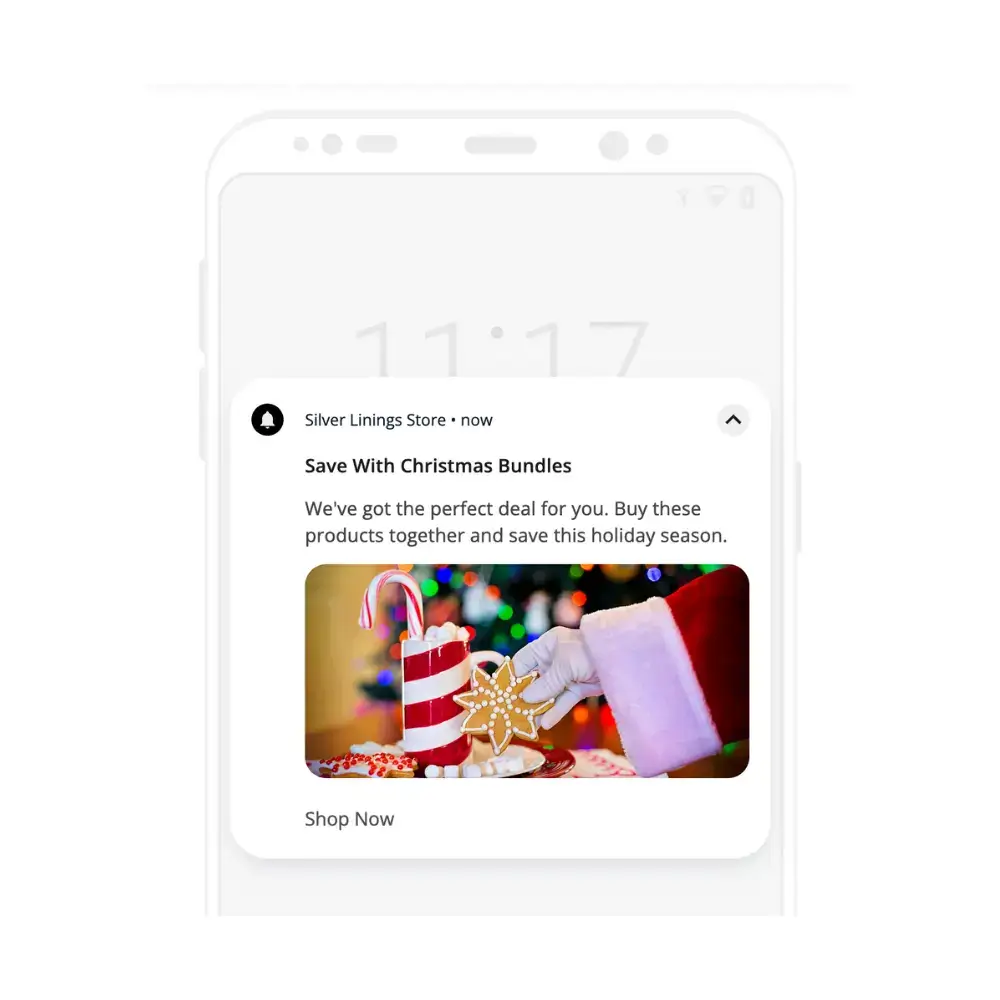
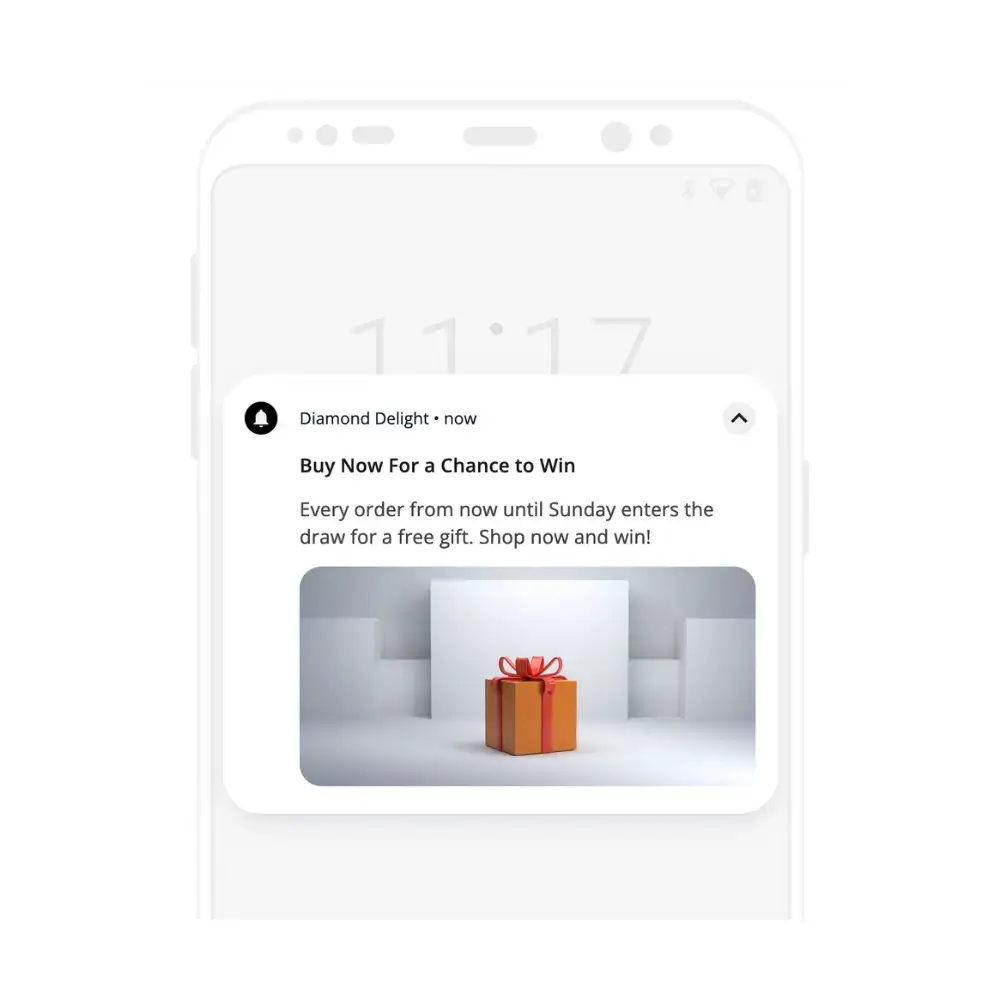
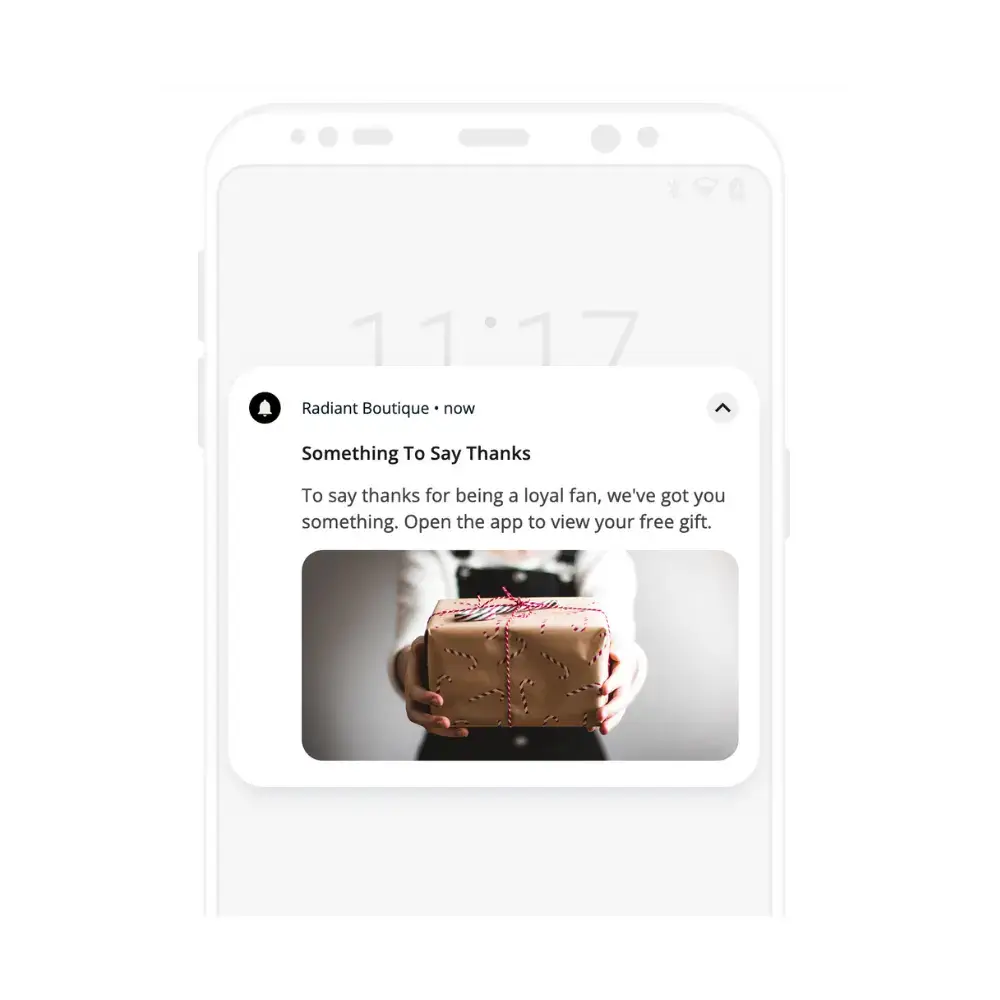
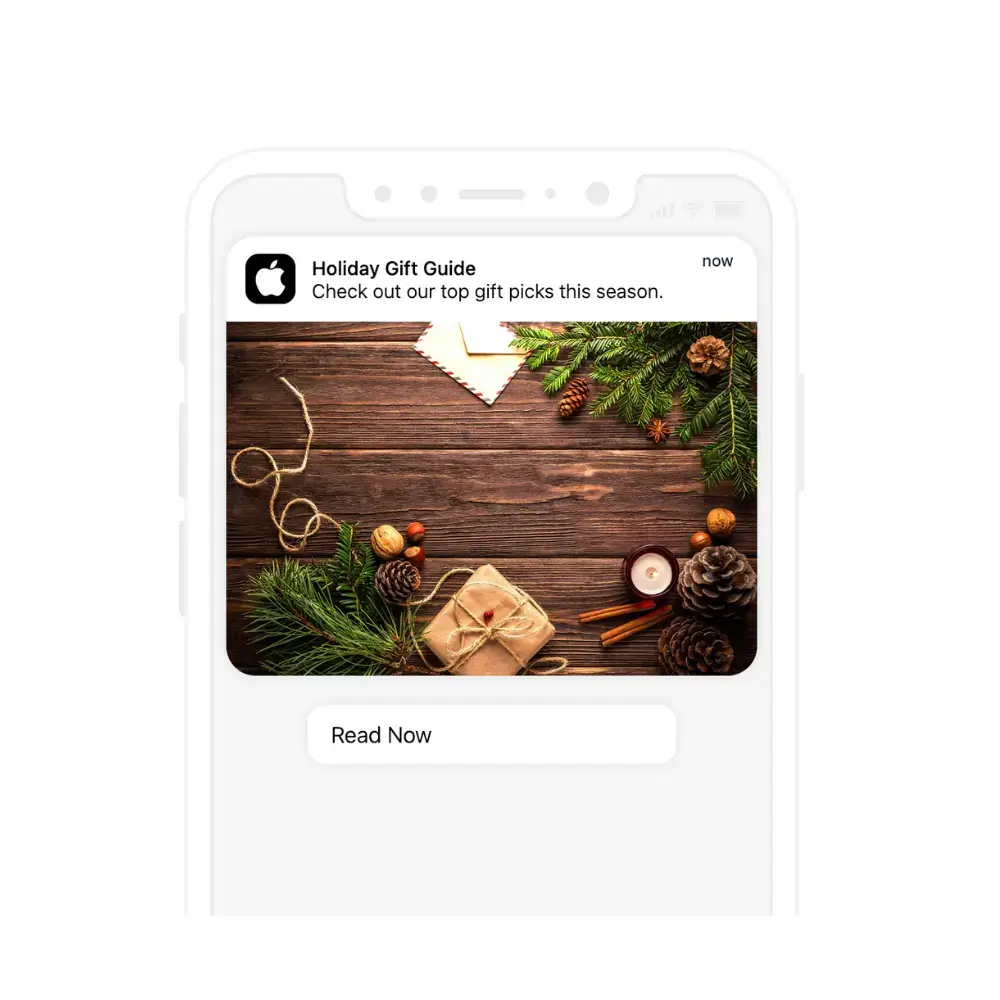
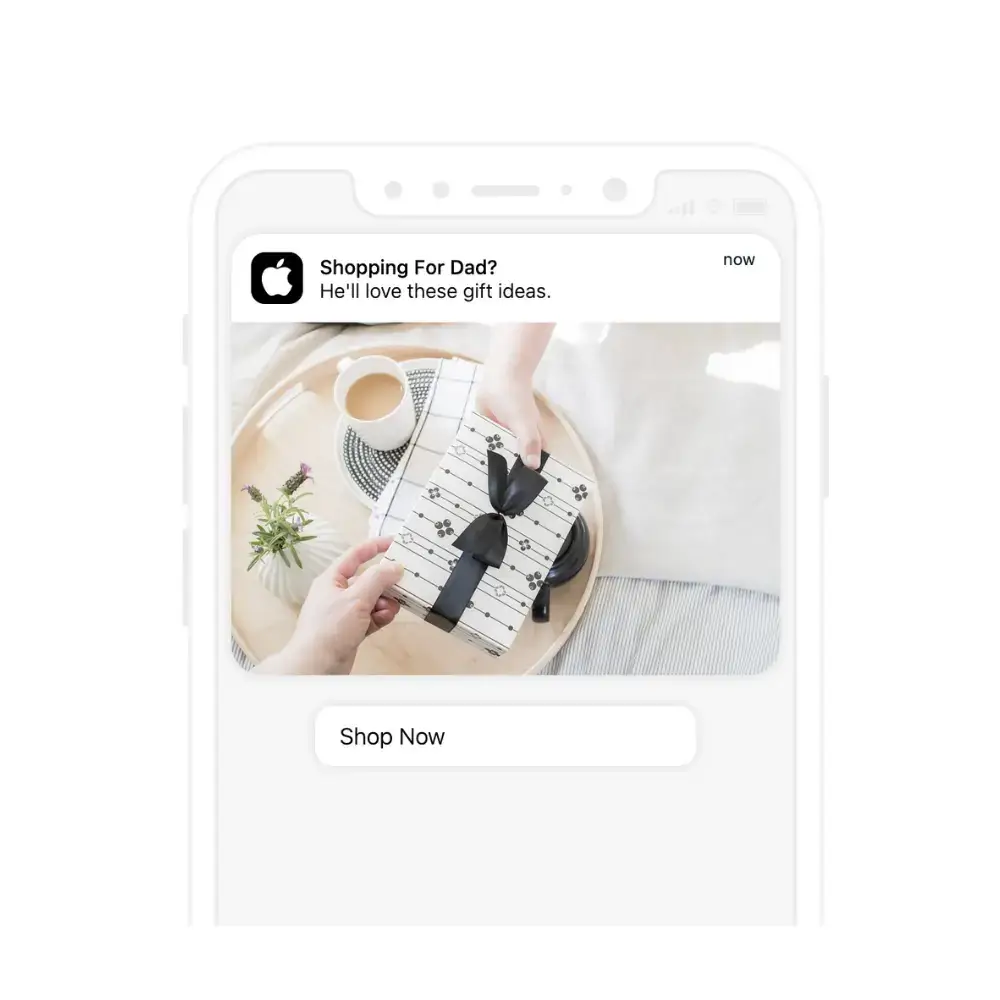
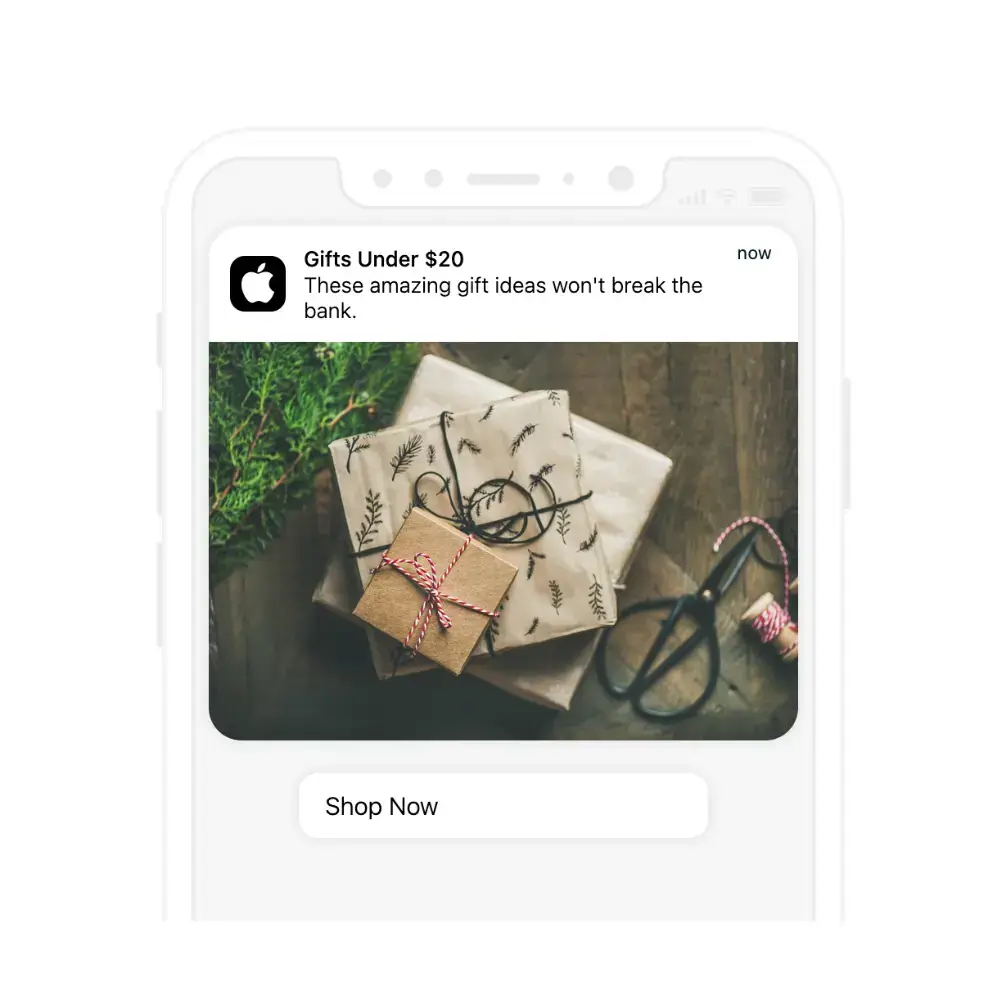
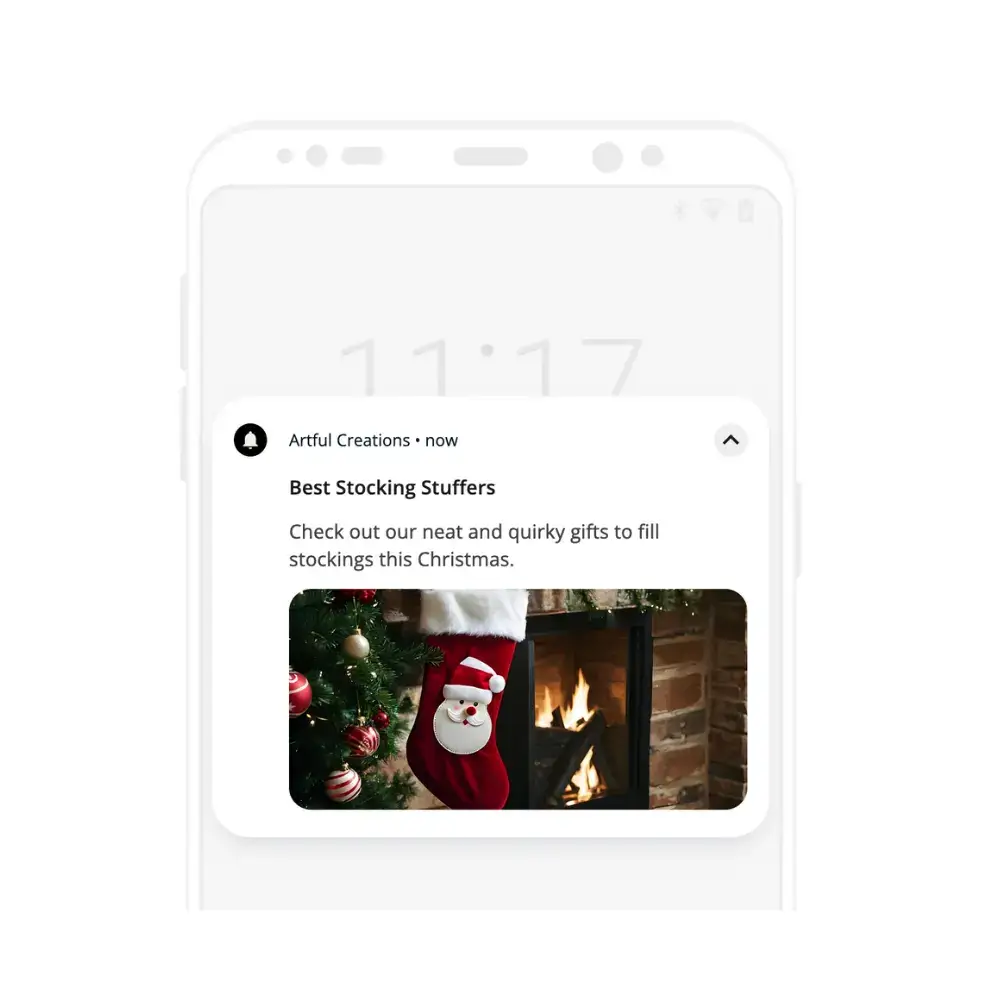
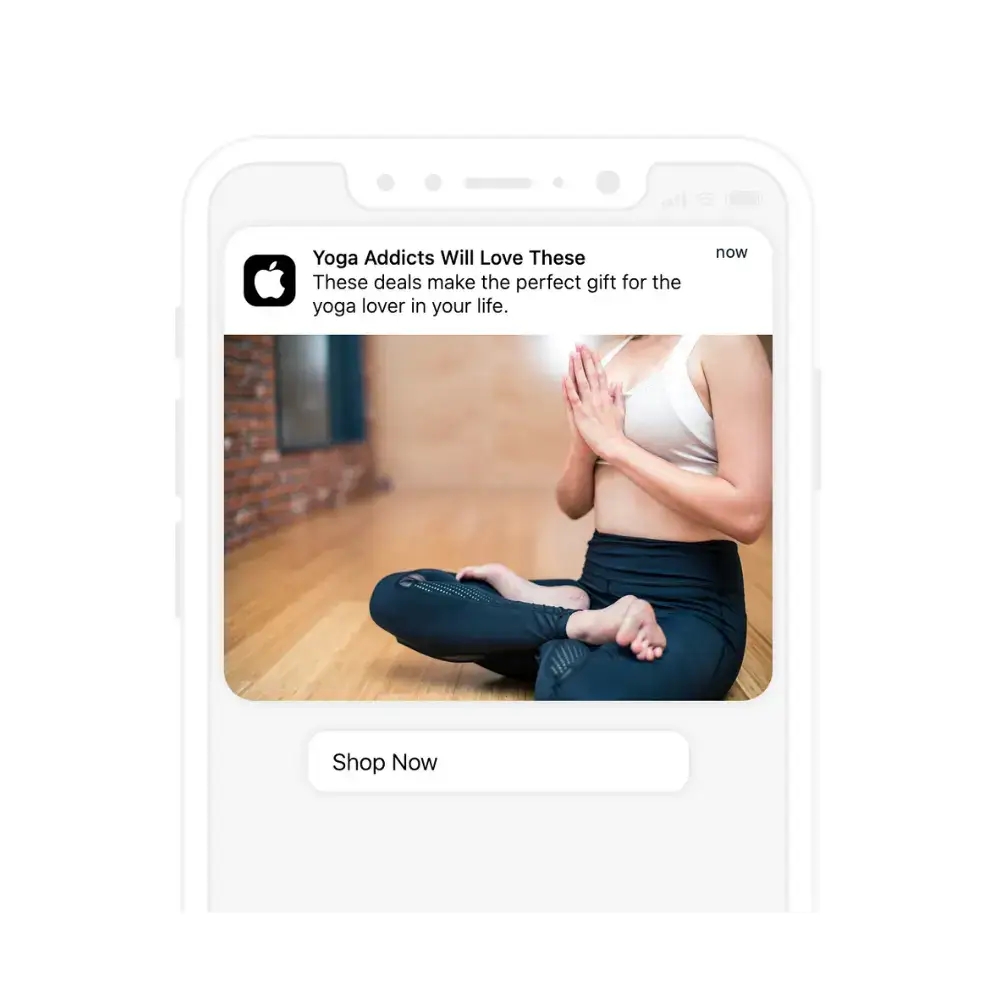
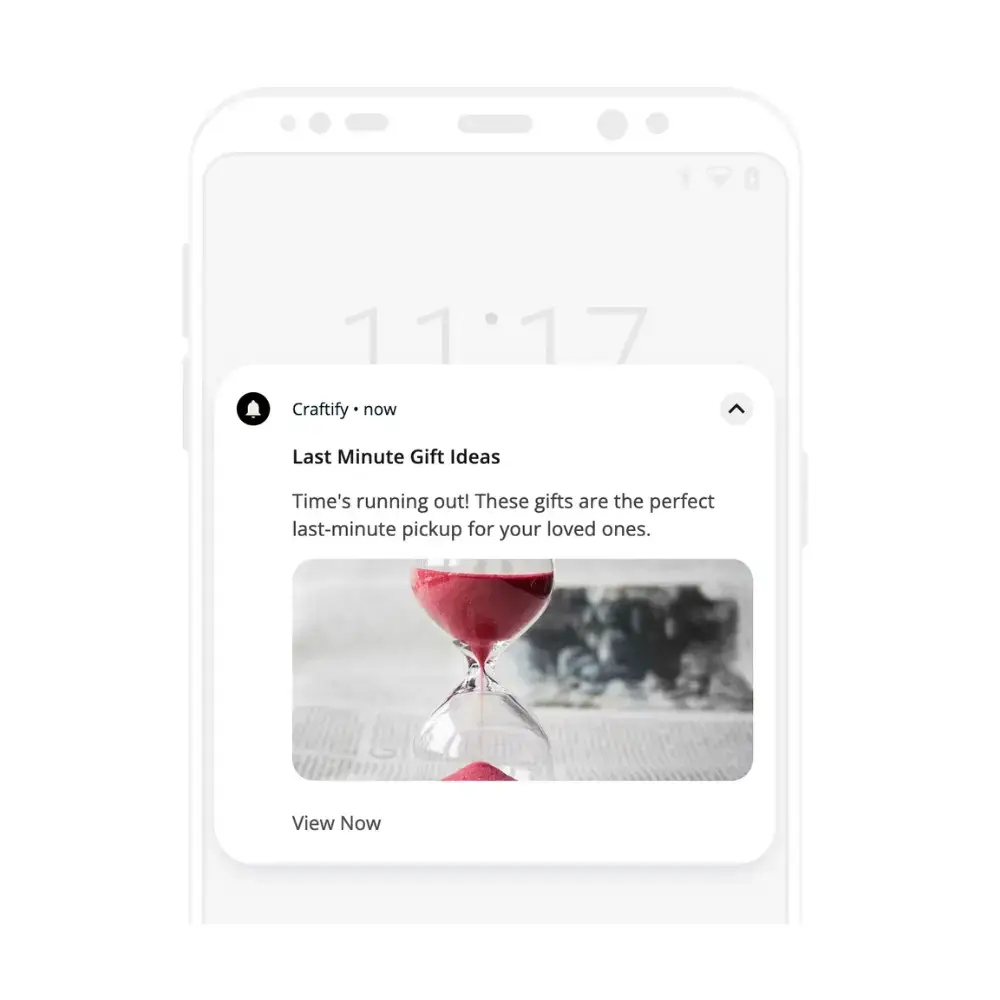
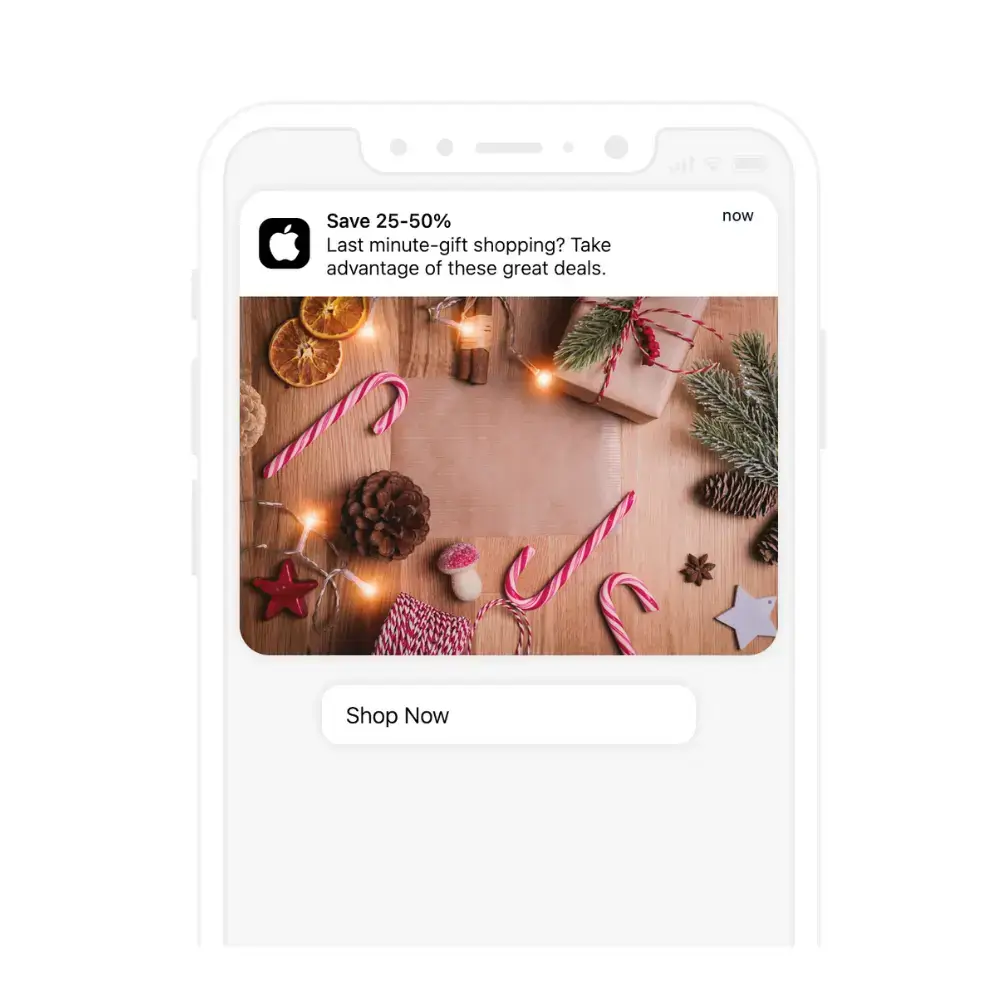
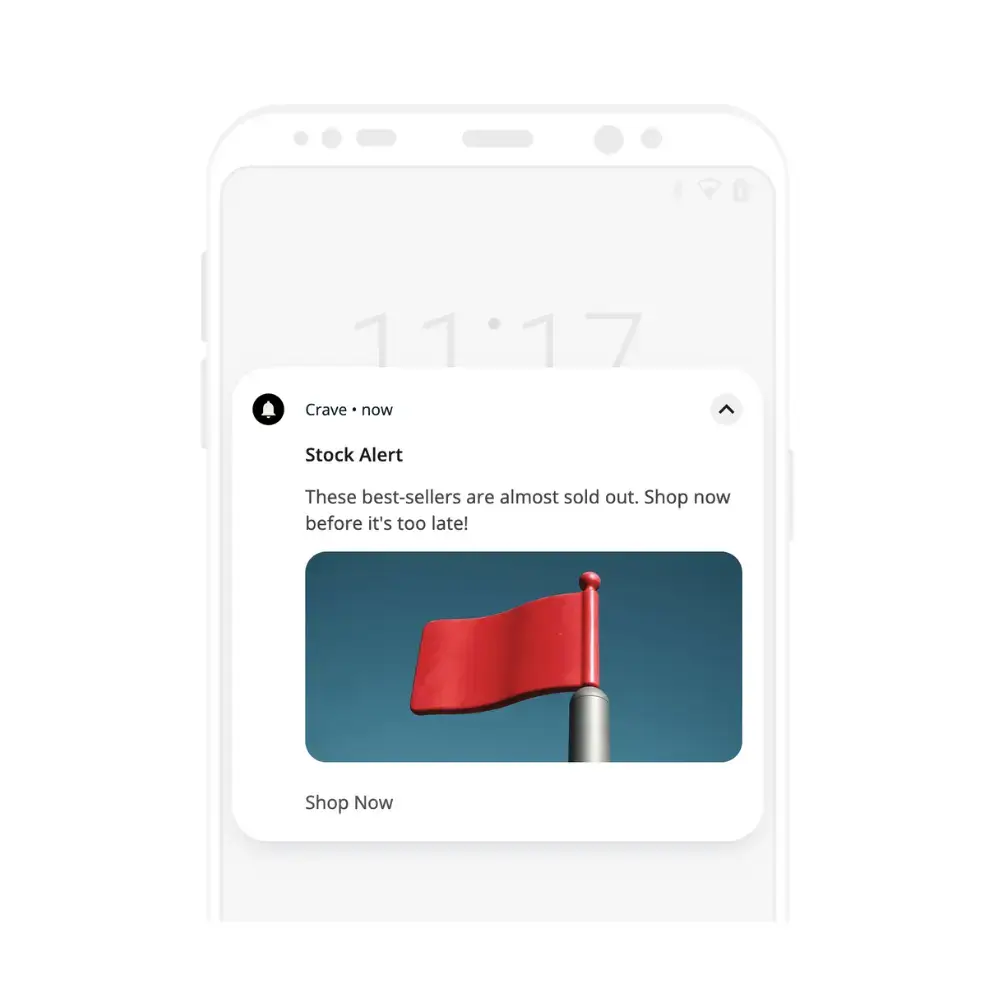
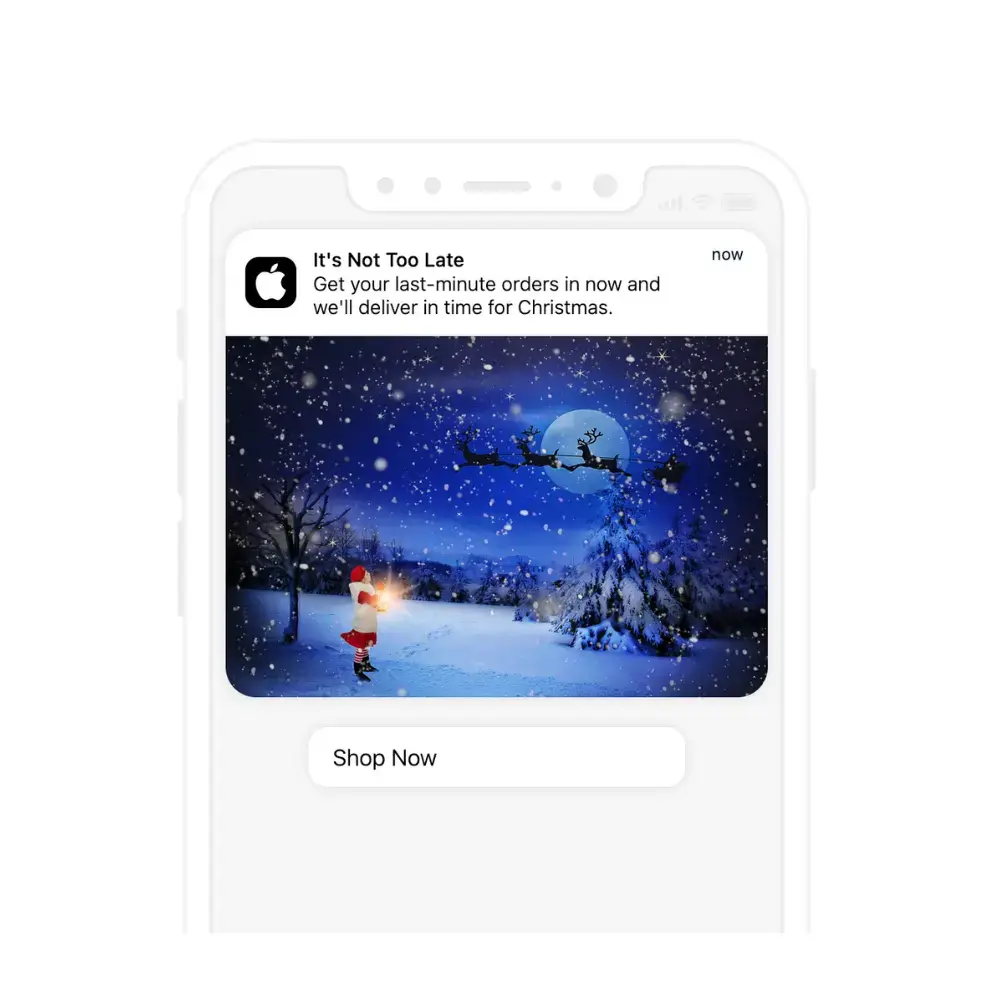
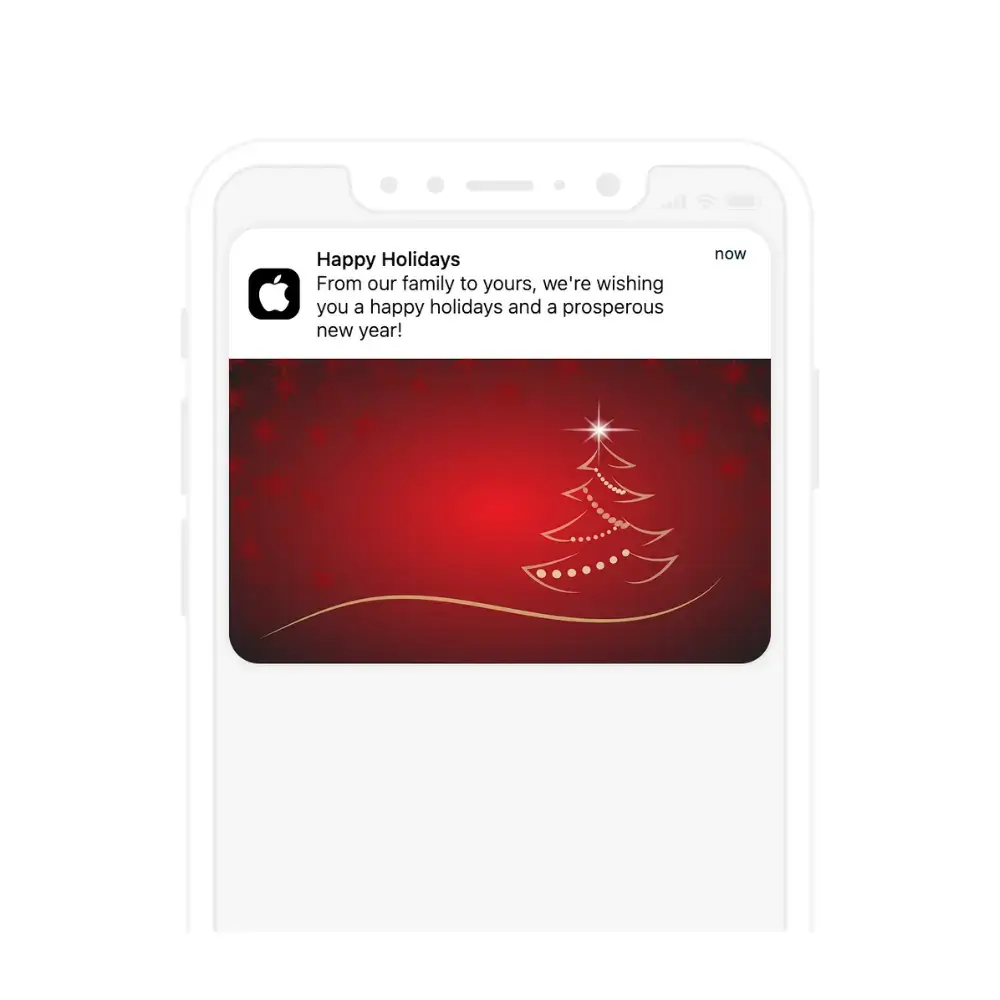
    6. Visual and Interactive Elements

    One of the great things about push notifications is the ability to use rich media like images, links, and even audio and video. 

    Eye-catching graphics and emojis

    Many eCommerce brands have found that incorporating high quality images, graphics and emojis can capture a customer’s attention. 

    Photo by wu yi on Unsplash

    The key is to make sure that any images you use are not only attractive but also relevant to the high level message.

    A few tips:

    • Choose high-contrast graphics that pop on various device screens
    • Use emojis to express emotions or highlight key deals, but don’t overdo it

    With eCommerce we all know how important a good image of the product is, so when you’re promoting items and offers – make sure you show them through push too. 

    CTA buttons

    Interactive elements like buttons or sliders are great for enticing CTAs, and can even allow customers to take important steps without opening the app. 

    There are a few options to test.

    Buttons can be used in push notifications for:

    • Call-to-Action (CTA) Buttons: directing users to specific actions like “Shop Now,” “View Sale,” or “Add to Cart.” 
    • Quick Responses: offer options like “Save for Later” or “Remind Me,” which are particularly useful for cart abandonment notifications or for items that are back in stock.
    • Feedback Collection: use buttons like “Like” or “Dislike” for users to quickly provide feedback on the relevance of the product recommendations or notification content.
    • Navigation Shortcuts: buttons can serve as shortcuts to specific sections of the app or website, like “New Arrivals,” “Wishlist,” or “Order History.”

    Your customers want simple, one click options to get stuff done. Push notification buttons give them just that. 

    Visual elements (icons, images, colors)

    The visual “look” of your notifications helps them to be not only seen but also well-received. 

    A few best practices:

    • Use brand-consistent icons and images that customers associate with your store
    • Use a branded color palette that has enough contrast to ensure legibility
    • Make sure visual elements don’t overshadow the message, but rather augment it

    Test multiple designs to see which elements resonate best with your customers. 

     7. A/B Testing

    As with many things, A/B testing is crucial.

    A/B testing—or split testing—allows you to compare two versions of a message to see which performs better. 

    Every A/B test should start with a goal for a metric you want to improve, which feeds into a hypothesis of the form “if we change x, then we will get y result”. 

    Then, it’s a case of:

    • Drafting two distinct messages: there are different things you can test – headlines, body text, calls to action, and visuals
    • Testing one segment at a time: to maintain data integrity, test with a specific user segment
    • Using a significant sample size: make sure the audience size is large enough to yield statistically significant results
    • Timing it right: timing can affect the outcome, so run both versions concurrently 

    It’s vital to change only one element at a time to pinpoint what influences the performance.

    Ideally you should always have tests running. 

    Start small, aiming to optimize the low hanging fruit, and in time you can build up to sophisticated testing systems as needed. 

    Most major push notification platforms will give you solid A/B testing options. For example OneSignal, which we integrate with, gives you a ton of testing tools straight out of the box.

    Performance metrics

    Alongside testing, the next step is a thorough analysis of performance metrics. Here’s are the key metrics that matter when it comes to push:

    1. Open Rate: tells you how compelling your notifications are at first glance
    2. Click-Through Rate (CTR): a direct measure of immediate interest
    3. Conversion Rate: the all-important % of customers who complete the desired action
    4. Retention: did the users who clicked on a notification continue to engage?
    5. Unsubscribe Rate: high opt-out rates from a message indicate that it could be too pushy or irrelevant

    This is an individual choice and possibly a project for one of your analysts or marketing people. 

    It is important for them to stay organized with spreadsheets and analytics software. 

    More sophisticated still – many brands export push notification data into their own custom analytics platforms, or use tools like Python and Pandas to analyze the data in a more hands-on manner.  

    The bottom line: Use data to fine-tune your approach and send notifications that truly resonate with customers and drive results for your business. Each datapoint is a puzzle piece, eventually you’ll put them all together and leverage push to its full potential.

    8. Iterative Improvement 

    This is similar to the previous best practice, but more from the perspective of mindset. 

    It’s crucial to adapt to customer behavior and feedback. 

    Customers frequently leave clues, either through direct feedback or interaction with notifications themselves. You should make it a top priority to listen for these patterns and clues. 

    Over time, you’ll be able to tailor your eCommerce push notifications to align with what makes your customers tick.  

    A few examples we’ve mentioned previously:

    • Customizing content for different groups
    • Adjusting the timing of notifications 
    • Offering incentives tailored to behavior 

    The key is to think of it as an ongoing process of improvement and iteration. 

    Think of notifications as a personalized touchpoint for each customer, that over time gets better and better at connecting with them. 

    Continuous improvement based on analytics

    Armed with data, you should adjust tactics and strategy in real-time by tweaking copy, design, and timing. 

    Performance metrics are not just numbers; they’re insights into user behavior and campaign effectiveness. They can guide the decisions you make for months and years to come

    Through a continuous cycle of testing, analysis, and iteration, your strategy will become more refined and your results will improve incrementally.

    9. Legal Compliance and Ethical Considerations

    Compliance can be a minefield, and you should consult with an expert for your particular circumstance to know where you stand with push. 

    Photo by Mari Helin on Unsplash

    Here are a few things to consider…

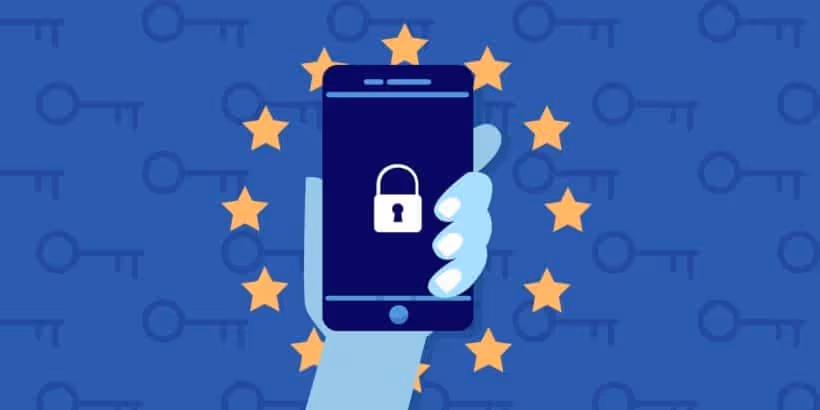
    Privacy Laws (GDPR, CCPA)

    Staying on the right side of privacy laws is crucial. 

    For eCommerce businesses, this means complying with regulations such as the General Data Protection Regulation (GDPR) and the California Consumer Privacy Act (CCPA). 

    Some starting points for solid compliance:

    • Understand user consent: Before sending notifications, make sure you have explicit consent from your users. This isn’t just a best practice; it’s a legal requirement under GDPR for individuals within the EU, and similar principles apply under CCPA for California residents.
    • Provide clear information: When asking for consent, be transparent about what data you’re collecting and how it will be used. Users should know what they’re signing up for, and this straightforward approach will benefit your brand’s trustworthiness.
    • Data protection: Safeguard personal data with robust security measures. Any breach can lead to heavy penalties, especially under GDPR, which can levy fines of up to 4% of annual global turnover or €20 million (whichever is greater).
    • Respect user rights: Users have the right to access their data and request its deletion. Ensure you have processes in place to promptly honor these requests.

    Opt-in/Opt-out 

    Transparency is essential when it comes to opt-in and opt-out processes for push notifications. Here’s how I ensure clarity and give users control:

    • Clear opt-in: explain what kind of push notifications they’ll receive and how often
    • Easy opt-out: Just as users should be able to easily opt-in, the opt-out process must be straightforward
    • Preferences: offer users the option to customize their push notification experience. 

    With Vendrux apps, your app users will be able to customize their push preferences. They can explicitly state which notifications they’re interested in, and give you the permissions you need to fire away. 

    Following these steps for transparent opt-in and opt-out processes not only ensures compliance with privacy laws but also fosters a positive relationship with customers, who appreciate the respect for their privacy and choices.

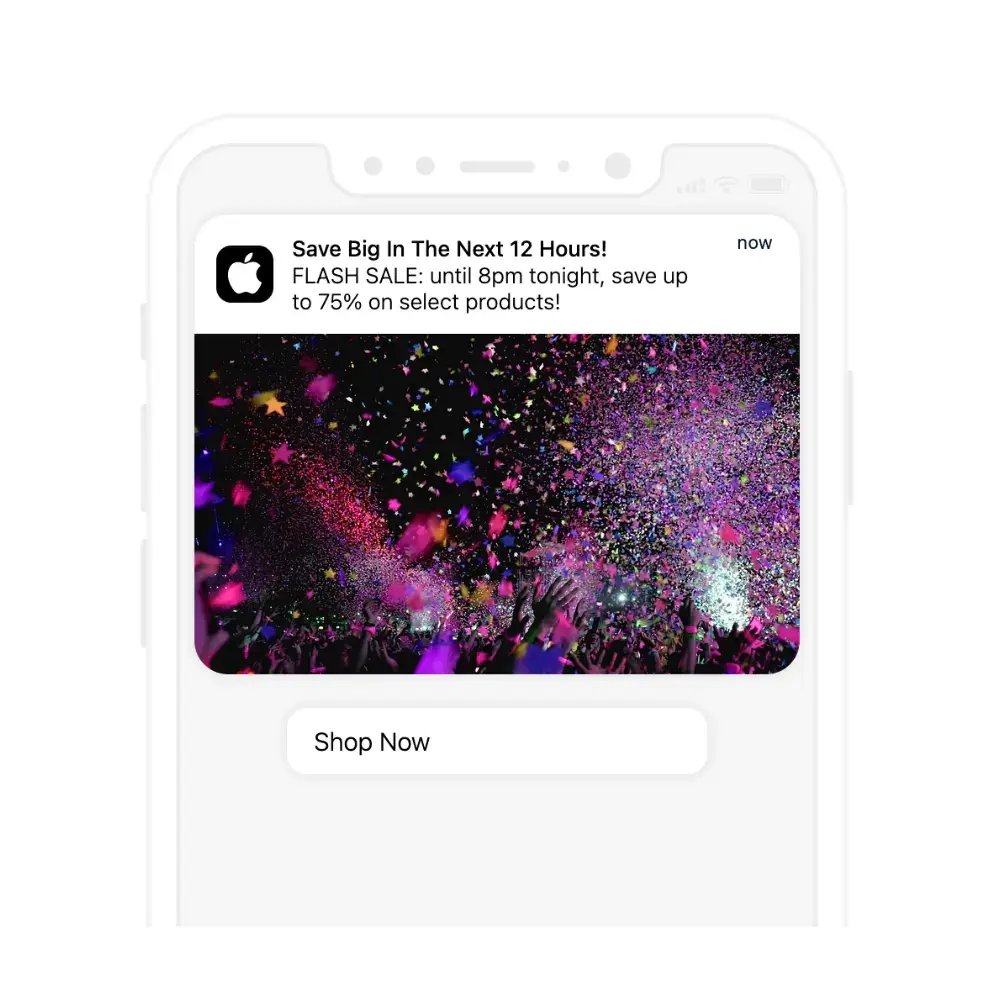
    10. Urgency and Exclusivity

    Using copywriting best practices will help your notifications to succeed. 

    In the frenetic, overloaded world of the customer’s lockscreen two psychological principles that can work well are urgency and exclusivity. 

    Getting noticed and triggering a quick response can be the difference between a sale and a missed opportunity, so here are some ways to create urgency:

    • Countdown timers: tell customers they’ve a limited window to act
    • Flash sales notifications: Announce sales that last for a few hours or a day at most
    • Last-chance reminders: Send a notification when the offer’s about to end

    Crafting these urgent messages is an art form that requires a balance – it’s important not to pressure users to the point where it becomes a turnoff.

    Exclusive deals to encourage immediate action

    Exclusive deals make customers feel special, like they’re part of an elite group. 

    This is an excellent technique for spurring action. Here are some examples:

    • Subscriber-only offers: create special discounts only for app users and promote them with push 
    • Early access to sales: give your push notification subscribers deals before they’re available to the public
    • Personalized discounts: send tailored offers based on the customer’s shopping history 

    By blending urgency and exclusivity, you may well see engagement and conversion rates soar. 

    Remember, the key to successful push notification best practices is to provide value immediately, not just sell products.

    Push notifications are one of the top reasons why a mobile app can be a game-changer for eCommerce brands. Check out how much your business could gain by launching an app, with our eCommerce App Revenue Calculator.

    Get Started with Push Notifications Today, with Vendrux

    So there you have it: ten crucial push notification best practices for eCommerce brands to follow, if they want to see results.

    If you’re not using push notifications yet, and need to get set up fast, we can help.

    Vendrux converts eCommerce web stores into high-end, conversion-driving eCommerce apps for iOS and Android. 

    Our apps preserve everything from your existing web store, combining what already works for the web with the best of native app UX.

    That means that your existing team (and ours) can take care of the apps, and there’s no need to spend big bucks hiring native app developers or agencies. 

    Plus, we build the apps for you, completely. 

    We also handle all ongoing updates and maintenance as part of our full service. The apps will hum along, make you money and grow your brand practically on autopilot. 

    We’ve built thousands of apps, including for some massive eCommerce brands with Billions in revenue.

    __wf_reserved_inherit

    Vendrux apps are as good as Amazon’s, but come at a tiny fraction of the price tag and maintenance overhead!

    All our apps also include unlimited push notifications, giving you the ability to print money with the most effective communication tool for modern eCommerce brands.

    Get started now – speak to a mobile app expert today and we’ll show you how easy it is to build an app and start harnessing the power of push notifications.

  • The Ultimate Guide to Holiday Push Notifications for eCommerce

    The Ultimate Guide to Holiday Push Notifications for eCommerce

    The holiday season is the most crucial time of the year for eCommerce stores. Consumers’ spending jumps significantly, and getting your piece of the pie is a great way to generate momentum (and cash flow) going into the new year.

    This guide will explain everything brands need to know to utilize push notifications, one of the most efficient and cost-effective communication channels, in their marketing over the holiday season. We’ll run through some general tips and best practices for push notifications, specific strategies to follow during the Christmas period, and then share some specific examples of push notifications to send.

    Keep reading to learn how to make this holiday season (and every holiday season to follow) a success for your brand.

    Holiday Season Shopping Stats: a Trillion-Dollar Pie for Retailers

    It’s not exactly breaking news that people spend more money during the holidays. But just how much?

    Some estimate that holiday sales amount to 20 percent of retailers’ total annual sales. Currently, holiday retail sales in the US total more than $950 billion, and are projected to reach $1 trillion soon. 

    Nearly one-quarter of Americans spend over $1,000 in the holiday season. 45% spend more than $600.

    There’s a lot of money to be had here, each year a bigger share of which goes to eCommerce, with an increasing number of people preferring to shop online than in-person.

    And of those people, many are gravitating towards mobile. During Cyber Week 2023, more than half of all online sales came on mobile.

    This is a big reason why push notifications should be a core part of your marketing strategy. They’re mobile-friendly, as well as being cheaper and more effective than email and SMS. 

    The personal, direct nature of push notifications helps you stand out in a day where so many brands are competing for consumers’ attention.

    We’re sharing these statistics to impress upon eCommerce brands the importance of getting your holiday marketing strategy right.

    Do it right, and you’ll be in line for a big windfall, and momentum you can use to invest in and grow your business in the new year.

    Do it wrong, and it could be the beginning of the end for your business, as you fall behind competing brands who nailed the holiday season.

    Foundational Principles of Push Notification Marketing

    Push notifications can be a huge driver of engagement and revenue for eCommerce brands, if you do them right.

    To help, we’ll share everything you need to know about marketing with push notifications. Later in the guide, we’ll look at some specific ways to approach push notification marketing during the holidays, but first some general best practices to follow in regards to push marketing, no matter the time of the year.

    Keep your copy concise

    You have limited space to work with in a push notification, so make the most of it. You generally have a little as 40 characters to get your message across and convince the user to click through. Practice writing effective micro-copy that fits the medium.

    Use clear CTAs

    Your push notifications should have a call to action, clearly telling the user what action you want them to take next. This should be clear, specific, and again, concise.

    Create a sense of urgency

    Once you have the user’s attention, you need to encourage them to act immediately, before their attention strays and they forget about your message.

    This is true throughout all forms of marketing, but particularly important for push notifications. If a user is interested, but doesn’t feel a sense of urgency about what you send, they’ll often dismiss the notification, where they’ll most likely forget about what you sent.

    Adding something like “act now” to your copy, or better yet, setting a deadline for the user (e.g. “save X% today only”, “this deal ends tomorrow”) will foster this feeling of urgency and result in more clicks/conversions from your notifications.

    Create a sense of intrigue

    Another important feeling to convey is one of intrigue, or making the user want to know more.

    Your goal when sending promotional push notifications is to get the user to click through to your site/app and give you their attention.

    Though you might show the user a great offer, which definitely interests them, it’s easy for it to slip their mind and not lead to anything, especially with push notifications, where the bulk of the user’s attention may be elsewhere.

    Yet if you stoke their curiosity, you can get them to click through from the notification to learn more, where you’ll be able to capture and hold their attention easier.

    It’s working along the same lines as the concept of urgency –  you want the user to act now, before other things fill their headspace and push your brand to the side.

    You’ll want to find the right balance between conveying enough information to get the user interested, while keeping them wanting more, to where they’re willing to move deeper into your sales funnel.

    Send at the right time

    Timing is important for push notifications. As we established when discussing the importance of urgency and intrigue, it’s really easy for someone to dismiss a push notification, tell themselves they’ll check back on it later, then forget about it.

    For eCommerce brands, you want to send notifications at a time when the user has the free time to browse your store and buy something.

    Though the hours of 12-2pm have been shown to have the highest CTR for push notifications, it’s hard to give a one size fits all answer for this. The best time to send push notifications depends on the industry, but can also differ from user to user.

    The best way to figure out when to send push notifications is to test. You’ll want to experiment with different timings and find out what seems to work best for your user base.

    Personalize your push notifications

    One key tip to make your push notifications more effective is to use personalization. Personalization has been shown to lead to as much as four times higher open rates.

    Use whatever information you have about your user to send them hyper-relevant, personal, targeted push notifications.

    Here are some ideas to personalize your notifications:

    • Use their name in the copy (Kate, get 50% off on your next purchase)
    • Use their location (These products are popular with shoppers in Columbus)
    • Use purchase history to send targeted product offers (Get this pair of shoes to go with the glasses you just bought)

    Of course, you don’t always need to call out personalization in the copy. Using someone’s name is a great way to make an offer feel like it’s personally crafted for that customer, but personalization is just as effective when the user doesn’t know it’s happening.

    This can mean segmenting users based on their interests, and sending different offers or messages to each segment.

    It could also mean personalizing the timing of your messages. If you have a lot of data to work from, you might be able to segment users into those who respond most to messages at night, and those who respond during the day.

    You can get really granular with personalization. The more personalized your push notifications are, the better your results are likely to be.

    A/B test and use what works

    Ultimately, we can give you a hundred tips and best practices for sending push notifications, but this advice won’t hold true for everyone. The only way to know for sure what works and what doesn’t is to test.

    You’ll want to run A/B tests for different variables, such as:

    • Different types of copy
    • Different CTAs
    • Rich content vs plain text
    • Timing
    • Different promotional methods (e.g. $ off vs % off vs BOGO)

    Find out what works, file away your findings, and stick with what produces the best results.

    Push Notification Strategies to Make Your Holiday Marketing Campaigns a Roaring Success

    The holidays are a great time to run promotions and market to your customers via push notifications. Unfortunately, every other brand is doing the same, creating a lot of competition for your customers’ attention (and their money!)

    Here are some tips to help you get better results during the holiday season from your push notification campaigns.

    Lean into the holiday spirit

    First, take advantage of the excitement surrounding the holidays, and really lean into the Christmas/holiday spirit.

    Sprinkle ho ho hos, Christmas-themed emojis and images that conjure the holiday spirit throughout your marketing campaigns and push notifications.

    The holidays come with a lot of positive emotions, and tapping into this emotion with your customers will result in a lot more engagement.

    Use past data to understand what works

    The best way to know how to shape your holiday marketing campaigns is to look back on past years.

    If it’s not your brand’s first holiday season, you should have insights as to what worked and what didn’t in years past.

    Replicate approaches that worked well, and steer away from approaches that didn’t produce results.

    Create specific segments for holiday shopping

    During the holidays, a lot of your customers aren’t necessarily shopping for themselves; they may be shopping for gifts for others.

    With that in mind, you might want to switch up your personalization for the holiday season. Instead of segmenting users based on all their past purchases, try looking back on what people purchased during the holidays in previous years.

    It could happen that you have a treasure trove of data on what your customers generally buy as gifts, allowing you to serve hyper-targeted product recommendations.

    When to start your holiday marketing campaigns

    There’s a lot of debate over when the ideal time is to start marketing for the holiday season.

    Some brands start as soon as Black Friday-Cyber Monday is over. Yet some start earlier, keeping in mind that many consumers do their holiday shopping earlier, often taking advantage of Cyber Week sales.

    You can generally feel comfortable starting any time from the start of November onwards.

    Don’t leave it too late; if you only start marketing for the holidays in the middle of December, a lot of people will have already done all their holiday shopping.

    However, you don’t want to use that as a reason to stop your holiday marketing campaigns early. There are still a lot of people out there who leave it to the last minute and don’t finish their holiday gift shopping until a few days before Christmas.

    This is a great opportunity for brands to send a “last minute gift ideas” push notification deep into December to capture a revenue boost from these shoppers.

    Use the holidays to deepen customer relationships and brand loyalty

    Don’t see the holiday shopping season as just a money grab. It can be an opportunity to build brand loyalty and cultivate deeper customer relationships, which pay off big in the long run.

    This could mean offering your customers a great deal in which you make little to no profit, or a free gift with no strings attached.

    It could simply mean sending a push notification to wish your customers a happy holiday season and a prosperous new year.

    Cut down on non-promotional notifications

    Though you may send a last-minute “happy holidays” notification, in general, if you regularly send non-promotional push notifications (e.g. sharing educational content), you might want to slow or pause these notifications during the holidays.

    Most brands will want to send a lot of promotional notifications during the holidays. If you send these, along with your regular, non-promotional notifications, your users can easily get overloaded.

    This could lead to negative effects, such as your push notifications getting ignored, or users disabling push notifications altogether.

    Finding the sweet spot where you message your customers regularly, but not too much, is important. Save space on your push notification schedule for campaigns with a high return during this time.

    Utilize abandoned cart notifications

    Abandoned cart notifications are super effective, and a must-use no matter the season. But it’s particularly important to run abandoned cart campaigns during the holidays.

    On average, 70% of eCommerce shopping carts are left abandoned, without the user finishing their purchase.

    You’ll likely have more traffic during the holidays, which means a higher total number of abandoned carts to try and reclaim.

    Realistically, you may actually have a higher abandonment rate during the holidays, as shoppers deal with more distractions and competition for attention is at a premium.

    Automated abandoned cart notifications are simple to set up, and can net you a big increase in revenue that would otherwise be lost.

    Run non-discount promotions to stand out

    Typically, your default marketing strategy during the holidays will likely be to promote discount promotions to your audience.

    This is not a bad way to go – a discount is an attractive, dependable incentive to boost sales.

    But if you want to stand out, consider doing something different. Aampe found that 81% of eCommerce push notifications contain a discount.

    During the holidays, 95% of eCommerce push notifications contain a discount.

    If you’re offering a discount, you’re going to blend in with the competition. If you can raise the curiosity of your customers with something else – such as a free gift, giveaway, bundle, product recommendations or gifting guides – you could be able to stand out from the crowd.

    Send product recommendations

    As just mentioned, product recommendations can be one way to do push notifications a little differently to other retailers. It can also be a really powerful way to provide value to your customers, and give them something they want more than just a discount.

    For some, money isn’t as much of a concern during the holiday season as the stress of wondering what to get for their loved ones.

    This presents a big pain point that you can solve. If you can recommend the perfect gift, you save a lot of work and a lot of stress for the customer, and will likely close the sale – potentially even at full price.

    This is not just a hypothesis – push notifications work. Aampe studied 1.2 million messages, sent to 800,000 users, and found that messages with product recommendations drove 300% as many clicks and 289% more checkout events.

    A report by Salesforce found that product recommendations drove 7% of visits to eCommerce sites, but drove 24% of orders and 26% of revenue.

    Combining product recommendations with personalization, as we discussed earlier, can be the backbone for a holiday marketing campaign that takes your revenue to a whole new level.

    21 Push Notification Examples for the Holiday Season

    If you’re looking for inspiration for how to send push notifications to your customers during the holiday season, here are 21 examples for you to work with.

    Discount

    The most straightforward way to run a promotion during the holidays is to offer a discount to your customers – and push notifications are the ideal medium to let your loyal shoppers know about it.

    Free shipping

    If you want to offer something a little different, run a free shipping promotion. The idea of free shipping just hits different, even if it’s the same or less value than a straight up monetary discount.

    BOGO

    Another promotion idea is a Buy One, Get One (BOGO) promotion. These promotions are super effective for consumable products, as they can easily lead to repeat purchases and an increase in customer lifetime value (CLV).

    Abandoned cart

    There’s no question, you should be sending abandoned cart push notifications over the holidays. Just set up your automation, let it run passively, and you can easily recover 10-15% of orders that would otherwise have been lost.

    Flash sale

    Flash sales are great because they automatically create a sense of urgency, encouraging the customer to act immediately, before the deal expires. Push notifications are particularly well-suited for flash sales, as they’re generally seen by the customer right away, allowing you to run very quick sales (as little as a few hours) and maximize urgency.

    Deal of the week

    A deal of the week promotion is another way to stimulate urgency and scarcity (deal of the day works great too). The best part is that you can personalize this for different customer segments, showing hyper-targeted deals to each customer.

    Bundle offer

    Bundles are a tried and tested way to increase average order value. You can offer customers extra value if they buy several products together, or just cross-sell complementary products can capture more revenue from each buyer.

    Giveaway/contest

    Giveaways and contests tend to deliver an excellent ROI, as well as generating a sense of excitement and boosting visibility for your brand. You can enter all customers in the draw to win a prize, run a “spin to win” type of contest, or get creative. This is an excellent idea if you want to stand out from all the competition who just offer a straight discount.

    Free gift

    A free gift during the holidays is the perfect token of appreciation for your best, most loyal customers. It could be a gift with purchase (make any purchase and you give them something for free), or even a gift with no strings attached, just to say thanks.

    Holiday gift guide

    The one thing many of us want more than a discount during the holiday season is inspiration for what to buy for our loved ones. A gift guide, offering different ideas for different members of the family, costs basically nothing to create, yet delivers a ton of value. You could also sweeten it with promotions for your top gift ideas.

    Personalized gift recommendations

    If you’ve got the data, you can get personal with your gift recommendations. If you know that certain customers are likely to be shopping for their parents, brother, sister, spouse or kids, you can make their life a lot easier, and close the sale as a result.

    Gifts under $X

    Another great idea to get more specific with gift ideas is to recommend products under a certain amount, helping your customers stick within their desired budget.

    Stocking stuffers

    Stocking stuffers are a perfect opportunity to up-sell and increase revenue with small, cheap, quirky products that are a good fit for the family’s xmas stockings.

    Gift ideas for ____

    Create gift guides targeted at different individuals – “Gift Ideas for Dad”, “Gift Ideas for Mom”, “Outdoorsy Gift Ideas”, “Gift Ideas for Sport Lovers”. Pair this with personalization for amazing results.

    Gift cards

    For the people who are impossible to buy for, there are always gift cards. If you offer gift cards, send a push notification to your users reminding them about this as a great fallback if they can’t decide on the perfect gift idea.

    Last minute gift ideas

    A “last minute gift ideas” notification is a great way to capture revenue from those who leave their holiday shopping late. These people are likely to be scrambling to find something for their loved ones before it’s too late, making them more likely to take you up on your suggestions.

    Last minute promotion

    You can also run last minute promotions, and let money do the talking for those who are still shopping for gifts and want to keep their Christmas shopping on-budget.

    Stock alert

    Use stock levels to your advantage, by creating an air of scarcity that encourages people to act fast. This could be a notification that certain products are running low on stock, pushing customers to buy before there’s none left, or a notification that products are back in stock, with the implication that stocks will only last for a limited time.

    Christmas delivery schedule/holiday countdown

    One of the biggest anxieties facing those who do their holiday shopping online is whether or not their gifts will arrive in time. Send a push notification telling customers that there’s still time to order a product and get it in time for Christmas, and use this urgency to drive sales.

    Shipping & delivery notification

    Once someone’s made a purchase, they’ll still feel that anxiety over whether it’s going to arrive in time, up until the parcel lands on their doorstep. Put your customers at ease (and reduce the chance of people getting worried and canceling their order) by providing updates on the delivery status.

    Thank you/happy holidays

    Finally, this push notification requires little effort, no discounts, no free gifts or giveaways. Just a notification to say thank you to your customers and wish them a happy holidays. 

    Mobile vs Web: How to Unlock the Full Power of Push Notifications

    There are different ways to send push notifications. You can send push notifications on desktop via web browsers, on mobile via web browsers, or send mobile push notifications through your mobile app.

    There’s no question, mobile apps give you the best use and full power of push notifications.

    • Mobile is the ideal platform for push notifications, allowing you to reach your customers at any time, wherever they are.
    • More than half of all Black Friday-Cyber Monday online sales in 2023 came on mobile, proving that mobile is becoming most peoples’ favorite way to shop.
    • Apps allow you to reach all users on all devices (some browsers/operating systems don’t support mobile web push notifications).
    • Apps give you more options for personalization and segmentation.

    If your brand has an app, you’ll want to send your push notifications from the app.

    If you don’t have an app yet, check out Vendrux. Vendrux lets you convert your eCommerce store into an app for a minimal investment in time and money, with no technical expertise required.

    Examples of eCommerce apps built with Vendrux

    Our team handles everything for you, fully converting your website to native apps, complete with all your existing apps, integrations, plugins and features.

    It’s fully synced with your web store, and requires little to no upkeep and maintenance from you, letting you benefit from an app store presence, plus the full power of push notifications, without major changes to your workflow.

    If you want to level up your mobile revenue and build a retention machine, get started with a free preview of our app, or get in touch with us now and talk to one of our experts about how Vendrux can help.

  • Ten Headless Ecommerce Platforms Powering Agile Online Brands in 2026

    Ten Headless Ecommerce Platforms Powering Agile Online Brands in 2026

    Headless ecommerce platforms provide the backend commerce engine (products, inventory, pricing, checkout, orders) while leaving the frontend entirely up to you. 

    It’s a modern, and (arguably) more flexible way to build an online store; instead of being locked into a theme or template system, you build whatever storefront you want and connect it to the backend via APIs.

    The platforms on this list range from traditional ecommerce platforms that now offer headless capabilities to purpose-built headless-first systems designed around APIs from the ground up. 

    Some are best for mid-market DTC brands; others are built for enterprise-scale operations with complex requirements.

    Read more: The Top Examples of Headless Commerce from Major Brands

    Ten Popular Headless Commerce Platforms in 2026

    Maybe you’re thinking of going headless. Perhaps you’ve made the decision already, you’re just looking for the right platform.

    It makes sense to take your time and do your research – after all, this is the foundation of your digital storefront we’re talking about.

    We work with numerous ecommerce brands, of various scales, operating on headless platforms. With that as a starting point, plus extensive research into the landscape, we gathered a list of contenders and assessed each platform on:

    • Headless architecture quality: API depth, frontend flexibility, developer experience
    • Ease of adoption: How much development work is required to go headless
    • Ecosystem: App/integration availability, developer community, third-party support
    • Pricing transparency: Whether you can evaluate cost without a sales call
    • Scale fit: Which business size and complexity level the platform serves best

    You’ll want to do your own research in parallel, of course, but this should give you a good starting point for picking the right platform for your brand.

    Now let’s dive deeper.

    1. Shopify Plus (Hydrogen/Oxygen)

    shopify headless ecommerce platform

    Best for: Shopify merchants who want full frontend control without leaving the Shopify ecosystem

    Shopify’s headless offering is built around Hydrogen (a React-based storefront framework) and Oxygen (Shopify’s global hosting for Hydrogen apps). Shopify Plus itself is not exclusively a headless platform; but it offers the option to go headless.

    If you’re already on Shopify Plus, going headless doesn’t mean migrating to a new platform. It means replacing your Liquid theme with a custom React frontend while keeping Shopify’s backend running your commerce operations.

    The Storefront API (GraphQL) provides access to products, collections, carts, and customer data. Checkout is managed by Shopify’s hosted checkout, which has been expanded through checkout extensibility to allow more customization than before.

    The developer ecosystem is Shopify’s biggest advantage here. Finding React developers who can work with Hydrogen is easier than finding specialists for most other headless platforms. Shopify’s documentation, starter templates, and community support are strong.

    For a deeper look at when Hydrogen makes sense (and when it doesn’t), see our Shopify headless commerce guide.

    Pricing: Shopify Plus starts at $2,300/month. Hydrogen and Oxygen are included at no additional hosting cost.

    Key strength: Lowest-friction path to headless for existing Shopify merchants.

    2. Commercetools

    commercetools - headless ecommerce platform

    Best for: Enterprise brands building a fully composable commerce stack

    Commercetools is headless-first. There’s no built-in frontend, no theme editor, no “standard” way to build a storefront. Everything is accessed through APIs, and the platform is designed to be one component in a larger composable architecture.

    This makes it extremely flexible but also more complex to implement than platforms like Shopify or BigCommerce. You’ll need experienced developers (or a systems integrator) to build the frontend, integrate a CMS, set up search, and configure the rest of the stack.

    Where Commercetools shines is backend flexibility. Custom data models, complex pricing logic (multi-currency, B2B tiered pricing, market-specific rules), and multi-tenant architectures are natively supported. 

    It’s a MACH Alliance certified platform built for the kind of complexity that enterprise brands deal with.

    The 60-day free trial lets you evaluate the platform before committing to a custom quote.

    Pricing: Custom pricing (60-day free trial available).

    Key strength: The deepest backend flexibility for enterprise-scale composable architectures.

    3. BigCommerce

    bigcommerce headless platform

    Best for: Mid-market brands that want headless flexibility with more out-of-the-box functionality than a headless-first platform

    BigCommerce’s headless approach lets you use the platform’s backend (products, checkout, orders) with any frontend framework. They support Next.js, Nuxt.js, and Gatsby.js with official starter kits, and integrate with headless CMS platforms like WordPress, Contentful, and Prismic.

    The advantage over a pure headless-first platform like Commercetools is that BigCommerce gives you more out of the box: 

    • A capable product management system
    • Built-in checkout
    • Native features (multi-storefront, multi-currency, complex catalog support) that would need custom development on a headless-first platform.

    The advantage over standard BigCommerce is full frontend control. If your brand has outgrown BigCommerce’s built-in themes but doesn’t want to migrate off the platform, headless is the middle path.

    API support is extensive, covering catalog, cart, checkout, customer, and order management. The developer community is smaller than Shopify’s but active, and BigCommerce’s support team is well-regarded in reviews.

    Pricing: Enterprise plans are custom-quoted. Standard plans with API access start at $29/month, though headless implementations typically require Enterprise.

    Key strength: A balanced blend of headless flexibility and built-in commerce features.

    4. Adobe Commerce (Magento)

    magento headless for ecommerce

    Best for: Large enterprises that need deep customization and are already in the Adobe ecosystem

    Adobe Commerce (formerly Magento) has been a major ecommerce platform for over a decade, and its headless capabilities have expanded significantly. The platform offers GraphQL APIs for storefront data, PWA Studio for progressive web app development, and integration with Adobe Experience Manager for enterprise-grade content management.

    The customization depth is Adobe Commerce’s core strength. With access to the full codebase (especially on the open-source Magento version), developers can modify virtually anything. 

    This same depth is its challenge: implementations are complex, expensive, and typically require specialized Magento developers or a certified agency.

    Adobe Commerce headless makes the most sense for brands already invested in the Adobe ecosystem (Experience Manager, Analytics, Target) where the platform integrations add compounding value.

    Pricing: Adobe Commerce Cloud pricing is custom-quoted and typically starts well into six figures annually. The open-source Magento version is free but requires self-hosting and significant development investment.

    Key strength: Unmatched customization depth for enterprise brands in the Adobe ecosystem.

    5. Salesforce Commerce Cloud

    Best for: Enterprise organizations already embedded in the Salesforce ecosystem

    Salesforce Commerce Cloud (formerly Demandware for B2C, CloudCraze for B2B) is the natural headless option for businesses running Salesforce CRM, Marketing Cloud, and Service Cloud. 

    The native integration between commerce and CRM data is its defining advantage: customer purchase history, service interactions, and marketing engagement all inform the commerce experience.

    The platform comes with comprehensive APIs and supports flexible frontend framework selection. Commerce Cloud’s B2C and B2B capabilities are both strong, making it a fit for brands selling to both consumers and businesses.

    The pricing model is revenue-based (a percentage of gross merchandise value), which aligns cost with performance but can become expensive at scale. Implementation typically requires Salesforce-certified partners.

    Pricing: Revenue-based pricing (historically ~1-3% of GMV for B2C). Contact for current pricing.

    Key strength: Native CRM integration for brands already in the Salesforce ecosystem.

    6. Fabric

    headless ecommerce platform - fabric

    Best for: Brands looking for a modular, API-first commerce platform that covers the full customer journey

    Fabric positions itself as a modular commerce platform covering everything from merchandising to fulfillment. Its API-first architecture is designed for both B2B and B2C implementations, with a focus on reducing the development overhead typically associated with headless builds.

    The platform includes modules for product information management (PIM), offers and promotions, orders, and inventory, all accessible via APIs. Fabric’s pitch is that you get the flexibility of headless with less complexity than assembling a fully composable stack from independent vendors.

    It’s a newer entrant compared to Shopify or Adobe Commerce, so the ecosystem is smaller. But for brands that want a single vendor covering the commerce backend modularly (without the weight of a legacy platform), Fabric is worth evaluating.

    Pricing: Custom pricing (demo required).

    Key strength: Modular API-first platform that covers more of the commerce backend than most headless-first options.

    7. Spryker

    spryker headless ecommerce platform

    Best for: Enterprise B2B and B2C brands with complex, multi-channel commerce requirements

    Spryker’s fully composable architecture comes with over 900 API endpoints (built on its GLUE API layer), giving developers extensive access to every part of the commerce system. 

    The platform supports B2B, B2C, and marketplace models, making it one of the more versatile enterprise options.

    Spryker is fairly popular in European enterprise markets and is particularly strong for brands with complex B2B workflows (custom pricing, quote management, approval flows) alongside consumer-facing commerce.

    The platform requires significant development investment to implement, and the ecosystem is more specialized than Shopify’s or BigCommerce’s. It’s an enterprise tool designed for enterprise teams.

    Pricing: Enterprise pricing (contact required).

    Key strength: B2B + B2C versatility with deep API coverage for complex enterprise requirements.

    8. Medusa

    Best for: Developer teams that want a fully open-source, customizable headless commerce engine

    Medusa is an open-source headless commerce platform built on Node.js. It’s designed for developers who want full control over every aspect of the commerce backend without vendor lock-in or licensing fees.

    The platform provides APIs for products, orders, customers, carts, and payments out of the box, with an extensible plugin architecture for adding functionality. It’s particularly appealing for brands with strong in-house development teams that want to own their commerce infrastructure entirely.

    The tradeoff is that you’re responsible for hosting, scaling, maintenance, and building everything that proprietary platforms include by default. There’s no managed checkout, no built-in payment processing, no customer support team to call when something breaks.

    Pricing: Free and open-source. Costs are infrastructure and development.

    Key strength: Full ownership of the commerce backend with no licensing fees.

    9. Saleor

    Best for: Brands that want an open-source, GraphQL-native headless commerce platform

    Saleor is another open-source headless option, distinguished by its GraphQL-native architecture. Every interaction with the platform goes through GraphQL (not REST), which aligns well with modern frontend frameworks that use GraphQL natively.

    Saleor includes a dashboard for product and order management and offers Saleor Cloud as a managed hosting option for teams that don’t want to handle infrastructure themselves. The platform supports multi-channel, multi-warehouse, and multi-currency out of the box.

    Like Medusa, Saleor requires a development team to implement. The open-source version is free; the cloud-hosted version is priced based on usage.

    Pricing: Open-source version is free. Saleor Cloud pricing is usage-based.

    Key strength: GraphQL-native architecture with the option of managed cloud hosting.

    10. Centra

    centra - headless ecommerce platform

    Best for: Fashion and luxury brands with multi-market requirements

    Centra is a headless commerce platform built specifically for fashion and lifestyle brands. Its core strengths are multi-language, multi-currency, and multi-region support without the plugin complexity that most general-purpose platforms require for international selling.

    The API-first approach gives developers full frontend flexibility while the backend handles the complexities of international fashion commerce: wholesale (B2B) alongside DTC, complex size/variant matrices, and market-specific pricing.

    Pricing: Custom pricing (demo required).

    How to Choose the Right Headless Ecommerce Platform

    The decision usually comes down to three questions:

    Are you already on a platform? If you’re on Shopify Plus, going headless with Hydrogen is the simplest path. If you’re on BigCommerce, Adobe Commerce, or Salesforce, their headless capabilities keep you in your existing ecosystem. Migrating platforms AND going headless at the same time doubles the project scope.

    How complex is your commerce operation? Simple DTC catalog on Shopify? Hydrogen or even a well-optimized standard theme might be enough. Multi-brand, multi-market, B2B+B2C? You’re looking at Commercetools, Spryker, or Salesforce Commerce Cloud.

    What’s your team’s technical capacity? Headless-first platforms (Commercetools, Medusa, Saleor) require strong development teams. Platforms with headless options (Shopify, BigCommerce) offer a gentler on-ramp because you can lean on the platform’s built-in capabilities while building out the frontend.

    Ultimately, we can’t tell you what the best headless platform is. It’s down to what offers the best fit for you, business-wise.

    But this should give you a good idea of the options, and a solid foundation to zero in on the top contenders to evaluate in more detail.

    Headless Site to Mobile Apps

    One thing to keep in mind as you search for the right headless commerce platform: how you’re going to extend your storefront to mobile apps.

    A common misconception about headless is that it makes it simple to launch both a web storefront and an app.

    Technically, yes, it’s easier than with rigid, packaged platforms. But it still requires a lot of custom development (from developers with different skillsets from your web team), and a lot of complexity and moving parts.

    Or you can use Vendrux.

    Vendrux works with any headless platform on this list. It takes the web storefront you’ve built (regardless of which backend powers it) and delivers it as a native mobile app with push notifications, deep linking, App Store distribution and a home screen icon.

    It’s just an easier, more efficient way to build a mobile app for your headless site, compared to building and managing a separate frontend in React Native/Flutter/Swift/Kotlin.

    For a detailed look at how mobile apps work with headless architecture, see our guide to headless commerce mobile apps.

    Ready to see your headless storefront as a native app? Want to discuss how the platforms you’re looking at fit with apps? Book a free strategy call and talk it over with our mobile app experts.

  • How to Ensure Your Mobile App Meets GDPR Compliance Standards

    How to Ensure Your Mobile App Meets GDPR Compliance Standards

    What is the GDPR?

    GDPR stands for the General Data Protection Regulation.

    The GDPR will be enforceable from the 25th of May 2018. It is designed to protect user data storage and usage, and to ensure that the user is in control of their data, rather than companies being in charge of user data.

    Key GDPR Definitions

    To help you understand the GDPR for apps, there are a few key definitions that we will refer to throughout this article.

    Data Controller: A Data Controller is the entity that determines the purposes for and means of collecting and processing personal data. If you own a website or mobile app, and you’re deciding what is collected, how it is collected, and for what purpose, you are a Data Controller.

    Data Processor: A Data Processor is an organization that processes personal data on behalf of a data controller. For example, third-party services that plug into your website or app, such as Analytics (Google Analytics, KISSMetrics), Cloud Services (AWS), that access or host your customer data.

    Data subject: a natural person whose data is processed. For example, an app user or a website visitor.

    For a full list of GDPR definitions, you can read the Article 4 of the regulation.

    Does the GDPR affect me?

    Most likely, yes!

    The GDPR applies to all businesses with customers, or website/mobile app visitors who are from the European Union (EU). This means that any organization in the world that works with EU residents’ personal data in any manner has obligations to protect their users’ data and be GDPR compliant.

    What does “Personal Data” refer to under the GDPR?

    Personal Data” under the GDPR includes any information relating to an identifiable person who can be directly or indirectly identified in particular by reference to an identifier.

    The scope of this is broad, and includes anything from personal information, to a cookie placed on someone’s browser by an analytics tracking tool you might use to track your website usage.

    For your website or apps, this means you have to be considering how you collect and store personal identifying details such as names and email addresses, but also consider things such as users’ IP addresses and device IDs (unique IDs that devices share with external SDKs for ads and analytics).

    What does the GDPR mean for your mobile app?

    The fines for not being GDPR compliant are high – either 4% of annual global turnover or €20 million (whichever is greater!).

    With GDPR compliance becoming a requirement for every business with either customers or website visitors, or app users in the EU, you’re probably concerned about whether or not your mobile app is GDPR compliant.

    As a mobile app publisher, you will need to understand how you obtain, transfer, store, and handle your user data. You should take some time to understand exactly how you currently ensure data security for your users, and what you can do to improve this in order to have a GDPR compliant mobile app.

    Cennydd Bowles sums up why you should be compliant, even if it may be a lot of work initially:

    “You may end up with less rich customer insights than you had before. Some KPIs may slump. But for companies that have direct customer relationships, it’s all manageable, and on the upside you not only reduce your compliance risk but benefit from the increased trust your customers will show in you and the online world in general.”

    There are some key highlights that are relevant to your mobile app and business in general that will help you ensure GDPR compliance.
    Scroll down to find the 9 things you should consider in order to have a GDPR compliant mobile app.

    1. Privacy by Design

    Privacy by Design is now a legal requirement under the GDPR. From the moment you start creating your mobile app, you should be considering your users’ privacy.

    According to GDPR Article 23, your app must only hold and process user data that is absolutely necessary.

    This means that when you’re developing your mobile app, or having a third party develop it, you need to consider data protection and user privacy.

    Privacy by Design is not a new concept and pertains to thinking of your users data privacy in your app, website, or software from the very start, rather than leaving it as an afterthought. The idea of privacy by design includes deciding what data you need, and what data you don’t.

    In Brian Pagan’s overview to designing apps with privacy in mind, he asks if you really need a users name AND date of birth. In many cases, just one of these fields is enough. He writes:“the risk of someone opening a credit card in my name far outweighs the benefit of getting that “happy birthday” spam marketing e-mail from your company.”

    It’s worth considering all options when designing and building your mobile app.

    As well as being a legal requirement, your app users will appreciate the extra privacy considerations you have in place for their benefit!

    Our Recommendation:

    Think about your user data from the very start, and don’t let it be an afterthought.

    If pages from your website are loading within your mobile app (e.g. a contact form), consider the data collection happening on the website when reviewing your app.

    You should be thinking about Privacy By Design when you’re creating new features, or creating a new page on your app in order to remain GDPR compliant.

    As well as this, you should encrypt personal data with strong encryption algorithms. This will help you minimise the impact of a data breach.

    2. Ask for Explicit Consent

    Under the GDPR, businesses must request and receive user consent in order to collect, use, and move personal data.

    This includes data collected for advertising, analytics, crash logging or anything else. The opt-in must be understandable and clear. You won’t be able to get away with confusing Terms and Conditions that no one is likely to read or fully understand.

    Explicit Consent can be granted easily through an opt-in screen when your app launches. Your app users chose to download your app in the first place, so the likelihood is, most people will be happy to grant consent in order to use your app and receive further communications from your business, provided the recipient can see a benefit.

    Your users must also be able to withdraw consent as easily as they are able to give it. You may need to update your Privacy Policy to address this, and add another page on your website where users can opt-out.

    Our Recommendation:

    When someone registers on your mobile app, they should be asked to opt-in to have their data collected, or to receive communications, such as emails or Push Notifications. We highly recommend showing a consent screen on app launch, as this is the only way to be fully GDPR compliant. You should also notify users on these screens exactly where their data will be used. For example, will they be tracked in Google Analytics, or have data sent to Google Admob to show them relevant ads? Your users need to know, and it’s your obligation to inform them as soon as they begin using your GDPR compliant mobile app!

    As well as this, your GDPR compliant mobile app should have a dedicated page where users can opt out of communications from you, or ask for their data to be removed from them.

    Vendrux provides mobile apps with a Push Notification settings page, which helps at least for what concerns your app’s notifications.

    3. Providing Visibility and Transparency

    One of the most important aspects of GDPR is how the data you collect is actually used. If you are a data controller, you need to be aware of how your users can effectively manage, and protect their user data.

    Proving visibility and transparency through a clear, and understandable Privacy Policy not only benefits the users of your mobile app, but it’s a requirement from the App Stores. Google will remove your app if they can’t find a Privacy Policy on your Play Store’s profile page and accessible inside your app.

    You should also provide information to your users over which third parties you are using to collect or process user data.

    For example, if your app connects to external services such as user analytics solutions (e.g. Google Analytics, Fabric), advertising providers (e.g. Admob, MoPub), or push notification providers (e.g. Firebase, OneSignal), you should disclose this to users clearly in your Privacy Policy.

    You should also make sure that all third-party providers which collect any user data are GDPR compliant. They’ll be “data processors”, while you remain the “data controller”. As such you should have written agreements in place which meet the level of assurances in terms of data protection and security which GDPR requires. For some of them, you’ll be able to sign data processing agreements which add the required wording to the existing terms of your agreement.

    Our Recommendation:

    Create or update your app’s Privacy Policy page for your mobile app. You may choose to have a Sidebar or Menu item that links to the legal terms of your mobile app.

    This will enable users to easily find, read, and understand how your mobile app is using their data.

    If you’ve built your app based on your website’s content and you’re using Vendrux, this is very simple and can be done by adding a link to your app’s menu from the Menu Configuration tab in your app’s settings.

    4. Respond to User Requests

    If someone asks how you are using their data, under GDPR you are legally obligated to respond to them. This is called a Subject Access Request.

    A Subject Access Request may be done physically, or digitally. When a user asks for information about their data or a copy of their data that is used in your mobile app, you have one month to respond. For complicated requests, you will have up to three months to respond.

    This may sound like you’ll need to invest more time and effort into customer service, but if your business is set up to have GDPR compliant processes, it shouldn’t take too much of your time. At the end of the day, providing high quality customer service to your customers and mobile app users is a good thing!
    Initially you can respond to these ad-hoc, but eventually you’ll want to have an internal process to generate a response for this sort of request.

    Our Recommendation:

    Create a page on both your website and mobile app that includes your business contact information. This will allow users to contact you easily, and provide transparency from your side. Make an effort to respond quickly and clearly to all Subject Access Requests.

    5. The Right to Be Forgotten

    Article 17 of the GDPR highlights the Right to Erasure, or the “right to be forgotten”. This means that when a user asks you to remove their data acquired through your website or mobile app, you are obligated to remove every personal detail you hold about them in all systems, whether you control their data directly or through a tool or SaaS you use in your app (for example, Google Analytics).

    If you want your mobile app to be GDPR compliant, you could choose to provide solutions such as deleting user data from your own database directly from the app, or having a simple contact form or dedicated page where a user can request their data to be erased.

    Our Recommendation:

    Be transparent and allow users to easily contact you about erasing their data. When someone asks for their data to be erased, take the request seriously and comply with the request on every system you control.

    You are also obligated to notify Third Party Data Processors that the data must be deleted from their servers too. This can be done through calling an API of theirs that allows for the deletion of personal data (if this is made available by the provider).

    6. Review services and SDKs you use

    If your app sends personal data to an external service for processing (e.g. to analyse app usage), you need to be clear and transparent about where this is, and who will be in control of the transferred data.

    Then, you should sign Data Processing Agreements (DPAs) with your data processors. Written contracts between your business and your data processors will be a general requirement under the GDPR. The sooner you get this done, the better!

    Don’t assume that all Third Parties and SDKs connected to your app are GDPR compliant. If there is a data breach on one of your Third Parties that leads to your user data being exposed, you are responsible.

    It is the responsibility of the data controller, in this case, you, the app publisher, to ensure that all Third Party data processes are GDPR compliant, and have appropriate data security measures in place. To ensure this, you should talk to your third party partners directly, ask them about their latest Privacy Policy and Terms and what they’re doing for GDPR compliance.

    You should thoroughly analyse the vendors who process your data, and take time to understand whether or not they are GDPR compliant. If they’re US based, are they registered under the EU-US Privacy Shield Framework? Any business can self-certify under this, and having this certification is required for that vendor to be GDPR compliant.

    It’s worth the time it takes – Marcus Turner, CTO of Enola Labs says that:

    Ultimately, higher levels of cyber security are a necessary and worthwhile investment for business owners that care about protecting their customers and safeguarding their business. I often tell businesses that they can pay an upfront cost now to protect their data, or wait until a cyber security attack and pay an even bigger price later to clean up the mess. Waiting may very well cost you your business“.

    So, make sure you take the time to review your technology suppliers and invest in necessary ones that will help safeguard your business from being in breach of the GDPR.

    Our Recommendation:

    You should only have contracts with providers who can provide ‘sufficient guarantee’s that GDPR requirements will be met, and your users’ data is sufficiently protected.

    Many vendors will have GDPR pages on their website, or have updated their Privacy Policy or Terms and Conditions to ensure GDPR compliance. You should familiarize yourself with this, or talk to someone from their support or legal team to understand if they are GDPR compliant or not.

    7. Data Breach Notifications

    To increase trust between customers and businesses, and in the wake of notable data breaches from companies such as Yahoo!, Uber, Equifax and more, the GDPR is enforcing tighter deadlines for businesses to notify national supervisory authorities and their users. Disclosure must happen within 72 hours.

    To ensure this is possible for your business, you may need to invest in technology to ensure continuous surveillance of your data, and that notifies you when risks are present. You should also establish a clear procedure about how you will react to a data breach – including how you will inform users, and how you will protect their data.

    Our Recommendation:

    Establish a clear step by step process that you can use in case of a data breach that includes how you will inform users and national supervisory authorities of the breach.

    8. Appointing a Data Protection Officer

    Your company may need to appoint a Data Protection Officer (DPO) in order to be GDPR compliant. This applies to you if:

    • You are a public authority (except for courts acting in their judicial capacity);
    • Your core activities require large-scale, regular and systematic monitoring of individuals (for example, online behaviour tracking); or
    • Your core activities consist of large-scale processing of special categories of data or data relating to criminal convictions and offences.

    While this may not apply to all readers, if your website or mobile app processes large amounts of individual data you should be considering whether or not you need a Data Protection Officer to help you monitor internal compliance, inform and advise on your businesses data protection obligations, and act as a contact point for data subjects (i.e. your users) and supervisory authorities.

    Our Recommendation:

    Assess whether or not your business needs a DPO in order to be compliant. If so you should appoint one, and inform your website or mobile app users of how they can contact your DPO.

    9. Encryption and data storage

    Your mobile application should use SSL or HTTPS for external communications. When communicating personal information of any kind, that data must be encrypted. Not encrypting data means that information sent will be in clear text and will be exposed over the internet.

    If you built an app that connects to your website or web servers and transmits sensitive data (e.g. a username/password), you should verify that you’re using SSL for all connections from your app.

    Encryption is not only relevant for external communications. All data that your mobile app collects should be stored in a safe place and, and your backups should also be encrypted. Users should also know how long their data will be retained for.

    Our Recommendation:

    Ensure that your app uses secure communications through SSL and HTTPs, and make sure your SSL certificate has been properly deployed.
    All data stored should use encryption, and you should provide transparency to data subjects over how long you retain this data for.

    10. Log and Justify Your Data Collection

    Article 30 of the GDPR outlines that each data controller, or representative of the controller, “shall maintain a record of processing activities under its responsibility”

    This means that in order to ensure your GDPR compliance, you should start documenting all the data that you collect (either yourself, or through a third party).

    You should create a secure, comprehensive log of your data collection activities.

    For a good example of how to do this, we would recommend reading Step 1 of Startup Resources guide to GDPR compliance.

    This log should include all and any kind of personal data that you are collecting on website visitors and users. From people’s names (if collected) to IP addresses to the country they’re located in.

    Then, you should justify why you’re collecting this data. You need to identify where you’re storing it, how long it is stored for, how can the data collection be justified, and more.

    Our recommendation:

    Make sure you’re fully aware of every kind of user data that you’re collecting and ensure you can justify why you’re collecting it.

    Clear, complete documentation that you can refer back to will not only help you when customers or users ask about your GDPR policies but ensure regulatory compliance and safeguard both your business and mobile app.

    Wrapping Up

    GDPR is a legal requirement, and unavoidable for any business that interacts in any way with people and customers in the EU.

    Anyone whose data is processed must be able to exercise their rights over their data, even if it is in your control.

    You will need to have a GDPR compliant mobile app. Without ensuring compliance, you risk large fines and losing the trust that your customers have in your business! For this reason, creating a process to ensure compliance for your business and mobile app, should be a priority for you.

    We believe you should not see the GDPR as a headache, despite its strict rules. Providing your users with a GDPR compliant mobile app will let them know that you value them, and are committed to their data security. For many businesses, ensuring compliance will be a value-add, and make your users trust your mobile app, so you should embrace it!

    If you want to learn more about GDPR, we have included links to several resources below:

    If your website is GDPR compliant and you’re looking to build a GDPR compliant mobile app, Vendrux offers a solution that will be GDPR compliant, and provide your business with a new platform for user engagement and reach.

    Get started with a free preview of your app or, get in touch with one of our experts to learn more about how Vendrux works.

  • How to Get Your App Featured on Apple’s App Store

    How to Get Your App Featured on Apple’s App Store

    Getting featured on the App Store can transform your app’s trajectory overnight.

    I’ve helped launch dozens of apps, and I can tell you that in 2026, with thousands of submissions flooding Apple’s gates daily, the game has changed.

    But the fundamentals? They’re still gold.

    Ratings matter

    Your rating should be sitting at 4.5 stars or higher – anything less and you’re fighting an uphill battle. But here’s the part most miss: it’s not just about the average rating. You need a steady stream of recent positive reviews.

    Set up an intelligent review prompt system. The key word here is intelligent.

    Don’t ask for reviews randomly. Trigger your prompt after success moments – when users complete a task, achieve a goal, or receive value from your app.

    For a task management app, that might be after they complete their fifth task. For a fitness app, maybe after their third workout.

    Your update cadence matters more than you think.

    Establish a regular release cycle. Each update should mix bug fixes with meaningful improvements. Don’t just fix things; enhance things. Show Apple and your users that your app is alive and evolving.

    Build a clear path to revenue

    Your monetization strategy needs to be crystal clear, both to users and Apple.

    Free apps need a clear path to revenue. Paid apps need to justify their price tag. But here’s what really works in 2026: value-based pricing tiers.

    Start with a free tier that provides genuine value. Not a crippled version of your app – a complete experience that solves a real problem. Then layer on premium features that enhance that experience.

    Structure your subscriptions logically. Monthly plans work for content-driven apps. Annual plans work better for utility apps.

    Focus on a core feature

    Here’s where most apps go wrong. They try to be everything to everyone. Stop that. Look at your analytics. Find the one feature that gets the most engagement. The one thing users rave about in reviews. That’s your core. Double down on it.

    Take your main feature and make it exceptional. If you’re a photo editing app, pick one type of editing you do better than anyone else. Maybe it’s portrait enhancement, maybe it’s landscape optimization. Whatever it is, make it so good that users come to you specifically for that feature.

    Strip away features that dilute your core experience. Each feature in your app should support your main value proposition. If it doesn’t, it’s just adding complexity. Complexity is your enemy when trying to get featured.

    It sounds simple but it’s probably the hardest thing ever, so it can be a source of differentiation and what ultimately makes you stand out.

    Yes, consider adding AI

    Let’s get practical about AI. First, forget about slapping ChatGPT into your app. That’s not what Apple wants to see. Instead, focus on using AI to reduce friction in your user experience.

    Start with CoreML. Build models that learn from user behavior to make their experience better. If you’re a productivity app, use on-device AI to predict the user’s next action. If you’re a fitness app, use it to adjust workout recommendations based on performance patterns.

    The key is to make AI invisible. Users shouldn’t know they’re interacting with AI – they should just notice that your app seems to understand them better over time.

    Build with privacy in mind

    Privacy isn’t just about compliance anymore – it’s a feature set. Start by mapping out your data collection. For every piece of data you collect, ask yourself: “Can we provide this feature without this data?” If yes, don’t collect it.

    When you do need data, be transparent about it. Create a privacy dashboard in your app. Show users exactly what you’re collecting and why. Give them granular control. Let them opt out of optional data collection while keeping core functionality.

    Implement Sign in with Apple even if you have other sign-in options. Make it the first option users see. It shows Apple you’re aligned with their privacy vision and gives users an easy, secure way to try your app.

    Consider Digital Wellbeing

    Digital wellbeing isn’t just about adding a screen time tracker.

    Start by auditing your notification strategy. Create a hierarchy: urgent, important, and optional. Time-sensitive notifications should be rare – reserve them for things that genuinely need immediate attention. Tag your notifications properly. Build different experiences for different Focus states.

    Don’t chase engagement for engagement’s sake. Build features that encourage meaningful use rather than addictive patterns. If your app helps users accomplish their goals faster and then get back to their lives, you’re doing it right.

    Pay attention to your App Store Presence

    Your App Store page needs to sell your app in seconds. Start with your first screenshot – it should communicate your core value proposition instantly. Don’t waste it on a login screen or splash page. Show your app solving the user’s primary problem. Read our recommendations on how to design screenshots that convert.

    Write your app description like you’re telling a story. First paragraph: the problem you solve. Second: how you solve it. Third: what makes your solution unique. Use short sentences. Break up text into scannable chunks. Remember, most users will only read the first three lines.

    We’ve built an AI tool to help you generate optimized App Store descriptions. Try it here, it’s completely for free.

    Your preview video should be watchable without sound. Lead with your best feature in the first 3 seconds. Show real usage scenarios, not marketing fluff. Keep it under 30 seconds. End with a clear call to action.

    Update your screenshots seasonally. When Christmas comes around, show holiday-themed content. During back-to-school season, highlight relevant features. This shows Apple your app is actively maintained and culturally aware.

    Interface design is everything

    Start by mapping every user action to its impact. Each tap should have a clear, immediate result. If a user has to tap more than three times to reach a core feature, redesign that flow. Remember: the best interface is one the user doesn’t have to think about.

    Implement progressive disclosure. Don’t show all options at once. Surface basic features first, then reveal advanced features as users become more experienced. This keeps your interface clean while supporting power users.

    Design for interruption. Users will switch apps mid-task. Make it easy to resume where they left off. Save states automatically. Provide clear visual cues about progress and status. Consider adding a “continue where you left off” section on your home screen.

    Accessibility isn’t optional. Start with dynamic type support. Test your app with VoiceOver. Ensure all interactive elements have proper labels. Add proper contrast ratios. These aren’t just accessibility features – they make your app better for everyone.

    Consider the whole Apple ecosystem

    Don’t just port your iPhone app to iPad. Rethink how the larger screen can enhance your core features. Use split views meaningfully. Add drag and drop support. Make use of the Apple Pencil if it makes sense for your app.

    For Vision Pro, think spatial. Don’t just float your 2D interface in space. Consider how spatial computing can enhance your core functionality. If you’re a home design app, let users visualize furniture in their actual space. If you’re a productivity app, think about how infinite canvas could change how users organize information.

    Watch integration needs to be purposeful. Focus on glanceable information and quick actions. Don’t try to replicate your full app experience. Think about what makes sense in a five-second interaction on your wrist.

    Optimize performance

    Start with launch time. Measure your cold start time. If it’s over two seconds, you’ve got work to do. Use background fetch to pre-load data. Implement progressive loading. Show useful content before everything’s loaded.

    Monitor your battery impact. Use Instruments to profile your app’s energy usage. Background operations should be batched and scheduled intelligently. Network requests should be combined and cached where possible.

    Storage optimization matters more than ever. Implement proper cache management. Use On-Demand Resources for content users don’t need immediately. Add a cache clearing option in your settings. Users notice when an app respects their storage space.

    Build an app they can’t ignore

    Sustainability isn’t just trendy – it’s becoming essential. Add features that help users understand their environmental impact. If you’re a delivery app, show the carbon footprint of different delivery options.

    Build for international audiences from day one. Implement proper localization. Consider cultural differences in your feature set. What works in the US might not work in Japan. Show Apple you understand global markets.

    Getting featured isn’t about luck. It’s about building an app that Apple can’t ignore. Focus on quality. Be intentional about every feature. Think about how your app contributes to the broader iOS ecosystem. Make it easy for Apple to see the thought and care you’ve put into your app.

    Most importantly, think long-term. The apps that get featured aren’t usually the ones trying to get featured. They’re the ones focused on building something genuinely valuable, maintaining quality, and consistently improving based on user feedback.

  • Flutter vs Xamarin – Which Is Best For App Development?

    Flutter vs Xamarin – Which Is Best For App Development?

    Though they’re both used to build mobile apps – Flutter and Xamarin are very different technologies. 

    Choosing between them for your project requires deep knowledge of their key strengths and drawbacks, as well as your own specific requirements. 

    Here at Vendrux, we’ve built thousands of iOS and Android apps for businesses ranging from side project startups to multibillion dollar household names. We’ve had to stay at the cutting edge of mobile tech, and have formed some strong opinions over the years. 

    In this article we’re going to teach you what you need to know about Flutter and Xamarin. We’ll introduce both, break down their pros and cons, and guide you through your decision. 

    First off, let’s cut through the technical jargon and explain the fundamentals. 

    Understanding Xamarin and Flutter

    Before we get into the differences – let’s first look at what the two have in common. 

    Xamarin and Flutter share these important characteristics:

    • Cross-platform frameworks – both allow you to develop apps for multiple platforms from one codebase 
    • High performance – both compile (in different ways which we’ll cover) into native code, giving a high level of performance 
    • Big tech backed – Flutter = Google, Xamarin = Microsoft
    • Open source – both are open source, allowing for rich communities and customization options to form 
    • UX focused – both (again in different ways) frameworks share a strong emphasis on rich UIs 

    So they’re both tested and established cross-platform app development frameworks. Both are backed by the biggest names in tech, and offer high performance. 

    Now let’s look at them in more detail, before teasing out the key differences. 

    What Is Xamarin?

    Xamarin was launched in 2011 and later acquired by Microsoft in 2016. 

    __wf_reserved_inherit

    It’s an open-source framework for developing Android and iOS applications using .NET and C#, allowing you to reuse code across platforms – making development more efficient and consistent.

    Xamarin offers two main products: 

    • Xamarin.Forms for UI development across platforms with a single codebase
    • Xamarin.iOS and Xamarin.Android  – collectively referred to as Xamarin.native, for designing platform-specific UIs that require more control and flexibility

    Developers choose between Xamarin.forms and Xamarin.native – which are both frameworks –  for their projects.

    The two share a lot of similarities, but Xamarin.forms is more targeted toward rapid cross-platform development and code sharing through sharing a C# codebase across iOS, Android and Windows phone. 

    It provides developers with extensive libraries of controls (like buttons and sliders), that are mapped to the native controls on each platform. It also compiles to native code, allowing for high-end performance. 

    Xamarin.native goes one step further – providing more direct bridges to the native APIs on iOS and Android. This means developers can get a more granular level of control and interface with the phone OS in a deeper manner. 

    Generally, Forms is the default option. You can opt for Native if you want a highly custom UI and need to make extensive use of platform specific features that aren’t fully supported by Forms. 

    Both have:

    • Rich Development Environment: Xamarin uses Visual Studio, offering a comprehensive IDE with powerful debugging, publishing, and source control features
    • Native Performance: Xamarin provides direct access to platform-specific APIs, enabling apps to perform as well as native apps
    • Strong Community and Corporate Support: Being part of the Microsoft ecosystem, Xamarin benefits from excellent documentation, developer forums, and support options

    Now let’s take a look at Flutter.

    What Is Flutter?

    Flutter was introduced by Google in 2017 as an open source software development kit for building iOS and Android apps from a single Dart codebase. 

    __wf_reserved_inherit

    Flutter’s core features are:

    • Widget-Based Architecture: Flutter’s is centered around widgets, which can be combined and customized to build complex UIs
    • High Performance: Flutter applications compile to native code, which helps in achieving performance very close to natively developed apps on iOS and Android
    • Ecosystem: With support from Google and a growing community, Flutter has a vast selection of widgets and tools

    The most fundamental thing to understand about Flutter is that everything is a widget. Widgets are reusable pieces of Dart code that can be thought of as the building blocks of a Flutter app UI. 

    There are hundreds of core widgets, ranging from basic ones for text and images, to more complex widgets for layout, interactivity, animation, and styling. 

    Widgets are combined hierarchically in a tree structure to build the UI, which is then “drawn” aka rendered onto the device’s screen with Skia, a 2D graphics engine relied on heavily by Google. 

    This is how Flutter is able to “control” every pixel on the screen, allowing for flexible and custom UIs. 

    Flutter has really taken the app development world by storm in recent years – and powers thousands of successful apps like AliBaba, ByteDance, and Google Classroom. 

    You can read about Flutter in detail in Flutter 101, otherwise let’s move on with the comparison with Xamarin.

    Which has higher performance? 

    Xamarin offers near-native performance thanks to a few factors. 

    It leverages the Mono framework for Android and iOS, allowing your apps to run with minimal overhead compared to purely native applications. The critical aspect here is the “ahead-of-time” (AOT) compilation for iOS that compiles the Xamarin C# code into native ARM assembly code. 

    __wf_reserved_inherit
    Xamarin works great for both iOS and Android

    On the Android side, Xamarin uses “just-in-time” (JIT) compilation, which can introduce a slight delay at startup but generally delivers strong performance.

    Memory management in Xamarin is also optimized, interacting directly with the platform garbage collection. This can be great for efficiency but requires careful management.

    Flutter is also known for its solid performance. 

    This is mostly thanks to the Dart language and the unique rendering approach. 

    Unlike Xamarin, which uses native components for rendering, Flutter “draws” its own UI components with the Skia 2D graphics library. 

    This means that Flutter is optimal for graphics-heavy applications because it doesn’t rely on “bridging” between its code and native components – eliminating potential bottlenecks. 

    Dart is also compiled ahead-of-time into native code, which makes the apps fast with smooth animations at 60 fps.

    For startup founders, PMs and CTOs –  the choice between Xamarin and Flutter will largely depend on your specific performance requirements. 

    Xamarin offers a very close to native performance with direct access to native APIs and toolkits, which might be critical for apps that heavily rely on native functionality. 

    Flutter, on the other hand, is optimal for highly animated or graphically intensive applications, providing smooth performance and a flexible UI design that can be more easily customized.

    Developer experience

    Whether you choose Xamarin vs Flutter will really influence your team’s workflow, productivity, and ultimately success. 

    Xamarin integrates perfectly with Visual Studio, offering a familiar experience for .NET devs.

    If your team already has experience with .NET and C#, the transition and learning curve should not be too steep. Visual Studio has a robust debugger, UI design tools, and extensive libraries.

    Xamarin.Forms, a component of Xamarin, allows you to share code across platforms, reducing development time for simple(r) apps. 

    However, if your app needs intricate UIs, Xamarin.iOS and Xamarin.Android offer greater control at the cost of separate codebases for each platform.

    Flutter is also known for its great developer productivity features. 

    The most famous one is hot reload, which is enabled by Dart’s just in time compilation and allows developers to preview code changes in real time without needing to rebuild. Xamarin has this feature too, but it is not as robust or acclaimed. 

    Dart is known as an intuitive language very similar to others from the C family, and Flutter’s widget based ecosystem offers excellent control over the UI. 

    Overall – developers tend to love it. 

    Both Flutter and Xamarin are modern, cutting edge frameworks. It is impossible to say which is a “better” developer experience – but you should think about what you value, your team’s skill sets, and the specific UX goals of your apps to decide which is right for you. 

    Ecosystem & Investment 

    Xamarin, backed by Microsoft, has a strong community thanks to its long life and integration with Visual Studio. 

    It has a lively community of developers across forums, GitHub, and Stack Overflow, backed by professional Microsoft support and a wealth of learning resources. 

    However, Xamarin has a reputation for being “corporatey” and associated more with Enterprise applications and tech culture –  so the perception is that its growth may not completely match the pace of newer technologies. 

    That said, the community is undoubtedly strong, professional and knowledgeable. 

    Flutter – although it has only been around 7 years – has seen rapid community growth. 

    Its philosophy has attracted a dynamic base of developers keen on design and innovation. It is supported by an active community and frequent Google updates, making sure it stays at the cutting edge of new tech. 

    To summarize – both have great communities that you can find wherever developers hang out. The documentation and learning resources of each are also excellent!

    Cost and Time Efficiency

    It is hard to say which is faster and “cheaper” – since this will vary completely from app to app. 

    In general though, all things being equal, it should be faster and lower cost to develop comparable apps. 

    Flutter’s powerful “write once, run anywhere” approach and features like hot reload are great for speeding up UI development and shipping fast. 

    Its rich set of widgets cover almost all common use cases, and allows you to build rich UIs “out of the box”, often without needing to invest too much time into making custom widgets. 

    All this goes out of the window of course if your team already work with C# and the Microsoft stack. 

    Flutter vs Xamarin app examples

    The consistent theme of this article so far is that Xamarin and Flutter are both good. 

    They are both modern, well supported, and powerful frameworks for developing mobile apps without obvious general downsides. 

    This is shown by some of the famous apps built with both, let’s take a look at what’s possible. 

    Apps Made with Flutter

    Let’s look at some great examples of apps built with Flutter. Take a look at them on your own device to get a feel of them. 

    1. Google Ads (iOS/Android) – this app provides users with a mobile interface for managing their ad campaigns on the go
    2. Reflectly (iOS/Android)- an AI-driven personal journal app that uses Flutter to deliver a beautifully designed, intuitive, and interactive user interface.
    3. Alibaba (iOS/Android) – the world’s largest ecom company uses Flutter to power parts of its app, helping them handle millions of customers and transactions
    4. Philips Hue (iOS/Android)- Flutter was used in the redesign of the app controlling Philips’ line of smart home lighting products
    5. Hamilton Musical (iOS/Android) – The official app for the Broadway hit, offering fans news, a lottery, merchandise store, and more

    This is a very small fraction of the 1+ million Flutter apps that have launched over the past 7 years. 

    We can see that Flutter is well suited to high end app development. 

    Apps Made with Xamarin

    Xamarin powers fewer apps than Flutter, and is a slightly more niche choice. 

    That said, there are still plenty. We don’t have reliable data, but several years ago Microsoft stated that 15000+ businesses were using Xamarin. 

    Here are a few prominent ones.

    1. Alaska Airlines (iOS/Android) – a high performance app that allows travelers to book trips, check in, move easily through airports, and more
    2. Insightly (iOS/Android) a CRM app to help businesses manage contacts, projects, tasks, and sales pipelines efficiently.
    3. Storyo (iOS/Android) – A video storytelling app that automatically creates multimedia stories from users’ photos
    4. Good Food (iOS/Android) – formerly BBC Good Food, this app has thousands of recipes and cooking tutorials 
    5. UPS (iOS/Android) – enables users to track shipments, create shipping labels, find UPS service locations, and manage their deliveries conveniently

    As you can see – Xamarin is used by a lot of large enterprises with demanding requirements. 

    Xamarin vs Flutter – which one should you choose? 

    We’ve looked at both Xamarin and Flutter, seen how they work, and looked at some of the advantages and drawbacks of each. 

    We think both can be good choices, depending on your case. 

    Why Xamarin? 

    We mentioned that Xamarin is typically associated with large enterprises and corporations – although it is not only for this market. 

    That’s because many large corps are already deeply embedded with .NET, C#, and other parts of the Microsoft ecosystem. 

    __wf_reserved_inherit
    Xamarin is often used for Enterprise app development

    Many of these enterprises require complex business logic and data to be shared between their existing systems and the apps, and it makes complete sense to do that with familiar technologies and tools. 

    If a lot of your existing business logic – like code for data operations, network communications, validation and other back end functions – are already written in C#, then it makes sense to stick with that. You can not only build the front ends cross platform, but also the back end.

    If that describes you – Xamarin is likely the best shot. It would make little sense to switch to Flutter and Dart solely for the apps if your existing tech stack is already tailored toward Xamarin. 

    Your existing specialists will be more likely to upskill quickly, and the integration with your existing workflows will be smoother. 

    Xamarin also might give a higher level of native performance, because through Xamarin.native you can directly use the native APIs. This is in contrast to Flutter which “draws” its own UI components through its own rendering engine. 

    Why Flutter?

    Flutter is more associated with tech companies and startups because it’s all about creating beautiful and custom UIs – fast and efficiently. 

    Recall that Flutter draws its own UI using its own rendering engine? 

    Well this extremely fine control of the design allows for great UI consistency across platforms, with the apps looking and performing virtually identically on iOS and Android. 

    Flutter’s rendering through Skia is also well suited for high-end graphics, and for handling complex animations.

    Paired with Flutter’s extensive widget catalog which can be styled and customized to create any kind of UI – Flutter is the king of sophisticated and complex interfaces. 

    Shipping with Flutter should also, generally, be faster and more efficient. That is if you’re starting from scratch and not already C# centric. Because of features like hot reload and the endless pre-build widgets – Flutter is highly efficient. 

    Flutter can also be used to build desktop and web apps too – again from the single codebase – so it could be a great foundation of your tech stack if you’re starting from scratch. 

    Flutter vs other platforms 

    We compared Flutter with several other app development options as part of this series. 

    You can take a read of them to learn about how Flutter stacks up against other options too. For now though, let’s wrap up the comparison with Xamarin.

    Flutter vs Xamarin – the bottom line

    Essentially, our advice is this. 

    If your company already has a C# tech stack and needs to tightly integrate the apps with existing business logic, or you want to build complex business applications that integrate tightly with the native APIs – go with Xamarin. 

    If you’re a smaller business, startup, or starting from scratch, and you want to build slick and UI focused cross platform mobile (desktop, web?) apps from the single codebase – go with Flutter. 

    There are also shared problems with each though. 

    Building apps with either Flutter or Xamarin is a huge project. You’ll need (at least) several skilled developers working on them full time for months to get them ready to launch. 

    They’ll cost at least $100k+ for the first versions. 

    Then you’ve got expensive and specialized ongoing updates and maintenance that will cost tens of thousands annually. 

    This all makes the decision to build apps in general risky. 

    If you want to eliminate this risk, our platform Vendrux is better than both Flutter and Xamarin. 

    The best alternative: convert your site to native apps

    Why is Vendrux better than Flutter and Xamarin then? 

    Because we build you apps that are just as good for a fraction of the cost. 

    Vendrux apps are ready to launch in just weeks, and cost

    There’s no need to team members or to your workload either – because we build the apps for you, and handle all ongoing updates and maintenance, saving you thousands every year. 

    How are we able to do this? 

    Vendrux is so efficient because we build iOS and Android apps from your existing website or web app. 

    The apps are your website, converted into native apps and with all the native elements added to ensure a great UX – like push notifications, native navigation, and much more

    Are the apps good? 

    Yeah, they are. Vendrux has worked great for thousands of businesses ranging from small startups and side projects to multibillion dollar global brands. 

    __wf_reserved_inherit
    The Jack & Jones app, built with Vendrux

    The only requirement is that you already have a website or web app. That’s why it works best for web startups, ecommerce brands, elearning platforms, content sites, and similar businesses. 

    It’s effectively zero risk compared to the massive organizational and financial commitment of developing with Flutter or Xamarin. You’ve already done the work building for the web – now with Vendrux you can leverage that onto the App Store and Google Play too!

    To learn more about Vendrux – our team of app experts are waiting to answer all your questions. 

    Book a demo call today.

  • Flutter vs Swift

    Flutter vs Swift

    You can build great apps with both Flutter and Swift, but which is better? Which should you choose for your own apps? 

    The short answer:

    You should choose Swift if you want to create very high performance apps for iOS, like demanding games and cutting edge use cases. If you want to build apps for iOS and Android, and your requirements are not extreme, you should probably choose Flutter. 

    Now for the long answer, in this article we’re going to break down the key differences, advantages and drawbacks of each. 

    What is Flutter?

    Flutter is a cross-platform app development framework created by Google. It’s cross-platform because it lets developers write apps for iOS and Android from a single codebase – which then compiles into native code for each platform. 

    Flutter uses the Dart programming language and a rich library of widgets to construct intuitive and rich UIs for a vast range of app types. 

    You can read about Flutter in much more depth in our Flutter 101 guide, in this article we’re mostly going to focus on comparing it with Swift. 

    What is Swift?

    Swift is a programming language created by Apple designed for the iOS and MacOS ecosystems, as well as Apple Watch and TV applications. 

    __wf_reserved_inherit
    Swift – the language of iOS

    Swift is used to build native iOS apps, and is known for its high performance and ability to tightly integrate with the hardware of Apple devices. 

    Flutter vs Swift – key differences

    Swift and Flutter are quite different technologies with a different purpose. Let’s compare them on a few different criteria.   

    Programming Language vs Framework 

    Swift is a programming language but Flutter is a framework that enables cross-platform development with the Dart programming language. 

    Flutter uses Dart, a language developed by Google for both mobile and web development. It’s a C like language suited to a declarative programming style – making it suitable for teams with experience of similar paradigms. 

    __wf_reserved_inherit
    Swift and Flutter – different programming languages

    Swift on the other hand, is a language created by Apple specifically for iOS, macOS, watchOS, and tvOS app development. Swift is known for its clarity, efficiency, and safety, making it a preferred choice for developers aiming for native Apple platform applications.

    Native vs cross-platform performance

    Flutter has great performance thanks to its ability to compile directly to native code, setting it ahead of some other cross-platform frameworks that “bridge” to native. It is used in countless high-end apps and can give a great level of performance. 

    However, the highest possible level of performance comes from the native languages of the platform themselves. 

    Swift can (potentially) offer the ultimate speed and performance for iOS development, which could be necessary if your app is a high end game or very computationally demanding. 

    Ecosystem

    Flutter has an established and growing community and ecosystem, thanks to its cross-platform flexibility and the backing of Google. Its widget library is very extensive and documentation is thorough. 

    Swift’s community is very mature and well-established, particularly for developers focused on Apple’s ecosystem. Apple’s continuous updates and the language’s popularity have spawned a huge range of resources, from libraries and frameworks to tutorials and professional support. 

    Investment

    When it comes to cost, Flutter is generally seen as the cheaper option. This is usually in the context of developing apps for both iOS and Android and the expensive nature of developing and maintaining two separate native codebases. 

    If you only want to build iOS apps, there is nothing inherently more expensive about using Swift – although this will depend on a wide range of factors. 

    Flutter vs Swift – which should you choose?

    A key consideration is that Swift is only for iOS development. Do you only want to release mobile apps for iPhone users?

    Some apps have gone that route, like Clubhouse, Overcast and Apollo. iPhone exclusive apps are a good way to specifically target a more wealthy, US-centric audience. 

    But most apps these days cast a wider net and enter the massive Android market too. 

    With Swift, you’d need to develop Android apps completely separately in the tech stack native to the Android OS. Flutter on the other hand would let you develop iOS and Android apps from the one single codebase. 

    Let’s look more closely at the ideal use cases of each. 

    When to use Flutter

    There are some situations where Flutter is the clear choice over Swift.

    1. Cross-platform Development: If your aim is to launch on both Android and iOS with a single codebase, Flutter it is. 
    2. UI-Focused Apps: for apps where a custom, aesthetically pleasing user interface is the most important thing, Flutter’s widget-based architecture allows for flexible and fast development compared with native 
    3. MVP and Rapid Prototyping: startups looking to quickly validate an idea will like Flutter’s developer productivity features and fast development cycles 
    4. Applications with Limited Native Integration: if you don’t need to interface very deeply with the native features of iOS and Apple hardware, Flutter will be great

    When to use Swift

    Swift really still shines over Flutter in a few scenarios. 

    1. iOS-exclusive apps: Swift is built for high-performance, robust iOS applications. If your target audience exclusively uses Apple devices, using Swift is the gold standard
    2. High-performance: apps that require very high performance and speed, such as advanced games or intensive computational apps, will see better performance from Swift
    3. Apple ecosystem features: projects that need to integrate with the Apple ecosystem (e.g., iMessage apps, Apple Watch extensions) will love Swift’s deep integration with Apple’s native APIs and SDKs

    Flutter vs other platforms 

    We compared Flutter with several other app development options as part of this series. 

    Check out how it compares to:

    For now, let’s wrap up our discussion of Flutter vs Swift.

    Flutter vs Swift – the bottom line 

    In summary – use Swift if you want to build iOS exclusive apps, apps that deeply integrate with Apple’s ecosystem, or apps that are very computationally demanding. 

    Use Flutter if you want to build more UI focused apps, for both iOS and Android, from a single codebase. 

    We also want to share our own platform, Vendrux, and how it can be better than either Swift or Flutter for the right business. 

    Convert your site to native apps instead

    Building apps with Swift or Flutter is no joke. It will cost $100k+ and take many months of work to get launched, and a serious ongoing investment to keep the apps updated and maintained. 

    We built Vendrux to bring down the barriers to app development. 

    Vendrux builds both iOS and Android apps from your existing website or web app. 

    You already did the hard work building for the web, we take that and convert it into native app form, adding in all the necessary features and UX elements to ensure the apps are a powerful asset to your business and a great experience for your users. 

    __wf_reserved_inherit
    Convert your existing site or web app with Vendrux

    It works perfectly for eCommerce stores, web apps, elearning platforms, content sites – and a wide range of other businesses. Check out some of the 2000+ brands that use Vendrux for their apps today. 

    With Vendrux, you can get apps in just weeks, for a fraction of the cost of Swift or Flutter. 

    There’s no risk, and nothing for you to do on the technical side – our team builds the apps for you, publishes them on the App Store and Google Play, and maintains and updates them forever. 

    You can just focus on your core web business and using the apps strategically – they will effectively run themselves. 

    So there you go – if you already have an established presence on the mobile web, Vendrux blows Swift or Flutter out of the water in terms of convenience and potential ROI. 

    To learn more and get all your questions answered – get in touch with one of our app experts and let’s start building your App Store presence. 

    Book a demo call today.

  • React Native vs Flutter for App Development in 2026?

    React Native vs Flutter for App Development in 2026?

    Cross-platform frameworks are emerging as the best way to build mobile apps today, and React Native and Flutter are the two most popular ways to build cross-platform apps.

    These two frameworks share a lot of similar qualities, but also have some important differences you’ll need to be aware of if you’re planning on choosing one to build your app.

    In this article, we’ll give you a crash course on React Native vs Flutter, how they compare, and which framework is more popular with today’s mobile app developers, before sharing whether there are any other options you should consider if you’re planning to build a cross-platform or hybrid app.

    Flutter vs React Native: Key Points

    Let’s start with a quick summary of the key points you need to know when comparing Flutter vs React Native:

    • Both are cross-platform development frameworks, which allow you to create apps for Android and iOS with a single codebase.
    • Both are free, open-source frameworks.
    • React Native is built and maintained by Meta (aka Facebook), and based on the JavaScript programming language.
    • Flutter is built and maintained by Google, and based on the Dart programming language.
    • Both Flutter and React Native come with a hot reload feature, which makes it easy to iterate on code and see the results in real time.
    • Each framework is used in a number of high-profile apps, including Meta’s and Google’s suite of mobile apps.
    • React Native is older and boasts a more extensive community, though Flutter is catching up in that regard.

    Flutter and React Native: Two of Today’s Most Popular Cross-Platform Frameworks

    React Native and Flutter are, by most estimations, the two most popular ways to build cross-platform apps today.

    What are cross-platform apps, or cross-platform frameworks?

    They are an alternative to building platform-specific apps using native code.

    Generally, iOS apps (apps for iPhone/iPad) are built in Swift, or Objective-C. Android apps are built in Java or Kotlin.

    This means, if you want to launch apps for both platforms, you’re going to need two completely separate codebases, as you can’t reuse code between each programming language.

    This makes it much more expensive and time-consuming to launch apps that are available to all mobile users, and also means it takes twice the work to update and maintain your apps.

    Cross-platform app development, with frameworks like Flutter and React Native, makes it easier. These frameworks let you write code that can be deployed on multiple operating systems. You can write once and build apps for both iOS and Android platforms. You’re also left with just one codebase to maintain, which cuts overhead in half compared to native app development.

    More and more, developers are starting to prefer cross-platform frameworks to fully native apps. Unless your app relies heavily on native device features, you can achieve great results for less effort and expense by going cross-platform.

    Alternative cross-platform frameworks include Ionic, Xamarin and NativeScript, along with no-code tools that let you deploy one app across multiple environments, but React Native and Flutter are the two with the highest profile (likely due to the big names behind each of them).

    Learn more here about tools and frameworks for developing cross-platform apps.

    Now let’s give you a rundown on both Flutter and React Native, before diving into an in-depth comparison between the two.

    Beginner’s Guide to React Native

    So what is React Native?

    React Native is a framework that allows developers to build mobile applications using JavaScript and React. 

    It lets developers create cross-platform apps that work on both iOS and Android devices, sharing a significant portion of the codebase between the two platforms. 

    React Native’s tagline is “learn once, write anywhere”. It speeds up development time and streamlines the process of app development by allowing developers to use one development framework for multiple platforms.

    The syntax of React Native is very similar to React.js, the original web-based JavaScript framework. The difference is that it uses native iOS and Android components, instead of outputting HTML and CSS code, as you would if you build for the web.

    This means you can’t simply deploy a React web app as a native app using React Native, but developers with experience in React will be able to easily learn React Native and use this to build native apps.

    React Native App Examples

    React Native was created by Meta (formerly Facebook), with the intention of being used in their ecosystem of apps, including Facebook, Instagram and Messenger.

    Alongside Meta apps, React Native is used by more of the biggest names in tech:

    • Microsoft (used in the MS Office, Outlook, Teams, Skype and Xbox Game Pass mobile apps).
    • Amazon (Amazon Shopping, Alexa and Amazon Photos apps, as well as supporting Kindle devices and the Amazon Appstore).
    • Shopify (the Shopify mobile app, as well as the customer-facing Shop app).

    Other high-profile React Native app examples include:

    • Coinbase
    • Discord
    • Wix
    • Pinterest
    • NerdWallet
    • Walmart
    • Tesla
    • Bloomberg
    __wf_reserved_inherit
    A few examples of notable apps built with React Native

    Learn more about React Native examples on their showcase page.

    Beginner’s Guide to Flutter

    Flutter could be seen as Google’s answer to React Native.

    Flutter is Google’s UI toolkit for building beautiful, natively compiled applications for mobile, web, and desktop from a single codebase.

    It empowers developers to create stunning user interfaces using a single language, Dart, while achieving cross-platform compatibility. With Flutter, you can build apps that look and feel great on iOS, Android, and the web, all while maintaining a consistent experience across different devices.

    Flutter is made up of pre-built and customizable widgets. The framework comes with many built-in widgets for things like layout, animations, UI elements and more.

    These elements can be deployed on multiple operating systems, again massively reducing the time it takes to build and launch mobile apps, as well as the time and effort required to maintain and update apps on multiple platforms.

    Flutter can even be used to build apps and user interfaces for other types of devices with screens, such as smart appliances; hence their tagline, “Build for any screen”.

    Flutter App Examples

    Flutter, too, is currently being used in some of the world’s biggest apps.

    As expected, it’s used heavily in Google’s apps, including the Google Pay App.

    __wf_reserved_inherit

    It’s also being used by companies such as:

    • Tencent
    • BMW
    • Toyota
    • eBay
    • Alibaba

    A few other Flutter app examples include:

    SoVegan

    __wf_reserved_inherit

    Caribou Coffee

    __wf_reserved_inherit

    QuintoAndar

    __wf_reserved_inherit

    Learn more on the Flutter showcase page.

    Key Differences Between React Native and Flutter

    We’ve given you the one-minute pitch on both React Native and Flutter, and perhaps you now understand a little about each framework. 

    There’s a lot of overlap between the two frameworks from what we’ve discussed so far. So let’s take a deeper look at the differences between React Native vs Flutter, to help you understand the pros and cons of one and the other.

    JavaScript vs Dart

    One of the most notable differences is that React Native is built on the JavaScript programming language, while Flutter is built on Dart.

    JavaScript is one of the most well-known and widely used programming languages in web development, used in millions of web apps and websites, with React and React Native among many other frameworks built on top of it.

    Dart, on the other hand, is a newer programming language, which was created by Google in 2011. Dart has a lot of similarities with JavaScript, but less widely used and perhaps more challenging for beginners to learn.

    Meta vs Google

    Another difference is that React Native is built and maintained by Meta, while Flutter is built and maintained by Google. Whether this has any practical difference for you depends on your views on each company. Both frameworks are still open-source, with active communities and in-depth documentation, so it’s not like you’re going to be interacting directly with the frameworks’ creators.

    Third-Party Libraries vs Built-in Widgets

    A more practical difference is in the way you compile your app’s user interface with Flutter vs React Native.

    In Flutter, there are built-in widgets for just about everything, from the layout of your UI to components like nav bars and buttons.

    These widgets are customizable, but essentially work out of the box, working the same on multiple platforms.

    React Native uses third-party libraries, which allow developers to add native components to their apps. This means there’s less you can do out of the box, and library quality and availability can be inconsistent. 

    But on the plus side, it gives the ability to build apps with a more native feel, as there are more components that are specifically designed for certain platforms. There’s also more flexibility possible with React Native, though the tradeoff is that it may take longer to set up.

    Platforms

    React Native primarily supports building for iOS and Android apps.

    It can be used in Windows and MacOS apps, as well as for smart TVs, and the code used for React Native apps can have a lot of crossover with the code used to build React web apps. But it’s still primarily used for mobile apps.

    Flutter is easy to use for a wider range of platforms, including building web apps. So if you wanted to build apps that were accessible across web, iOS and Android, you could do so using only Flutter.

    If you were to use React Native, you’d need a separate codebase in React for your web app.

    That said, Flutter may not be ideal for web apps, as it’s hard to build SEO-optimized web apps in Flutter, and its performance in building for the web can be spotty. 

    Ecosystem

    Having been in existence for longer, React Native has a deeper community and a wider ecosystem.

    There’s a wider availability of resources and community-built features for React Native. There’s also more apps that use React Native, and a greater demand for developers with React Native expertise.

    Both frameworks have good documentation to follow, though React Native documentation is spottier, due to the number of third-party libraries you’re working with.

    Flutter, in comparison, has more structured and organized documentation, which makes it a bit easier to get up and running.

    Learning Curve

    React Native is generally perceived as having a shorter learning curve, as it’s based on a more popular programming language (JavaScript), with a more familiar syntax.

    Generally speaking, if you’re proficient in JavaScript, it should be relatively easy to pick up React Native. And if you have experience with React.js, the learning curve is even smaller.

    Flutter is based on a lesser-known programming language, Dart, so it’s not as easy for most web developers to pick up.

    However, the greater built-in capabilities of Flutter may make it easier to pick up for people who have no prior experience in JavaScript or Dart. 

    Time to Market

    The development process is typically faster with Flutter, again due to the built-in capabilities it provides via widgets.

    Not taking into account any time it takes to get your head around Dart, you should be able to go to market with a functional app quicker with Flutter. 

    The only thing that may hold you back is if you run into problems, or need to do something outside of the core capabilities of the framework.

    In this case, React Native may prove faster, as there is more community support and a wider range of third-party resources available.

    Performance

    Whether Flutter or React Native offers a higher level of performance is up in the air.

    Flutter apps tend to be faster than React Native apps, though it’s not a huge difference.

    This is due to React Native using a JavaScript bridge to communicate with native modules, while Flutter’s components are native by nature.

    However, React Native gives a greater ability to build apps that require deeper OS interactions or native features. 

    As Flutter components are shared across platforms, there may be some elements that don’t feel fully native on one platform or the other. React Native gives greater potential to optimize feel and performance for specific operating systems (though not as much as building fully native apps).

    Which Framework is More Popular?

    React Native and Flutter are largely considered to be the two most popular cross-platform development frameworks.

    In a 2022 study asking nearly 30,000 developers around the world which cross-platform frameworks they use, 46% responded with Flutter, compared to 32% for React Native.

    __wf_reserved_inherit

    It’s interesting to note that both frameworks trended in different directions. The study polled developers each year from 2019 through to 2022, with Flutter’s share increasing from 30% to 46%, while React Native decreased from 42% to 32%.

    Stack Overflow’s 2023 developer survey also includes numbers on the popularity of React Native vs Flutter.

    67,000 respondents were asked which frameworks and libraries they used, and 9.12% responded with Flutter, versus 8.43% for React Native.

    Flutter is more popular on Github, with 162k stars, versus 116k stars for React Native.

    These figures indicate that Flutter is, overall, slightly more popular than React Native. However, there are a lot more React Native job opportunities than there are for Flutter.

    At the time of writing, a LinkedIn job search for US postings found 1,068 Flutter jobs, versus 6,413 postings for React Native developers.

    A search on Indeed found 1,990 US React Native jobs, versus 388 for Flutter.

    Takeaways: more developers seem to prefer Flutter, but there are more job opportunities for React Native, likely due to the larger number of projects built using React Native, as it has been around longer.

    Why Developers Choose React Native

    To get a better idea of why some developers prefer React Native over Flutter, here are some responses to this exact question on the React Native subreddit:

    • “RN uses JSX syntax for building UI. Flutter uses these nested functions (?) which looks very ugly – with these ),),),), in the end of widgets. Functional components and hooks are a good way to go instead of Flutter classes as well.”
    • “RN uses real UI elements, not something drawn on canvas. The app behavior is truly native with React Native.”
    • “You can build desktop apps (Microsoft even uses RN in Windows in one of the screen in Settings) and web (react-native-web + familiarity with React.js) – it’s supported better than in Flutter (IMHO here)”
    • “Dart is unpleasant.”
    • “Jobs, career, more mature libraries, web support, less code for same result. Definitely more elegant.”
    • “Meta has spent decades on the react and native framework and has a lot of stakes in the success of the product. Microsoft has began showing support and is currently in alpha of their own component library Basically, I trust meta and their support of the product due to how heavily invested they are into it.”
    • “UI Flexibility – RN is designed as a mobile platform, so it uses the time battled tested native components that deliver years of bug solving and accessibility that is just thrown away with flutter.”
    • “Prominent companies like Shopify, Wix, Discord, Microsoft are choosing React Native, indicating their expertise and preference for RN over Flutter.”
    • “Easier to Learn – I don’t think there is something easier than JavaScript/TypeScript.”

    Overall, the most common responses mention preference for JavaScript over Dart, more job opportunities, more native UI components and the high-profile apps and companies that use React Native.

    Why Developers Choose Flutter

    Looking at the same question – why developers feel Flutter is better than React Native (and Xamarin, another popular cross-platform framework) – users on the Flutter subreddit said:

    • “The dev experience is easier because dart is a better language than javascript. It is type / null safe by default and supports many modern features like extensions.”
    • “Widgets make sense and have a defined lifecycle. React hooks and components are more confusing than Flutter state and widgets. Flutter is closer to traditional mobile dev here.”
    • “Flutter is a full render system with a UI library that works nicely. React Native is missing many things a dev needs (like sheets, alerts etc). This makes Flutter apps usually easier to build something higher quality.”
    • “Flutter apps compile to more than just ios / android. Web, macos, etc are all supported and usually just a few clicks away. Flutter web is not as nice as a nextjs/react app, but there is still a good use case.”
    • “Flutter apps are much smaller than React Native. A Flutter app is usually just a touch bigger in package size than a traditional mobile app. React Native apps are usually quite large.”
    • “Flutter feels polished, while react native is scrappy. Google maintains dart, pubdev and flutter, while Facebook maintains React Native, but not javascript and npm.”
    • “React was originally conceived for the web, for instance, it has bad roots. Flutter is half a decade new and it was originally thought for mobile.”
    • “In one word – off the shelf widgets. I just don’t see the set of widgets in RN as in Flutter. Also, animation is probably easier.”

    These responses generally prefer the built-in widgets Flutter comes with, the mobile app development experience, and in some cases a preference for Dart over JavaScript.

    React Native vs Flutter: Which to Choose?

    If you ask real developers, you’ll get a lot of different responses for whether they prefer React Native vs Flutter. As you can see above, different people will make the argument for different sides.

    There’s no clear answer we can give you as to which framework is the best. It largely depends on which one you have a better experience with.

    If you’re used to JavaScript and/or React, React Native will likely feel better to work with. React Native is also a good fit for projects with a high need for native functionality and flexibility.

    Flutter is better if you want a more structured approach, with more functionality available out of the box. It might also be a better fit if you don’t have any prior experience with JavaScript. As you’ll be learning a new language anyway, you may find it easier to pick up Dart and Flutter than JavaScript and React Native.

    React Native & Flutter vs Vendrux

    While React Native and Flutter are two of the best and most popular frameworks for building cross-platform apps, they are not necessarily the best options if you have an existing web app or website, and want to rebuild or extend it to mobile apps.

    You’ve already done the work to build it for the web, and rebuilding it as an app means duplicating all that effort, as well as adding multiple codebases to manage once your app launches.

    For this, there’s our platform, Vendrux.

    Vendrux is part software, part service. Our platform, built and perfected over more than 10 years of building apps, is designed to convert any website into high-quality, native-feeling mobile apps for iOS and Android.

    __wf_reserved_inherit
    Examples of a few apps built with Vendrux

    You manage everything from one codebase – your existing web code. The apps are synced with your website, meaning any changes or updates you make only need to be made once, and go live on your website, iPhone app and Android app automatically.

    Our team handles the conversion process, as well as technical maintenance for your mobile apps (which are built using Kotlin and Swift, native coding languages for Android and iOS.

    Launch Cross-Platform Apps with No Coding in Just Two Weeks

    React Native and Flutter are great, but they take a lot of work and specialized skills. Vendrux is a much simpler, much quicker, much cheaper way to get basically the same end result.

    With over 2,000 apps under our belt, we know what it takes to build apps that look and feel like custom native apps, which would otherwise cost six figures at a bare minimum.

    As long as your website or web app is mobile-friendly, turning it into mobile apps is a cinch. We’ll prove it to you by showing an interactive preview of your site as an app, when you book a free demo.

    As part of our process, we’ll put some minor but meaningful touches to your app to give it a seamless native experience, and once finished, we’ll handle the app store publishing process for you.

    Get in touch with us to schedule a free demo, and learn how Vendrux is a more efficient way to build apps than React Native, Flutter or any other cross-platform framework.

  • Flutter Apps vs PWAs – Which Should You Build?

    Flutter Apps vs PWAs – Which Should You Build?

    These days there are so many choices when it comes to creating a great mobile UX.

    The mobile internet is better than ever, building apps is more accessible than ever, and new tools, frameworks and services come out constantly. 

    A key question is whether you need to build mobile apps for iOS and Android or whether a mobile friendly web app is OK. 

    Researching this question will naturally lead you to progressive web apps (PWAs), and cross-platform app development frameworks like Flutter. 

    Although they may seem similar on the surface, Flutter vs PWA are two very different technology choices, with different advantages and drawbacks. 

    In this article we’re going to break down each, explain all the important considerations, and guide you through everything you need to know. 

    We’ll start off by explaining the basics of Flutter and PWAs, then we’ll get into the comparison. 

    What is a PWA? 

    Progressive web apps are the cutting edge in web app development. 

    They are built with web technologies like HTML, CSS and JavaScript – and run in web browsers on mobile and desktop. 

    __wf_reserved_inherit
    PWAs – modern and powerful web apps

    They behave like a cross between a website and a mobile app though. 

    By leveraging web technologies like service workers, PWAs bring many of the features traditionally associated with native mobile apps to the web, like:

    • Offline functionality 
    • Push notifications 
    • Access to device hardware

    There is no strict definition that helps us, but to put it simply: PWAs are modern web applications that behave in a similar manner to mobile apps. 

    A PWA isn’t something “separate” from your main website or web app, it’s better to think of it as a series of enhancements to your site that give it specific modern capabilities. 

    For a detailed breakdown, check out this article. 

    What is Flutter? 

    Flutter is a cross-platform app development framework.

    Cross-platform app development is building apps for multiple platforms from one single codebase. A framework is like a development “toolkit” that makes certain tasks vastly more efficient. 

    __wf_reserved_inherit
    Cross platform apps – iOS and Android in one!

    In the case of Flutter, it was released by Google in 2017. 

    It allows developers to use the Dart programming language to build apps once, writing code for them once, then “converts” that into machine code that can run natively on iOS, Android, the web, and even desktop programs. 

    This is very efficient, because traditionally you had to write separate code bases for each platform. You’d need to build specific apps for iOS and Android, effectively doubling the work (at least) compared to Flutter. 

    Though many businesses still opt for the traditional, expensive and laborious native development – many are embracing Flutter and other cross-platform frameworks like React Native in recent years. 

    Flutter is known for creating smooth and pleasing UIs, as well as making mobile app development much more efficient. 

    Flutter vs PWA 101 

    So we’ve seen that Flutter apps and PWAs are different things. 

    PWAs are web apps that run in browsers, and share several of the key characteristics of native mobile apps. Fundamentally though, they are a web technology that can be thought of as an “enhanced” and cutting edge website. 

    These days, they’re fast and efficient to build, especially if you already have a web app, and in recent years have led to more engaging web experiences. 

    Flutter is a tool for building “real” native mobile apps. The apps do not run on the browser, but rather on the chip of the iOS or Android device. 

    They go (far) beyond the capabilities of a PWA, can be deployed on the Apple App Store and Google Play, and can take full advantage of the capabilities of the device. 

    Ultimately – Flutter apps and PWAs are not really “alternatives” to one another, although there are overlaps in the business benefits.

    Flutter vs PWAs – the Tech Stack

    Let’s look at some of the more technical differences between Flutter apps and PWAs. 

    Flutter’s tech stack 

    Flutter is a framework for Dart.

    Dart was released by Google back in 2013, and was originally seen as an alternative to JavaScript for web development. 

    __wf_reserved_inherit
    Flutter is a framework for Dart

    While Dart is used for building both web and server applications, it has really found its niche as the language of Flutter development. 

    Dart is known for being great to work with and feature rich. 

    It is object oriented, meaning it uses “objects” – self contained units that have both data and methods. It’s also class defined, which means objects are made from “classes”, which are like reusable blueprints for objects. 

    Syntactically, Dart is similar to languages from the C family, but has some special features. One is hot reload, which allows developers to “preview” code changes in real time. 

    To build the UI, Flutter has a vast library of “widgets”.  

    Widgets are like pre-built components that developers can combine to create the UI and functionality of the apps. 

    When the apps are ready, the code is compiled into native code for the platform in question – for our purposes iOS or Android. 

    Finally, when the apps run, the widget-based UI is rendered onto the users’ screen via Skia, an open-source 2D graphics engine used extensively by Google. Flutter can control every pixel on the user’s screen – allowing very rich and sophisticated user experiences. 

    The PWA Tech Stack

    PWAs are simpler. 

    Like everything on the web – they leverage the most standard web technologies, including HTML, CSS, and JavaScript. 

    But the technological lynchpin of PWAs is the service worker, a handy script that runs in the web browser and manages requests, caching, and storage in a very efficient manner. 

    This allows PWAs to perform well regardless of even in areas with relatively poor network conditions, which can really improve UX. 

    PWAs can also use modern APIs for other powerful capabilities like push notifications, background data sync, and interaction with the device features like the camera and GPS. 

    Flutter apps vs PWAs – which is better? 

    As we mentioned earlier, Flutter apps and PWAs aren’t really alternatives. Both have pros and cons. 

    Why PWAs > Flutter apps

    For example – PWAs are easier and more affordable to build. 

    Because they use standard web technologies, and are relatively simpler on a technical level, you should be able to build (rough estimate):

    • A simple PWA for $5k – $20k
    • A sophisticated PWA for $20k – $50k

    If we’re talking about converting your existing website or web app into a PWA, the cost should be lower still. 

    They’re easier to launch, and also to push updates to, since you don’t need to go through the App Store or Google Play review process. 

    Flutter apps on the other hand are more complex to build, requiring more specialized expertise. Generally – they’ll cost $100k+ to build. They also require a significant ongoing investment to maintain and update. 

    Since they run in the browser, PWAs are cross-platform by default, and they can use some of the most useful app functionalities like push notifications and the ability to install on the users home screen. 

    PWAs are also more discoverable on the web through organic search. 

    Why Flutter apps > PWAs

    PWAs are great, and have made progress in leveling the playing field between native apps and the web. 

    But, they aren’t there yet. Far from it in fact. This is for a few reasons. 

    Compared to Flutter apps, PWAs fall short in the following ways:

    • Limited access to device features – they won’t be able to interact with the hardware capabilities and device APIs as deeply 
    • Performance – while PWAs are fast, they often can’t measure up to the speed and smooth UX of native
    • Offline capabilities – although PWAs can have some offline functionality, this is generally limited in comparison 

    With PWAs, you also lack a few critical aspects entirely. 

    Firstly, you have no presence on the App Store or Google Play. Only native apps can be deployed on the two major app stores. 

    Although the user can “install” a PWA on their home screen – but this is effectively only adding a shortcut to the web. You’ll have to get them to do it too, which isn’t an easy sell. 

    Speaking of hard sells, with PWAs it is harder to send push notifications. 

    Native app notifications have:

    • Higher opt in rates 
    • Better for iOS 
    • Better personalization (and therefore are more powerful)

    They’re also a much better way to target the lucrative iOS market, because the permissions are more forgiving. 

    With PWA web notifications, you first need the user to install on the homescreen, and only then can you ask for permission to send them. 

    This is high friction. 

    Giving permission for web notifications isn’t really a thing on mobile, although it can work on desktop. We covered all this in detail here

    There’s also the fact that a portion of your users and customers will just expect an app on top of a web presence, as well as trust it to a greater extent.

    A PWA is not an app in most people’s minds – rather a fancy website – and having Flutter apps on the App Store and Google Play taps into existing habits much better.

    Flutter vs other platforms 

    We compared Flutter with several other app development options as part of this series. 

    PWAs are one thing, but there are also many other cross-platform frameworks and programming languages for developing apps.

    You can take a read of these to learn about how Flutter stacks up against other the other mobile app options.

    For now though, let’s wrap up our comparison with PWAs.

    Why they aren’t actually alternatives

    PWAs and native apps aren’t really alternatives. They are different things. 

    A PWA is an upgraded version of your site, with new and improved features and UX. 

    A Flutter app is an entirely new channel that works in synergy but (somewhat) separately to your site. 

    We recommend you get both. 

    Start off with a PWA for your standard web experience, then build iOS and Android apps for deep engagement with your most loyal users. 

    You can do this with Flutter – but it will take a lot of work to both build the apps and share business logic between the apps and the web. 

    Think multiple six figures and months of effort to get something running smoothly. 

    A much better option, if you already have a PWA or web app, is Vendrux. 

    Convert your web app to native apps with Vendrux

    We’ve seen that Flutter apps are expensive and difficult to build, and that PWAs are no alternative to native apps. 

    Vendrux solves the problem by letting you convert your website or PWA into native iOS and Android apps. 

    __wf_reserved_inherit
    Vendrux converts your web app into native apps

    We build the apps for you, based on your website but with all the native elements – like push notifications, native navigation and much more.

    You’ll get apps that give you all the benefits of Flutter apps, but they’re much better. 

    For a start the cost is The apps will sync automatically with your site, updating with any changes you make on the web. Our team also handles all the updates and maintenance – so there’s nothing to add to your team’s workload. 

    A PWA and Vendrux iOS and Android apps is a powerful combination. 

    It has worked for thousands of businesses, from small startups to multibillion dollar brands.

    It can work for you too. 

    So if you already have a website or a web app, get in touch with one of our mobile app experts and learn about what Vendrux can do for you. 

    Book a demo call today. 

  • Flutter vs Native App Development

    Flutter vs Native App Development

    Back in the early days of mobile apps, Native development was the only way to get apps launched on the App Store of Google Play.  

    Technology evolves though, and now there are other options. 

    One is cross-platform app development

    Flutter has emerged as one of, if not the, top choices for cross platform development. It’s used in thousands of projects from small hobby apps to massive tech companies with millions of users. 

    But why would you choose Flutter over native development, and vice versa? When should you opt for one or the other? What are the key advantages and drawbacks of each? 

    In this article we’re going to break it all down. We’ll start with a brief introduction to both Flutter and native development, then we’ll go deep into the relative strengths of each. 

    By the end you’ll have a solid idea of when to go with one or the other.  

    What is native Development? 

    Unless you’ve been living under a brick – you know that there are two key mobile operating systems: iOS and Android. 

    Just like their desktop counterparts, Windows and MacOS, iOS and Android work very differently on a fundamental level – from the way the UI displays to how the software interacts with the chip. 

    The software and the hardware is very different on each – which means that the development tools and programming languages used to develop apps are very different on each too. 

    Traditionally this means:

    • On iOS: Swift (or Objective C) as a programming language, Xcode and Simulator for development and testing environments
    • On Android – Kotlin or Java for programming, Android Studio and SDK 

    For both platforms, you’ll work with the native APIs and build each app in a radically different manner – just like if you were developing desktop apps for MacOS vs Windows. 

    __wf_reserved_inherit
    Developing apps natively is a lot of coding

    You’ll need specialists skilled in each of these stacks, who will work on two separate codebases to develop and maintain the apps. 

    Practically this means iOS and Android developers, designers, PMs, and poentially dedicated backend developers too. 

    How is Flutter Different?

    Recall how native development has you working on two separate codebases. 

    These share nothing in common with each other, on the front end at least. You can’t reuse any of the code, and every single piece of the UI and functionality needs to be built separately for each. 

    As you can imagine, this is very expensive. Specialized talent costs top dollar, and you’ll need thousands of developer hours over 6+ months to build even relatively simple apps. 

    This is why native apps typically cost $200k+ to ship first versions on each platform. 

    Flutter simplifies things and makes them more efficient. 

    Flutter is a cross-platform framework. 

    This means you can build the apps once, and have them run on both iOS and Android.

    __wf_reserved_inherit
    iOS and Android apps – from one codebase

    It’s a UI kit and Dart framework for developing from one single codebase. Because it compiles into native code for each platform, you effectively halve your work. 

    At the core of Flutter is a set of pre-built widgets that are leveraged to build the UI. With these widgets and the Dart programming language, you can create sophisticated apps for practically any device size. 

    When the apps run on a device, Flutter uses Skia, an open source 2D graphics engine to “paint” whichever element, animation, or interaction needs to be rendered. 

    On both operating systems, this works in broadly the same manner. Flutter also allows you to customize the UI for each specifically, making sure the apps “look the part” on each platform. 

    Let’s summarize Flutter’s core features:

    • One codebase: Flutter lets you develop apps for iOS, Android, the web, and desktop from one codebase. You can typically reuse 90% of your code across platforms. 
    • Hot reload: Dart allows you to see changes to the code instantly, this is very helpful for developer productivity
    • Rich Widget Catalog: Flutter has over 14 categories of widget to work with .
    • Performance: Flutter apps compile Ahead Of Time (AOT) into native machine code for iOS and Android
    • Customizable and Flexible: Flutter’s layered architecture and “control” of every pixel on the screen gives plenty of design freedom 

    So, that’s an overview of Flutter. 

    The key point is that, compared to native development, it lets you build apps for multiple platforms from a single codebase. 

    We covered Flutter in more detail in this article – Flutter 101if you want a deeper dive.

    For now we’ll move on with the comparison. 

    Flutter vs Native development – which is better? 

    As with many things in tech, things aren’t “better” or “worse” in a blanket sense.

    Rather, different technology choices carry different costs, opportunities, advantages and drawbacks. 

    It’s no different when it comes to Flutter vs native development. 

    Generally, the overall theme is that Flutter is more efficient, faster and lower cost – and that native is (potentially) higher performance and can give access to more cutting edge tech. 

    But, the real life performance difference is probably only noticeable or relevant if you need really high end performance. 

    Let’s break it down. 

    Pros and Cons of Native Development

    The key advantages of native development boil down to 3 essential points. 

    1. Performance
    2. Features 
    3. Ecosystem 

    Because native apps are compiled into code that native to the platform, and use the native APIs, they can have the highest possible level of performance. 

    By “performance” we mean they have the potential to run the most computationally demanding applications fast and efficiently. 

    This isn’t a given, it’s a matter of potential, they need to be built optimally to harness it. 

    Also, we’re talking about a marginal difference for the average app. For most apps, you won’t see a huge performance difference between Flutter and native.

    But if we’re talking apps that rely on large amounts of real-time data or graphics processing, graphics requirements, or complex UI transitions – native might be necessary. Think high-end games, trading platforms, and other apps where a small lag could ruin the experience., 

    Native apps are also better for access to the latest platform features. 

    When a big update rolls out and some sophisticated new capability is released by Apple or Google – native app developers get immediate access. 

    Whether its new UI elements, security features, sensor capabilities – or anything else – they can be worked with and integrated as soon as they’re available. 

    This can be critical for apps relying on the cutting edge of tech, and with innovative and sophisticated products. 

    Now, Flutter can do almost all the same things – but there might be a lag for it to be integrated, and tradeoffs in how they’re used. 

    Finally, the native development ecosystem is rich and expansive. There are countless libraries, toolsets, and developers in the communities that you can leverage for your project. This is true for Flutter to a degree too – but native has the advantage here. 

    Now, there are of course drawbacks too. 

    Native apps are expensive, harder to develop, and take longer to build. 

    They typically require more expansive teams, cost twice as much (on average), and are far slower to market. The ongoing maintenance costs are also doubled compared to cross-platform. 

    Now move onto Flutter. 

    Flutter pros and cons

    The real key advantage of Flutter relative to native is that Flutter apps are:

    • Faster to develop 
    • Cheaper to develop 
    • Easier to update and maintain 

    It is an oversimplification – but essentially all work, both upfront and ongoing, is effectively halved due to the single codebase. 

    Other factors help too, Flutter’s hot reload for example boosts development speed and productivity, and the rich widget library makes it possible to quickly build sophisticated UIs. 

    Another advantage some developers note is UI consistency. 

    Flutter makes it easier to get a consistent, branded look and feel across platforms. This may or may not be important to you. 

    Flutter also comes with its downsides. 

    The biggest one is the potentially lower performance for demanding apps. As we’ve said, this probably only matters for a small subset of businesses, but it is significant. 

    Flutter is also somewhat notorious for resulting in a large app size, which could also be a downside for some users’ perspectives. This has improved though in recent versions. 

    __wf_reserved_inherit

    Finally – the range of third party libraries is smaller than for native development. This might mean that if you have some specific niche requirement you need to create custom solutions with native code. 

    Again, this is probably only going to be a problem if you have very unique requirements. 

    Flutter & Native App Examples 

    Now we know the key differences between these two app development approaches – let’s look at some examples of famous apps built with each. 

    Remember that there are countless thousands of apps built natively and with Flutter, these are just a few standout examples to show what’s possible. 

    Native App Examples 

    Many of the “big tech” apps you use are probably built natively, at least to a degree. Here are a few good examples:

    • WhatsApp native apps are lightning fast, integrating flawlessly with device features like the microphone, camera, and more 
    • Spotify’s native apps handle complex tasks like audio playback, real-time data synchronization, and deep integration with device hardware
    • Waze, a GPS navigation software, was developed natively to efficiently handle real-time GPS data, route mapping, user updates, and more 

    Flutter App Examples 

    The above apps could also have been built with Flutter these days, albeit with potential tradeoffs. Flutter powers thousands of high end apps like:

    • Google Ads allows users to manage ad campaigns, and showcases how Flutter can be used to build complex and data heavy business apps 
    • Reflectly uses AI to help users create a personal journal, leveraging Flutter to create a pleasing and consistent UX across iOS and Android
    • Philips Hue controls smart lighting and is built with Flutter, demonstrating Flutter’s potential in integrating with IoT devices

    As you can see, you can use Flutter for a wide range of applications, and its performance and features are only getting better. 

    Flutter vs Native use cases 

    There are still ideal use cases for each, situations in which Flutter or native is likely to be the best choice. 

    Let’s look at the most important ones. 

    • Cross-Platform Development without demanding requirements – if you want to keep things simple and work from the one codebase, Flutter is the way to go, and it will suit you fine for most applications. This is great for lean startups and bootstrapped businesses that want to keep things simple. 
    • Limited budget and tight deadlines – companies or individual developers working with limited budgets and tight timelines benefit from Flutter’s rapid development features. Using Flutter can potentially save hundreds of thousands and months of work. 
    • UI-Focused Applications – Flutter shines for custom, visually appealing UIs thanks to its widget-based architecture. For design and UX focused brands, this can be great.
    • Prototype Development – when the goal is to quickly validate an idea or a concept, Flutter’s development speed and ease of use make it a better choice. 

    So Flutter is probably the right choice if your requirements are not extreme, and budget and time to market are important to you. 

    When to choose Native Development 

    Native development is still the “gold standard” when it comes to some use cases. 

    • High-performance requirements – for computationally heavy apps like high-end games, augmented reality (AR), or video processing applications, native development is preferred.
    • Cutting-edge features – if you want to be first to market with the latest platform features as soon as they’re released, the native iOS and Android APIs are the way to do it 
    • Complex hardware interactions – applications that rely on intricate and extensive interactions with bluetooth, GPS, various sensors like the accelerometer and such, often benefit from being native. 
    • Regulatory requirements – in some industries like banking or healthcare, there are extremely stringent requirements for security and data handling. The fine control of native development might make compliance easier in some cases. 

    These are the only major reasons you might want to take on the additional cost and time investment to choose native over Flutter. 

    Flutter vs other options 

    Flutter vs native is only one angle.

    You can also compare Flutter itself to other app development methods and cross-platform frameworks.

    For example, React Native is the main cross-platform rival to Flutter which we compared here.

    We also compared Flutter to Android’s native language – Kotlin – and the native language of iOS, Swift.

    For now though, let’s wrap up the comparison with native development.

    Flutter vs Native: the bottom line 

    So to sum up. 

    Native development is for when you need something special or unusual. They’ll cost a couple of hundred thousand dollars, and take teams of specialists 6+ months to develop. 

    Flutter these days is good for almost everything, and is more affordable and faster to develop apps with. 

    We hope you enjoyed this primer on Flutter vs native development, and it helps you understand the options better. 

    Now to conclude, a shameless plug of our own platform, Vendrux, which is better than Flutter and native development for most businesses.  

    The efficient alternative – convert your site to native apps

    Flutter apps will still generally cost six figures though and take months to build. Even though you only have one codebase, it still requires constant and skilled maintenance.

    There’s a much better option for 90% of businesses – our service at Vendrux. 

    We build you high-end apps for iOS and Android in just weeks, for a fraction of the cost of both Flutter and native development. 

    We convert your existing website or web app into native apps – adding all the UI elements and features you need to leverage the apps fully and give your users a great UX. 

    It’s hyper efficient, results in fantastic apps, and is used by thousands of businesses including multi billion dollar brands. 

    __wf_reserved_inherit
    The Jack & Jones app – powered by Vendrux

    They take no effort on your part to maintain – our team handles all that for you – so you can just focus on making them work for the business. 

    Because you can get started right away, there’s no need to hire anyone, and the cost is small business friendly – Vendrux is effectively zero risk and all upside compared to Flutter or native development. 

    In summary – if you have a web app, site, or store already, Vendrux is probably the best option. 

    To get all your questions answered, and learn how Vendrux stacks up in more detail – get in touch with one of our team. 

    Book a demo call today!