https://www.vendrux.com/help-knowledge-base/nativefunctions-onesignalsetexternaluserid
Category: Help Knowledge Base
-
https://www.vendrux.com/help-knowledge-base/nativefunctions-onesignalsendtags
https://www.vendrux.com/help-knowledge-base/nativefunctions-onesignalsendtags
-
https://www.vendrux.com/help-knowledge-base/nativefunctions-onesignalremoveexternaluserid
https://www.vendrux.com/help-knowledge-base/nativefunctions-onesignalremoveexternaluserid
-
https://www.vendrux.com/help-knowledge-base/nativefunctions-onesignaldeletetags
https://www.vendrux.com/help-knowledge-base/nativefunctions-onesignaldeletetags
-
https://www.vendrux.com/help-knowledge-base/nativefunctions-login
https://www.vendrux.com/help-knowledge-base/nativefunctions-login
-
nativeFunctions.logout() | vendrux
If your app is configured to require users to login before they can access the content, and you are already using the nativeFunctions.login() to log users in, you will want to implement the nativeFunctions.logout() function as well.
When triggered, the nativeFunctions.logout() will clear all cookies and sessions in the app, and reload the app, taking the user back to the login screen.
Imagine a situation where while browsing your app the user gets logged out because his cookies expired, if the nativeFunctions.logout() function is not triggered the user will see your website’s error messages for blocked content, and the user experience might get confusing for the user.
Instead, you should take the user to the login screen so he can provide his credentials and re-login accordingly.
You can call the nativeFunctions.logout() after you have confirmed that the user is not logged-in:
// Check if the user is currently logged-in, if not, call the logout function
// Log the user in
function appLogout(isAppReady) {
try {
// Check if the native functions are ready to be used
if (isAppReady.data && isAppReady.data == ‘nativeFunctionsLoaded’) {
nativeFunctions.logout();
}} catch (ex) {
console.log(ex.message);
}
} -
Native Functions Introduction | vendrux
Canvas apps include a Javascript API built into their source code, allowing your website to trigger certain in-app actions using Javascript functions.
The Native Functions are not available for use until your page is fully loaded within the app, for that reason when a page loads in the app we trigger an event, which tells us that the Javascript API is ready to be used. You will want to listen to that event to make sure the functions are called at the right time, preventing errors in your application.
Here you can see an example of how to listen to the event triggered by the app:
// Function that runs when the event is triggered
function runNativeFunctions(event) {
try {// Check if the native functions are ready to be used
if (event.data && event.data == ‘nativeFunctionsLoaded’) {
// Native function can be called here
nativeFunctions.onesignalSetExternalUserId(“1”);
}} catch (ex) {
// Log any error messages for easier debugging
console.log(ex.message;);
}
}We have also prepared a sample page that can be used in your app for testing the native functions, or if you prefer, you can copy its code and add it to your website directly, you can find the page here: https://mobiloudsupport.github.io/nativefunctions/
Below you can find a list of all the available native functions in the Canvas platform:
nativeFunctions.login();
nativeFunctions.logout();
nativeFunctions.onesignalSendTags(“1”, “2”);
nativeFunctions.onesignalDeleteTags(“1”, “2”);
nativeFunctions.onesignalSetEmail(“user@email.com”);
nativeFunctions.onesignalLogoutEmail();
nativeFunctions.onesignalRemoveExternalUserId(“user ID”);
nativeFunctions.onesignalSetExternalUserId(“user ID”); -
vendrux WordPress App Plugin | vendrux
Our solution started life as a WordPress Plugin.Although now we offer so much more than that, it’s still a core part of what we do and how we do it.Through the plugin, you can manage all facets of your native app – from it’s design and navigation, to analysing your users, to how you monetise traffic.We’re going to take you on a little tour of our plugin.You’ll see how it works, what it does, and understand how our users manage their sophisticated apps effortlessly without any extra workload.We build your apps to mirror your existing WordPress site, keeping the winning formula you’ve already created but enhancing it with native power.

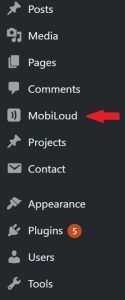
The app is managed through your existing set-up, and the plugin is the nerve center that sits right in your admin panel.Click on it, and you’ll see a tab menu displaying all the options for managing your app.

Let’s take a look at them one by one.First up is design.
Design
Initially, our apps are all built with custom design and fully branded for you.Going forward, you have complete control through the plugin to make any tweaks or changes you wish.Click through on design and you’ll see something like this.

First, you can upload your logo, which will be displayed on the navigation bar.You can also choose whatever color is right for your branding.
You also have the option to show a categories tab at the top of the screen, and decide how you want your articles to be displayed in a cascading list – including the size and style of the thumbnails.Incase you have content in Hebrew or Arabic, you can also enable right-to-left text.Now let’s move on to your options with the menu.
Menu

How will you structure your menus? You have several options when it comes to navigation.Choose how you will sync the current navigation of your site with the app.Hamburger, horizontal and sections menus are all easily implemented, and you have the option to enable tabbed navigation too.

Here you can also choose the active and inactive icon colors, and the background tab color.


Some help with this please
Settings

You’ll use the settings section to define what content is presented in the home screen, article lists and single article screens.
Home Screen Settings

The home screen settings is where you choose what will appear on your home screen.We recommend an article list for your readers to jump right into what they came for – your content, but there’s other options too.
Article List Settings

How will your article list look?You can decide here.Firstly choose between native or web, then decide:
- How you’ll display the publishing date
- Whether to show comments counts
- If you want to display an excerpt
You can also define how many articles will display in the list, custom fields, and images.
Post and Page Settings

You have options here related to the posts and pages displayed in the app.Do you want to display the featured image like on your site?Do you want images to link to the original target from your site or to open in a native gallery?You also have control over whether you display such information as the author, date published, and title.The internal linking architecture will mirror exactly that of your WordPress site, but you can choose how the links will behave in the app. Whether they point to another in-app page or open in an internal browser is up to you.
Related Posts and Comments

Showing related posts to your readers is great for encouraging habit-formation, engagement, and maximising the time they spend within your app.You’ll need the Jetpack plugin – which like any other WordPress plugin can be integrated fully with your app.Same goes for comments sections, a great way to build community and gain valuable feedback and insights from your audience.Readers can comment in-app through WordPress, Disqus or Facebook integrations.If you don’t want comments that’s fine too – just disable them!
Settings Settings

You also can change the settings of the settings…… What options your users themselves will have for configuring the app and how the options will be displayed to them.They can choose their preferences for receiving push notifications and other options.Here you’ll also choose the color scheme for on/off switches.
Ratings Prompt
Ratings are all important for your app’s success.You have the option here to give them a gentle nudge reminding them to leave a rating at certain intervals.

The welcome screen is what users will see when they first open the app.You have a lot of options to create and configure one that you think will do the job perfectly.
Advanced Settings

As you can see, there are a lot of advanced settings that you can adjust according to your needs.I won’t bore you by going through each one here – one of our app experts can explain all of these and the potential applications in a demo.Suffice it to say you will have a huge amount of control over how you manage your app.
Advertising

Many of our clients have seen great jumps in ad revenue through our apps.We are integrated with major ad networks – like admob, mopub and Facebook Audience Network – and can support all the most effective mobile ad formats.Let’s take a look at how to set it up.

First just pop in your privacy URL which is required by major networks.

Then the platform you use and the kind of ads you want to deploy.You can use mobile or tablet banner ads, and interstitals.

You can also use article list native ads.You then need to choose the intervals at which your ads will be displayed to users, which is an individual decision based on your goals.

You can also embed HTML ads within your content.As you can see, the options to make ad revenue through your app are vast.Ads aren’t the only option to monetize though, so let’s move on to subscriptions.
Subscriptions

Building a loyal base of subscribers is the key to success in modern digital publishing, so we give you all the tools you need to do that through your app.

If subscription is a part of your strategy – enable in-app subscriptions.We are integrated with Apple and Google in-app purchase platforms so just put your IDs in and the subscription buttons will display in your iOS and Android apps.Here you also put in the text you want displayed in both the subscribe and manage subscription links.

Now add the logo that will be displayed on your subscription window, generally the same one as your app.Crafting a great call to action is key – so choose the right title and text to convince your users to subscribe.Next, choose what text you’ll use on the subscribe button itself – like ‘subscribe now’ or ‘start free trial’.

Same goes for the trial button if you plan to have one.Choose the colors for everything, then add small text with a more detailed description of the subscription plan.

Foreign Policy , use our solution to optimize their mobile subscription strategyWe give you everything you need to drive subscriptions through your app, so make the most of it and start signing up readers today!
Analytics

Before you can maximise the amount of traffic and subscribers you gain, you need to understand your users.Most of them are on mobile, so we give you all the tools you need to analyze your audience on a deep level.

You’ll have several options.Firstly we integrate with Google Analytics and Facebook Analytics for Apps, which will give you tons of actionable data about how your app is performing and how to boost it even further.

You can also make use of Quantcast measure and comScore analytics, giving you even more data and insights to drive your content and marketing strategies.
Editor

Perhaps your technically adept, a developer yourself, or you have someone of that description on your payroll.

In that case our editor lets you inject custom HTML, PHP, CSS and Javascript into your post and page screens to make advanced customizations.Read more about this here.

You can also add custom CSS into your site’s theme to customize the app’s display.Our team can give you advice and support for any customizations you have in mind, and can even do them for you – we are app developers after all.
Rich Push Notifications

Push notifications are like magic for driving traffic and engagement.We integrate with PushBots and OneSignal, so you can manage your whole push strategy right here.You can set them up to go out automatically, whenever you publish something new from a certain category or post type.

You can also send them manually whenever you deem appropriate.

You can choose whether to include featured images in the notifications, and send different kinds of notifications to different user segments.

Simple Flying use push notifications to drive readers to their Vendrux appsYou can send push notifications to an unlimited number of devices through our platform, don’t miss this opportunity to connect with your readers on a whole new level.
Login

Do you want your users to login to access your app’s content? If so it’s simple to set up.

Some of our users, like Foreign Policy, require readers to login to their appHere are all the options you have to do so:

Choose the color scheme for the login button and input fields and add your logo.

Then give your readers options to register, read your terms, and change their password if they’ve forgotten it.You can also set up the button text intros for those registering and logging in.
Paywall

You can implement a custom paywall in your app with ease.Define the subscription screen settings with HTML content and CSS rules.

And do the same for paywall block settings.

Giving Publishers Everything they Need to Manage a Powerful WordPress App
Thus concludes our little tour.As you can see – our plugin is simple to use, requires no technical knowledge, and gives you complete control over your app.The plugin is what you’ll use to manage the app – but initially we build and set up the whole thing for you, including publishing on the App Stores.Gone are the days of quality apps costing a fortune to build, and requiring a team of developers to manage and maintain.Your app will have the same level of performance and sophistication as a top publisher’s like The New York Times, the Washington Post or Buzzfeed – except it will be built far more quickly and affordably.We’ll build it in a few weeks, and our plans start from $0.We also take care of any tweaks, maintenance and updates needed going forward.Every quality publisher should have their own app, and we’re on a mission to make it happen.Get in touch with one of our app experts today and start growing your traffic, revenue and brand.