The Welcome Screen feature was built to help with making sure your app is compliant with the latest General Data Protection Regulation (GDPR).It allows you to present more details on how your user’s data is handled and the terms that are being accepted when they use the app.Since each business has its own policies and branding we decided to provide a customizable design for this feature, so that you can have your own logo, colors, links, and content.You can download the template that we created by clicking here. Here are the steps that must be followed after downloading the template to set up your app’s welcome screen:
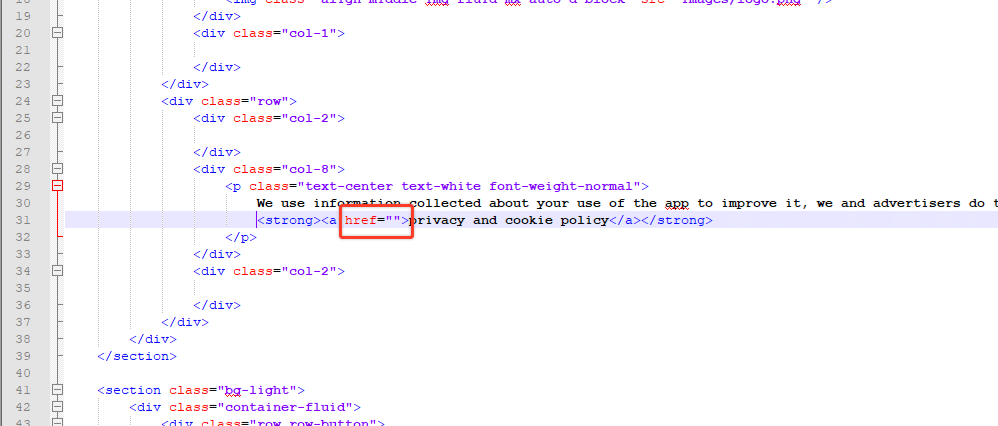
- Include your privacy policy URLYou must open the index.html file using a text editor and include your own privacy policy URL on line 31 between the double quotes that can be seen in the image below:

- Make sure to save your file afterward.
- Upload the vendrux-welcome-screen folder to your serverThe vendrux-welcome-screen folder needs to be uploaded to your server so that it can be accessed by the app using its own URL like this: https://yourwebsite.com/vendrux-welcome-screen (feel free to rename the folder if you prefer). For this step, we’d recommend that you contact your hosting provider for more details on how to upload files using an FTP client.
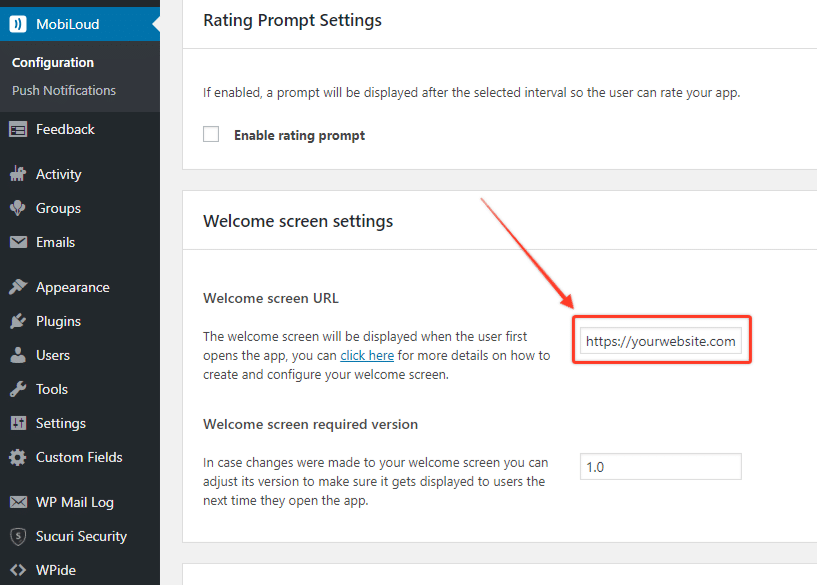
- Adjust your app configuration to include the new welcome screen URLNow that you have the welcome screen folder uploaded to your server you will need to go to the Vendrux News plugin “Settings” area and include the new URL under the “Welcome Screen settings” section on the “Welcome screen URL” setting, as you can see below:
Once your welcome screen URL is in place, you should see the welcome screen is displayed once you open the app. In order to be able to view the app’s content the “I Agree” button will have to be clicked. This will ensure that all users are aware of how your app handles their data and the terms that are being agreed on when they use it.Note that the Welcome Screen will only be displayed once, if you want to display it again to all users who previously clicked the “I agree” button you can increase the “Welcome screen required version”.Don’t hesitate to get in touch with our team in case you need further assistance with your Welcome Screen!